Web Manual Integration
Concept
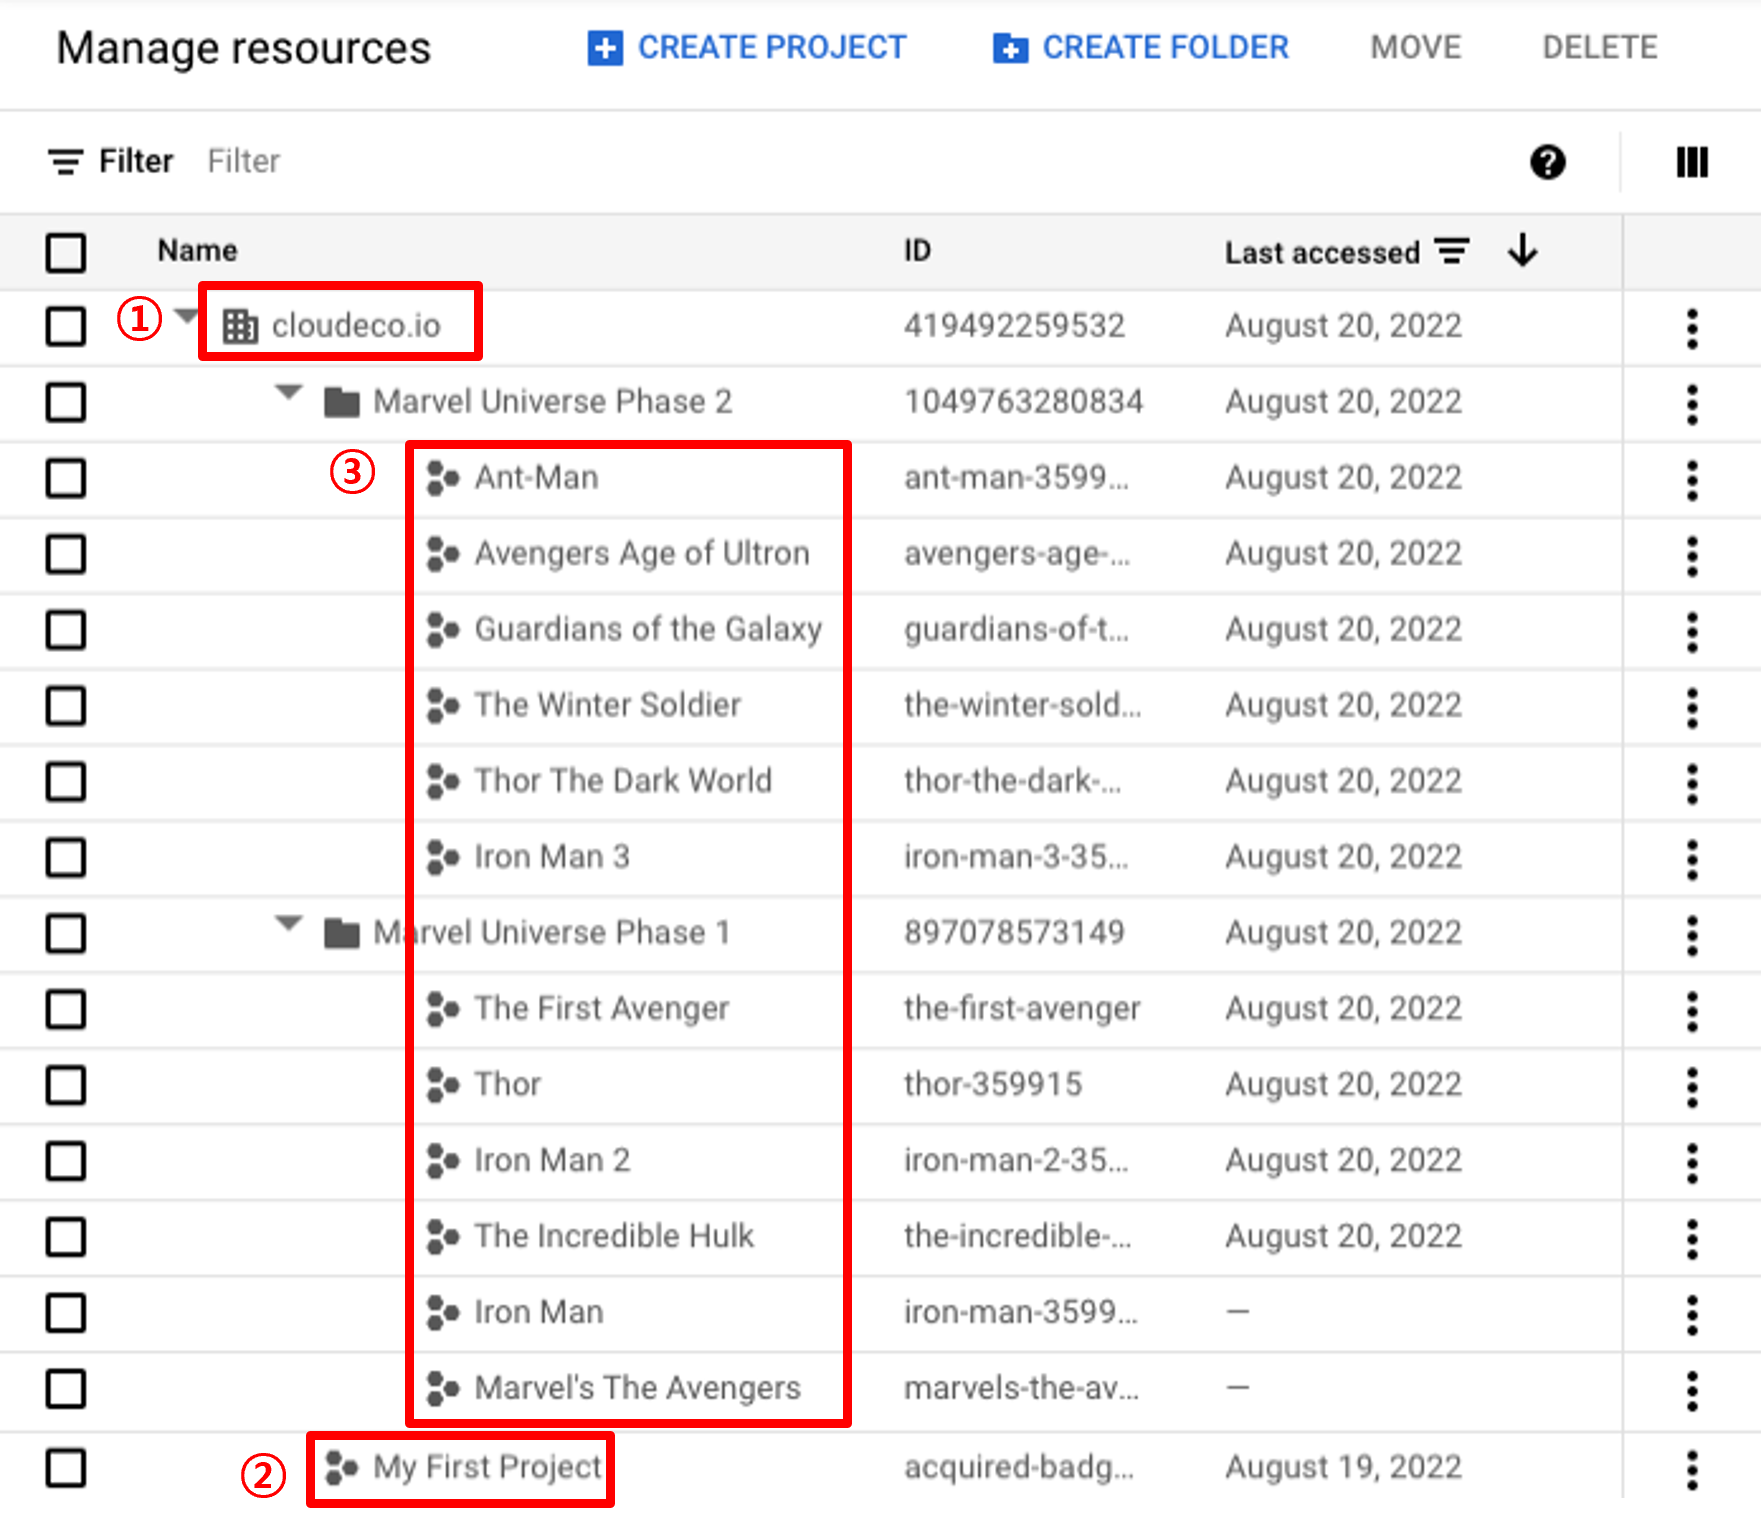
Google Cloud’s organizational hierarchy is structured as follows:
(1) cloudeco.io [Organization]: The top-level hierarchy (Organization Level) for managing Google Cloud resources
(2) Root Project [Top-level Project]: A project that has a service account for permission inheritance
(3) Projects [Projects]: Projects that inherit permissions from the [Top-level Project]
(4) Folder [Folder]: A collection containing projects
To collect data from Google Cloud service accounts, SpaceONE resource collectors require minimal permission settings. SpaceONE supports google_oauth2_credentials method based on OAuth2.0 for Google Cloud integration, which requires the following information:
- Client Email
- Client ID
- Private Key
- Private Key ID
- Project ID
- client_x509_cert_url
You can obtain integration information through project integration and organization integration by following the steps below.
0. Common
Login and Organization, Project Selection
The logged-in user must have the Organization Administrator role.
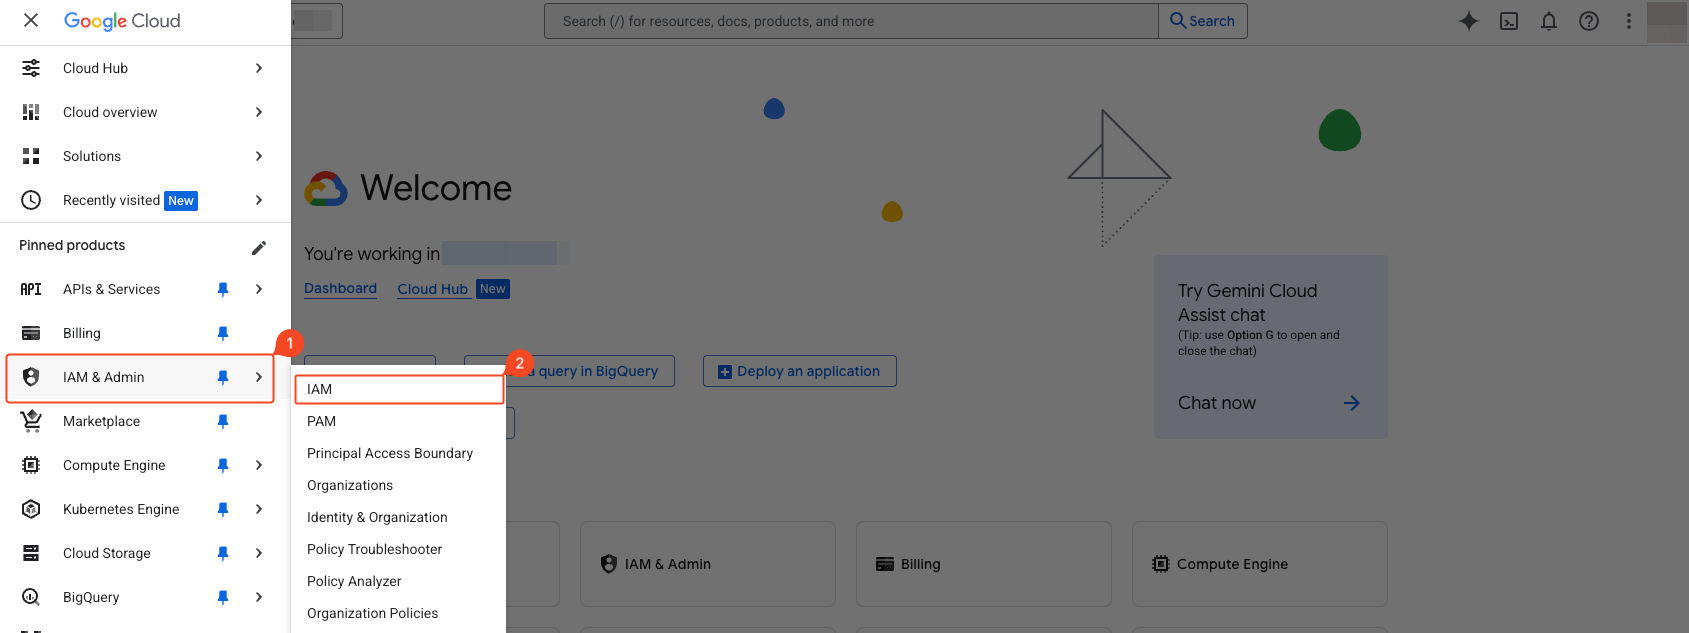
Check Permission Status
Select ‘IAM & Admin’ > ‘IAM’ from the navigation menu (☰) in the top left.
Select the organization resource at the top of the page. It’s important to accurately select the organization resource for which you want to check your permissions.
Find your email address in the ‘Principal members’ list. If the list is long, you can easily find it by entering your email in the ‘Filter’ field at the top. (If your email is not there, you may have been granted permissions through Google Groups. Filter by the group name.)
Check for the ‘Organization Administrator’ role in the ‘Role’ column next to your account.
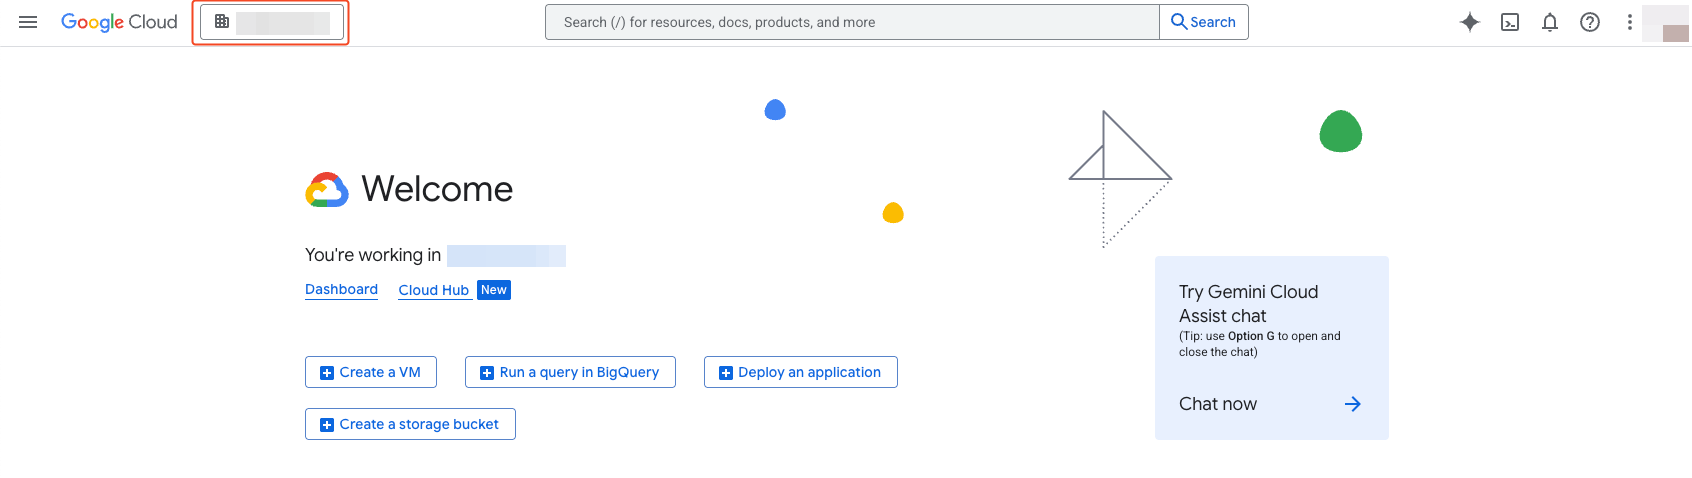
Log in to the console.
 Click the console in the top right.
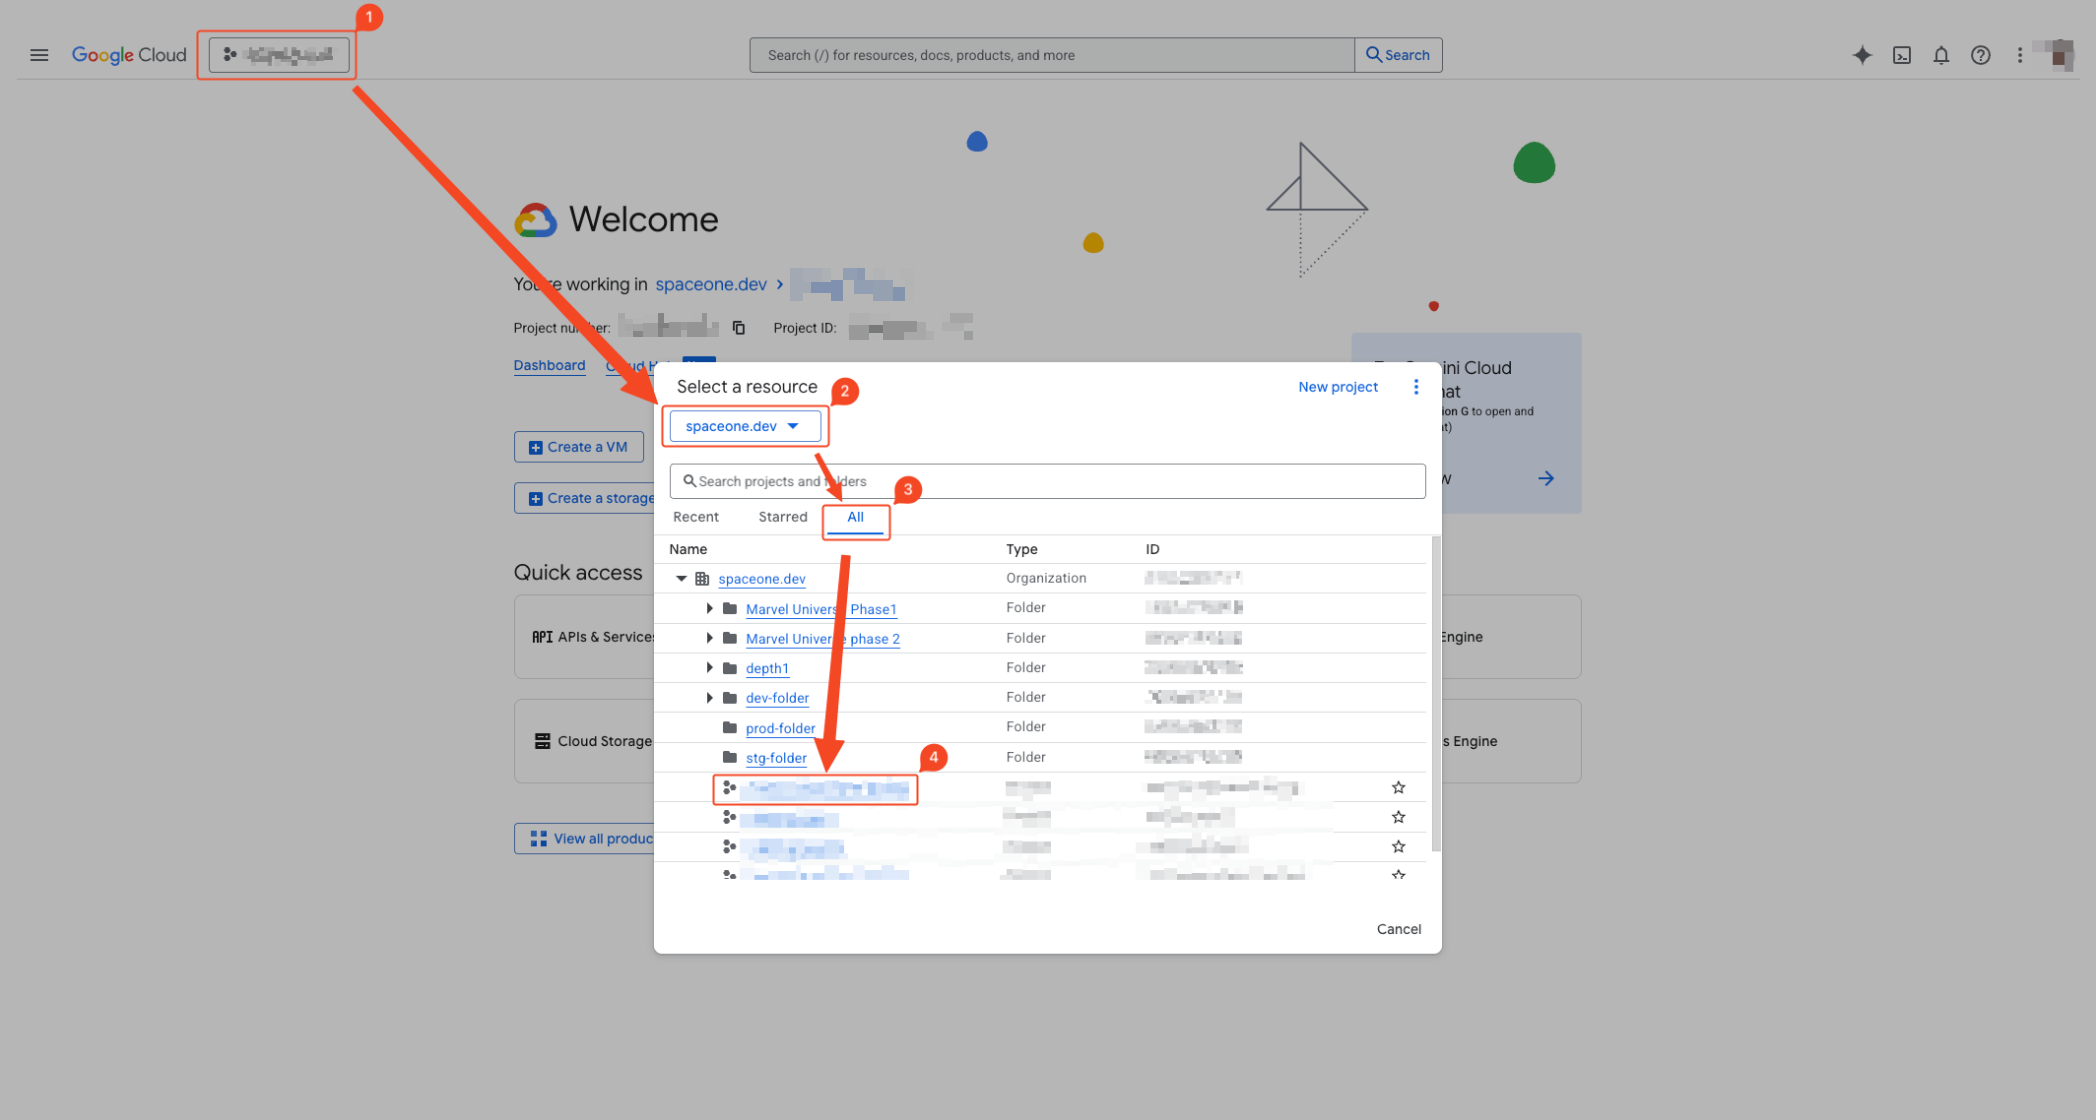
- Click the project dropdown in the top left to activate the modal.
- Select the organization you want to configure.
- Click the ALL tab to list all projects.
- Click the project where you want the service account to belong.
1. Service Account Creation
Login and Organization, Project Selection
Complete the steps from (Common) Organization, Project Selection .
Service Account Creation
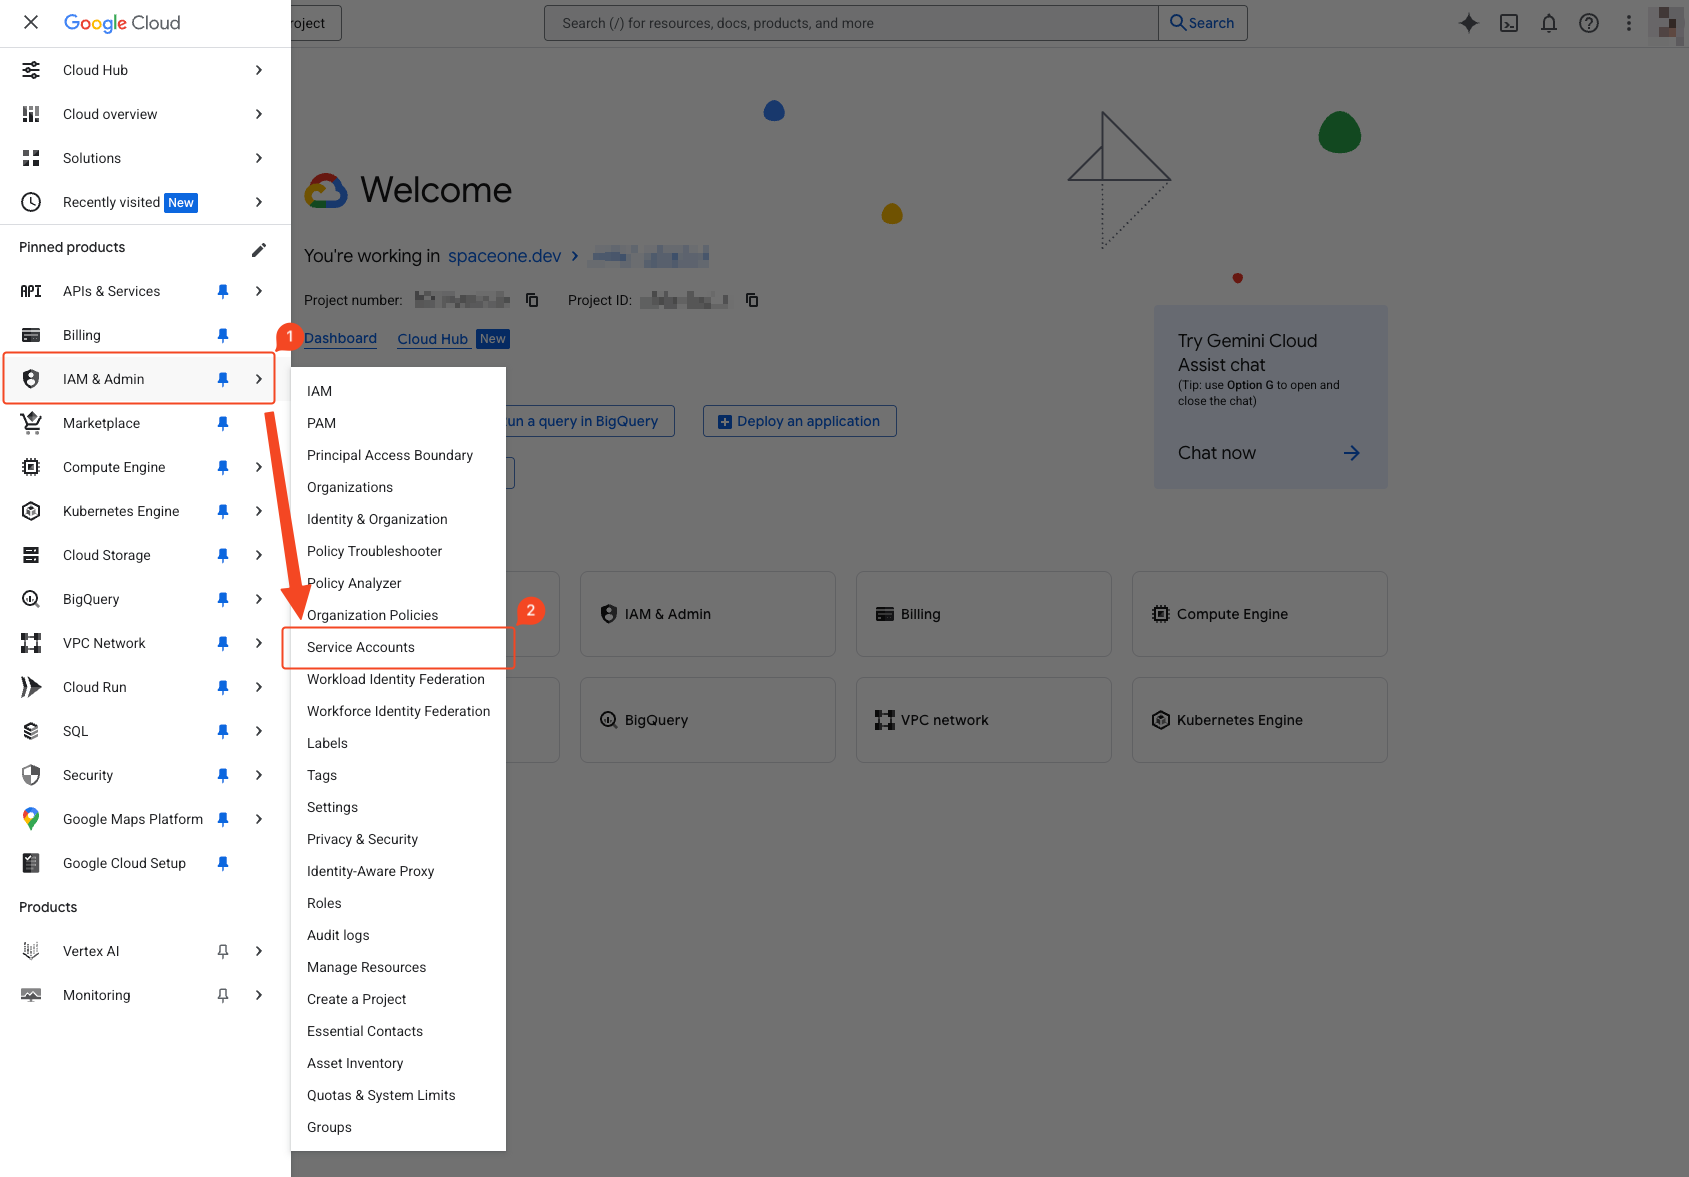 Select ‘IAM & Admin’ > ‘Service Accounts’ from the navigation menu (☰) in the top left.
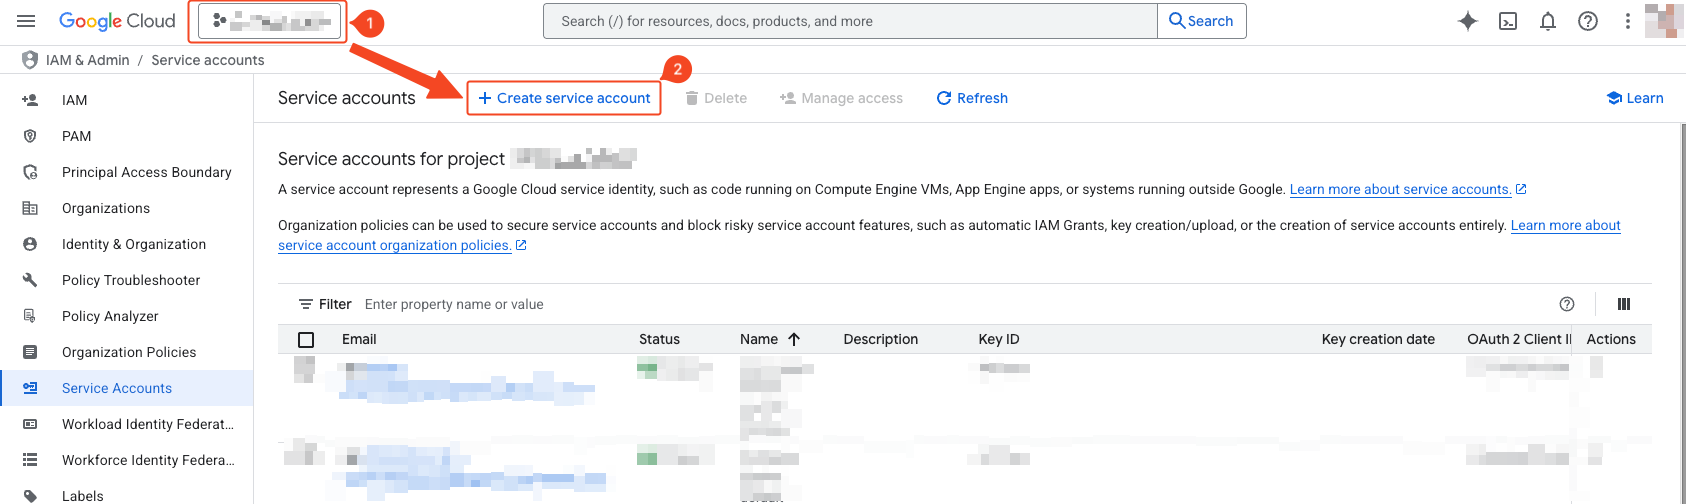
- Verify that the project where you want to create the service account is correct.
- Click Create Service Account.
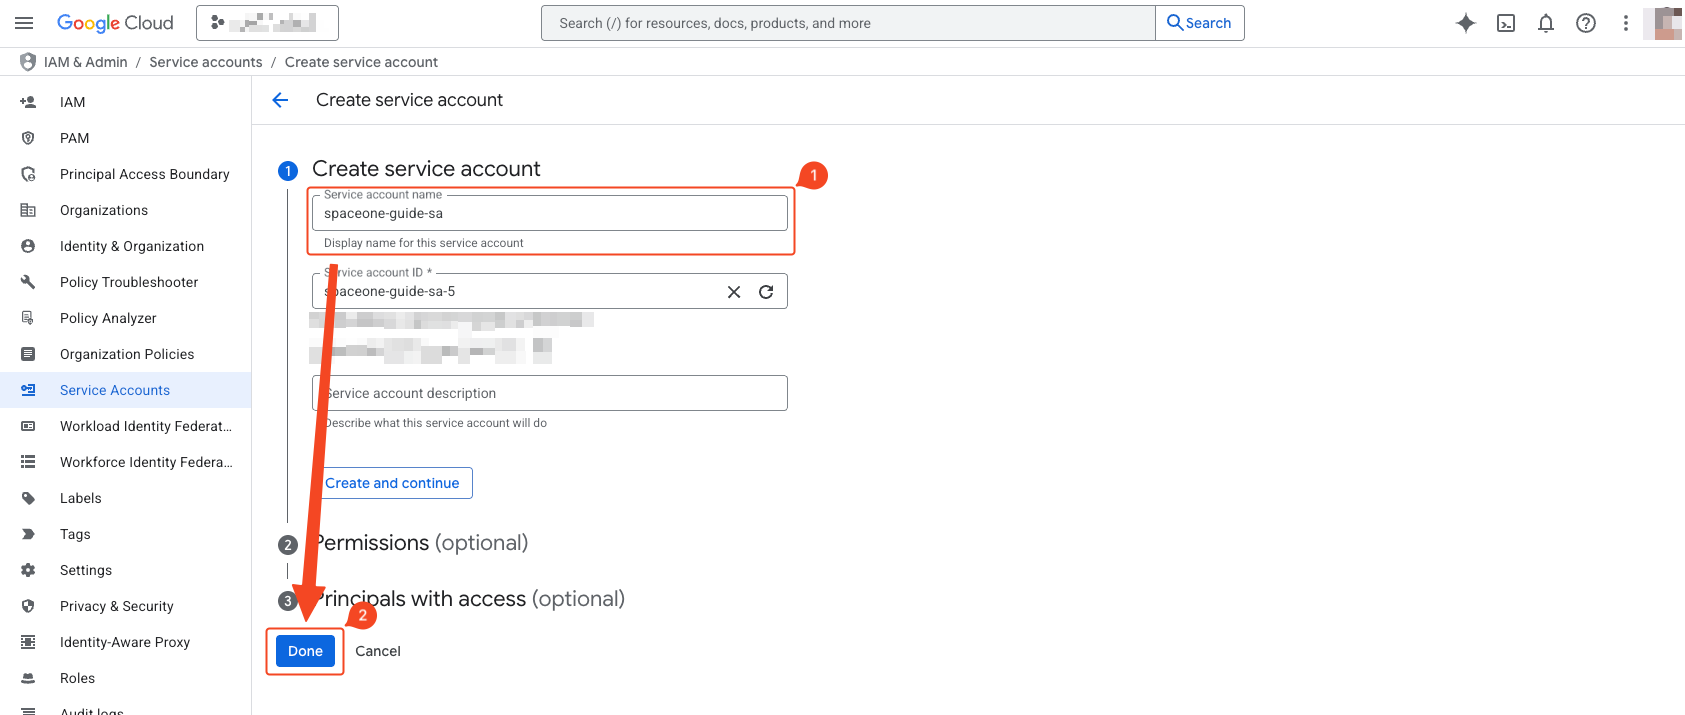
- Enter the service account name. A recognizable name is good.
- Click Done.
2. Service Account Project Role Assignment and API Activation
Login and Organization, Project Selection
Complete the steps from (Common) Organization, Project Selection .
Service Account Project Role Assignment
Select ‘IAM & Admin’ > ‘Service Accounts’ from the navigation menu (☰) in the top left.

- Enter the name of the created service account in the filter.
- Click the searched service account.
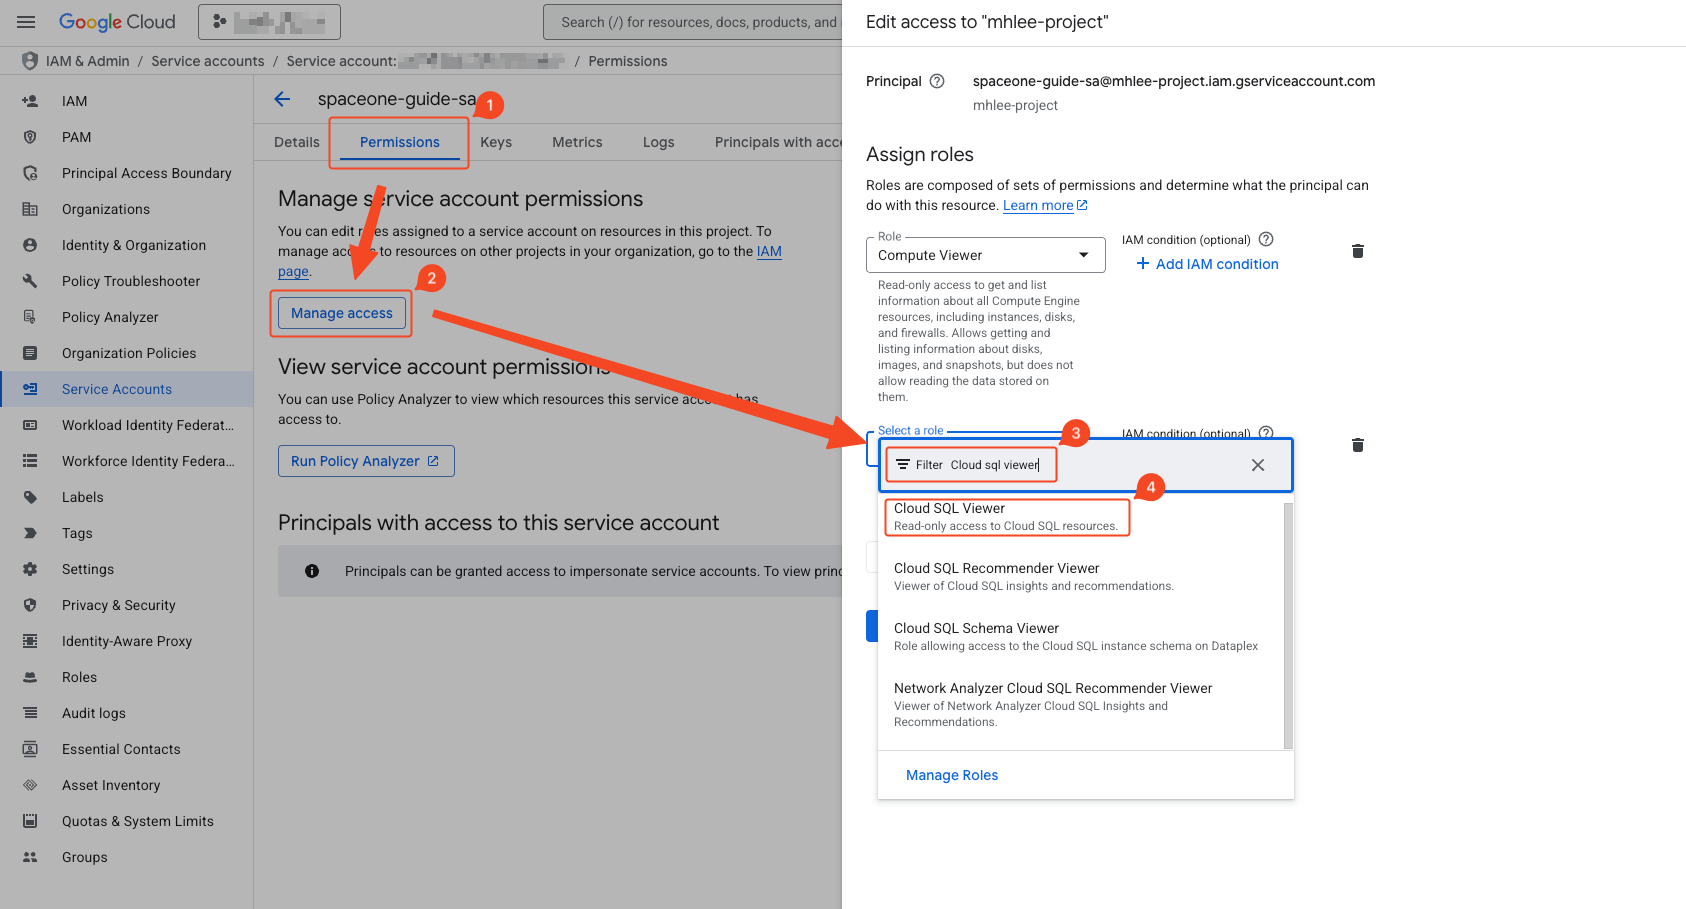
- Navigate to the Permissions tab.
- Click the Permission Control button to activate the right sidebar.
- Add the following roles:
Security Reviewer
Viewer
Storage Bucket Viewer
Storage Object Viewer
Browser
View Service Accounts
Role Viewer
Logs Viewer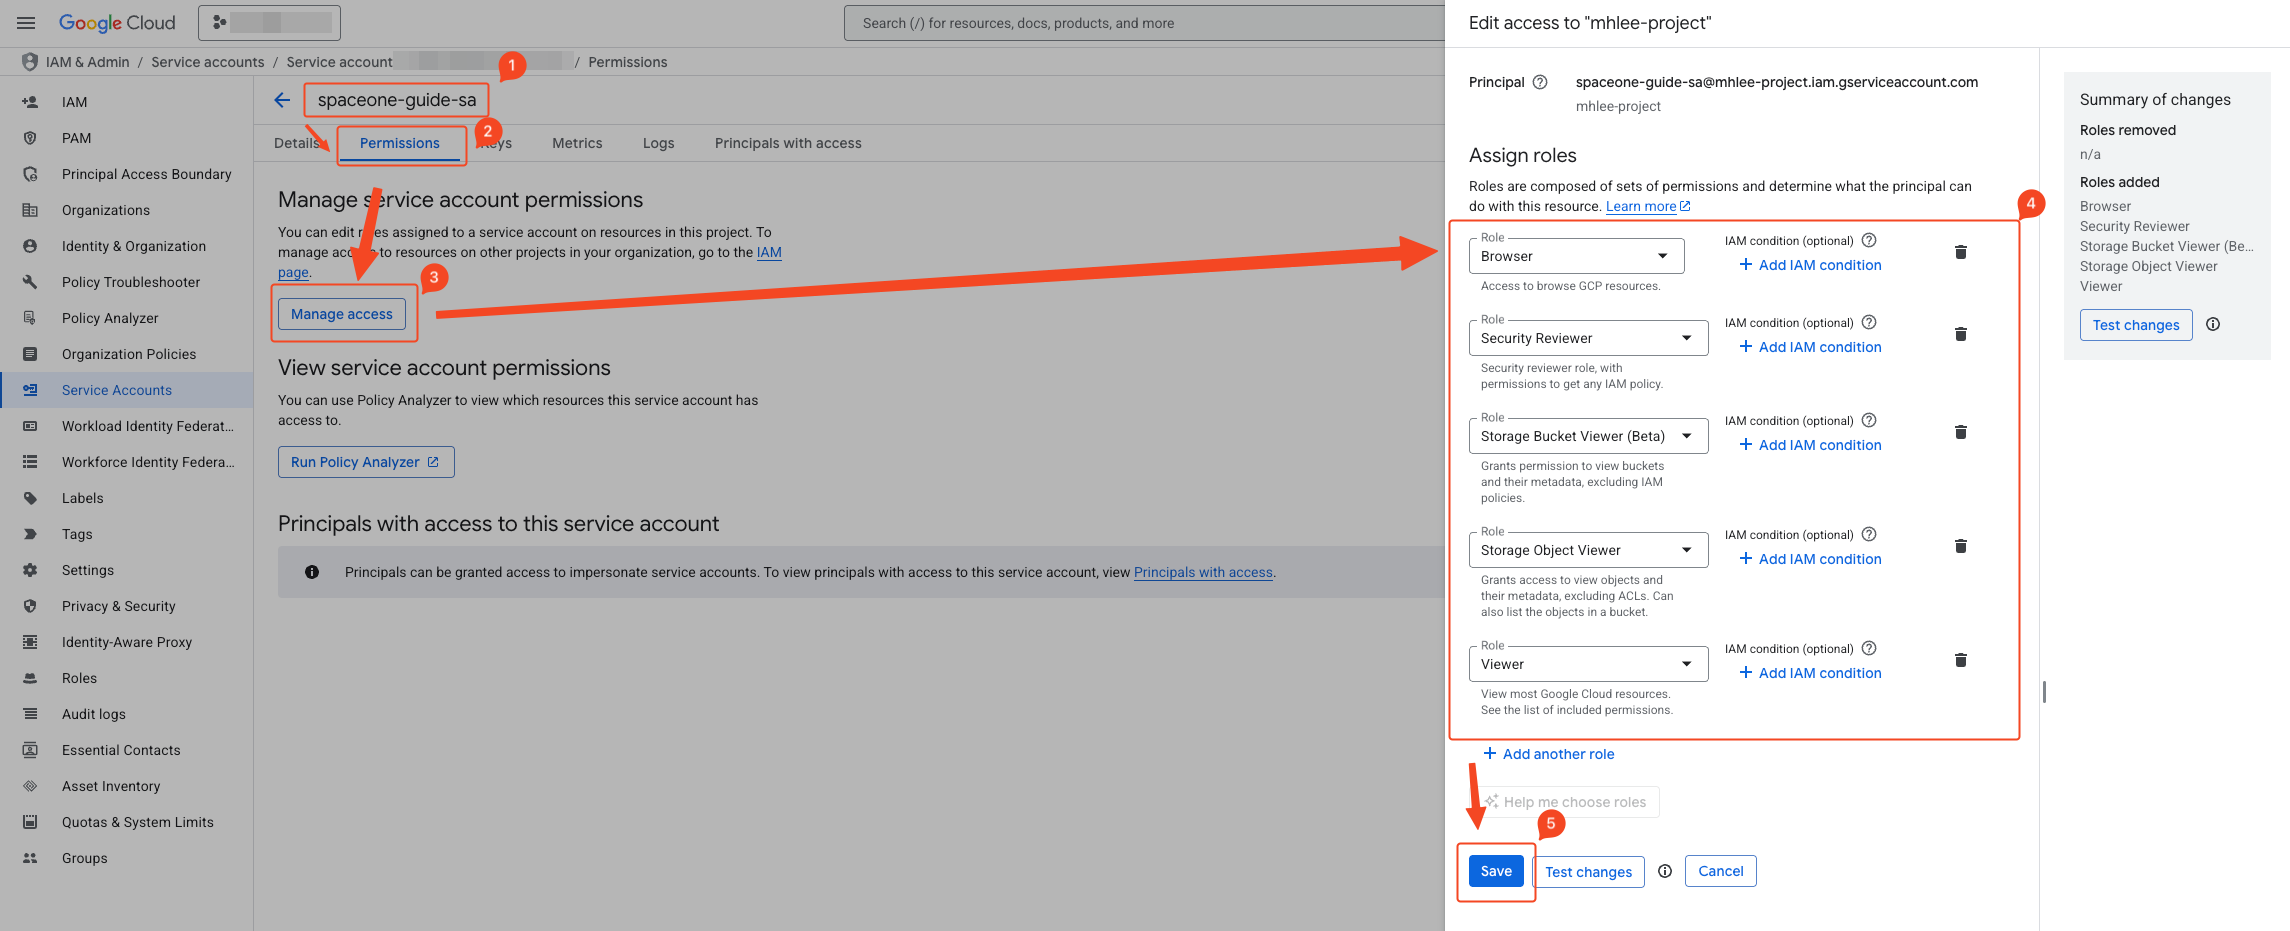
- Verify that 8 roles have been added.
- Click Save to apply.
API Activation
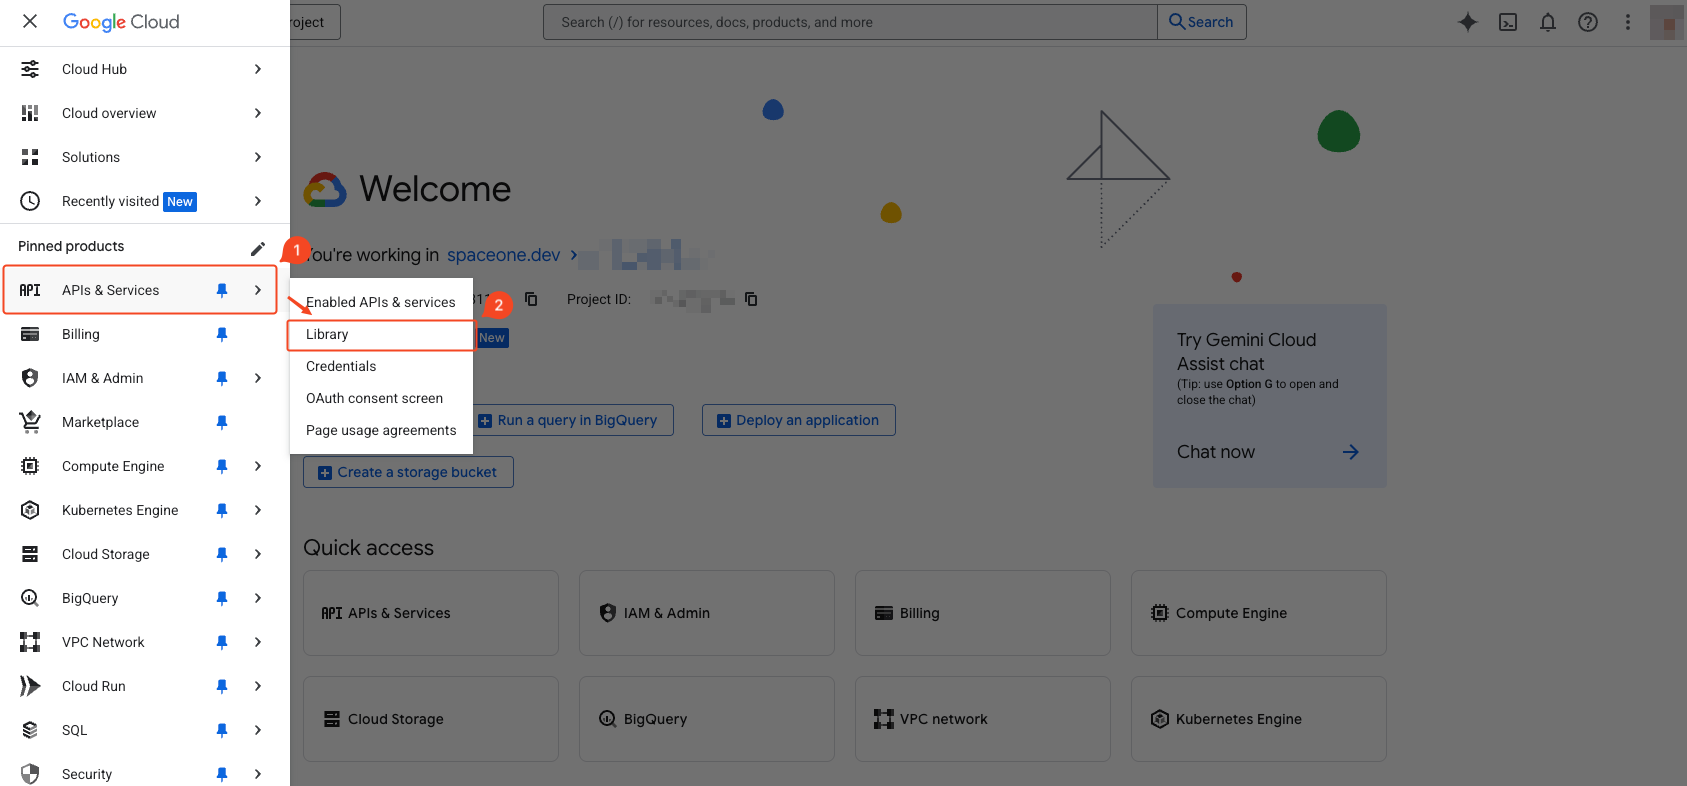 Select ‘APIs & Services’ > ‘Library’ from the navigation menu (☰) in the top left.
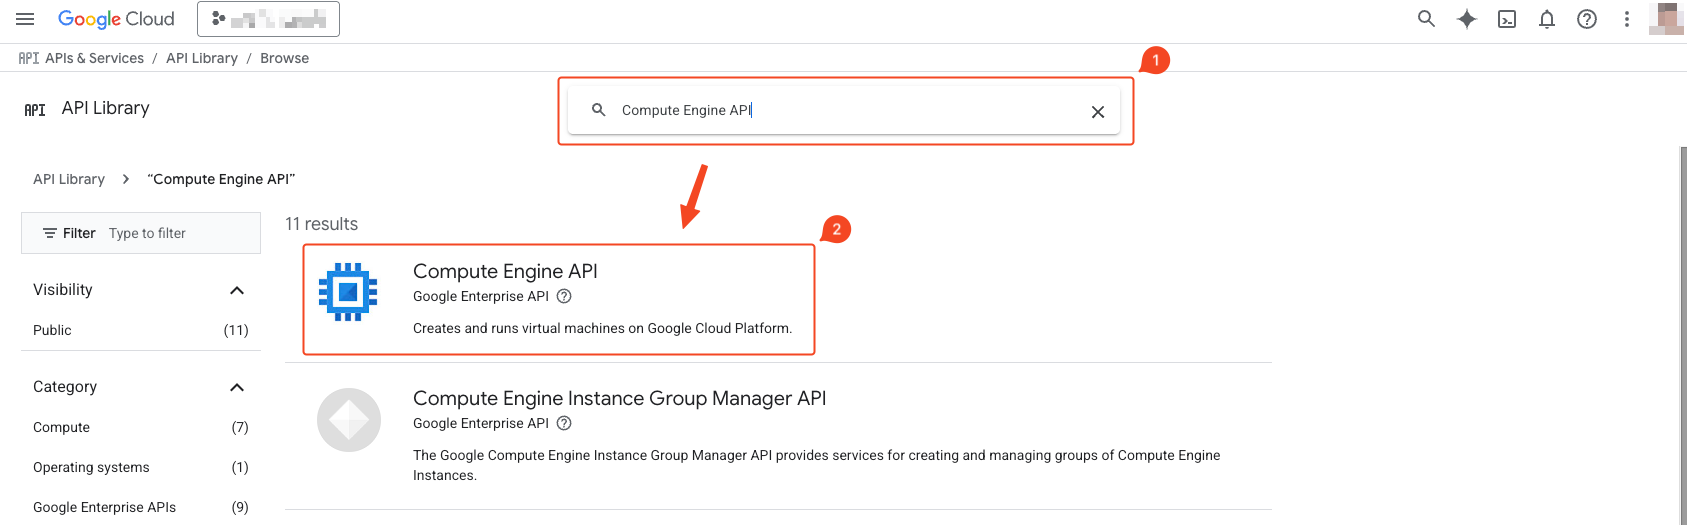
- Search for the following list:
Compute Engine API
Cloud Resource Manager API
Cloud Logging API
Cloud Pub/Sub API
Cloud Functions API
Cloud SQL Admin API
Cloud Identity API
Cloud Storage API
Cloud Build API
Cloud Monitoring API
Cloud Filestore API
Cloud Datastore API
Cloud Dataproc API
Cloud Key Management Service (KMS) API
Identity and Access Management (IAM) API
Secret Manager API
Service Usage API
Eventarc API
BigQuery API
Firebase Management API
Storage Transfer API
Batch API
Kubernetes Engine API
Service Usage API
App Engine Admin API
Google Cloud Firestore API
Identity and Access Management (IAM) API
Cloud Resource Manager API
Cloud Identity
Cloud Logging API
Additional Information
You can enable APIs by navigating to the links below:
- https://console.cloud.google.com/apis/library/compute.googleapis.com
- https://console.cloud.google.com/apis/library/pubsub.googleapis.com
- https://console.cloud.google.com/apis/library/sqladmin.googleapis.com
- https://console.cloud.google.com/apis/library/bigquery.googleapis.com
- https://console.cloud.google.com/apis/library/monitoring.googleapis.com
- https://console.cloud.google.com/apis/library/eventarc.googleapis.com
- https://console.cloud.google.com/apis/library/cloudfunctions.googleapis.com
- https://console.cloud.google.com/apis/library/file.googleapis.com
- https://console.cloud.google.com/apis/library/firebase.googleapis.com
- https://console.cloud.google.com/apis/library/storagetransfer.googleapis.com
- https://console.cloud.google.com/apis/library/cloudkms.googleapis.com
- https://console.cloud.google.com/apis/library/batch.googleapis.com
- https://console.cloud.google.com/apis/library/cloudbuild.googleapis.com
- https://console.cloud.google.com/apis/library/container.googleapis.com
- https://console.cloud.google.com/apis/library/serviceusage.googleapis.com
- https://console.cloud.google.com/apis/library/appengine.googleapis.com
- https://console.cloud.google.com/apis/library/firestore.googleapis.com
- https://console.cloud.google.com/apis/library/datastore.googleapis.com
- https://console.cloud.google.com/apis/library/dataproc.googleapis.com
- https://console.cloud.google.com/apis/library/iam.googleapis.com
- https://console.cloud.google.com/apis/library/cloudresourcemanager.googleapis.com
- https://console.cloud.google.com/apis/library/cloudidentity.googleapis.com
- https://console.cloud.google.com/apis/library/logging.googleapis.com
Or you can enable APIs using the following commands in GCP cloudshell or googlecloud cli:
gcloud services enable compute.googleapis.com \
    pubsub.googleapis.com \
    sqladmin.googleapis.com \
    bigquery.googleapis.com \
    storage.googleapis.com \
    monitoring.googleapis.com \
    eventarc.googleapis.com \
    cloudfunctions.googleapis.com \
    file.googleapis.com \
    firebase.googleapis.com \
    storagetransfer.googleapis.com \
    --project $PROJECT_ID

gcloud services enable cloudkms.googleapis.com \
    batch.googleapis.com \
    cloudbuild.googleapis.com \
    run.googleapis.com \
    container.googleapis.com \
    serviceusage.googleapis.com \
    appengine.googleapis.com \
    firestore.googleapis.com \
    datastore.googleapis.com \
    dataproc.googleapis.com \
    --project $PROJECT_ID

gcloud services enable cloudkms.googleapis.com \
    iam.googleapis.com \
    cloudresourcemanager.googleapis.com \
    cloudidentity.googleapis.com \
    logging.googleapis.com \
--project $PROJECT_ID - Click the one that matches the search term.
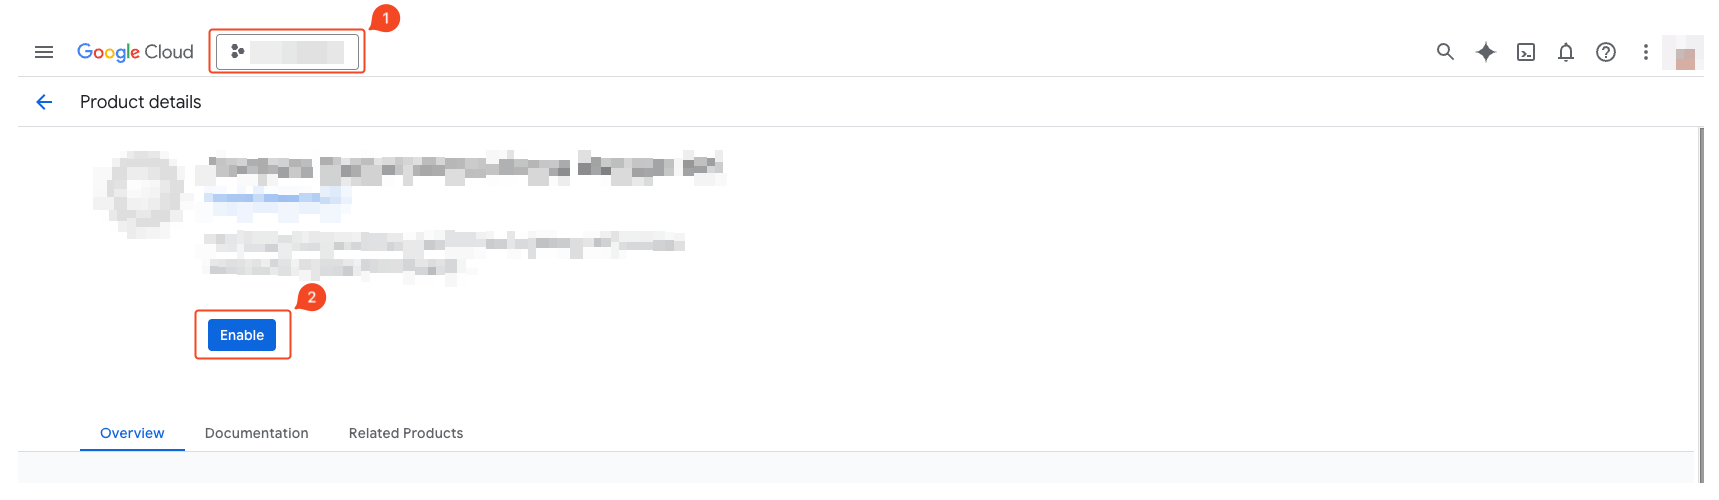
- Verify the selected project.
- Click Enable to activate the API.
 Select ‘APIs & Services’ > ‘Enabled APIs & Services’ from the navigation menu (☰) in the top left.
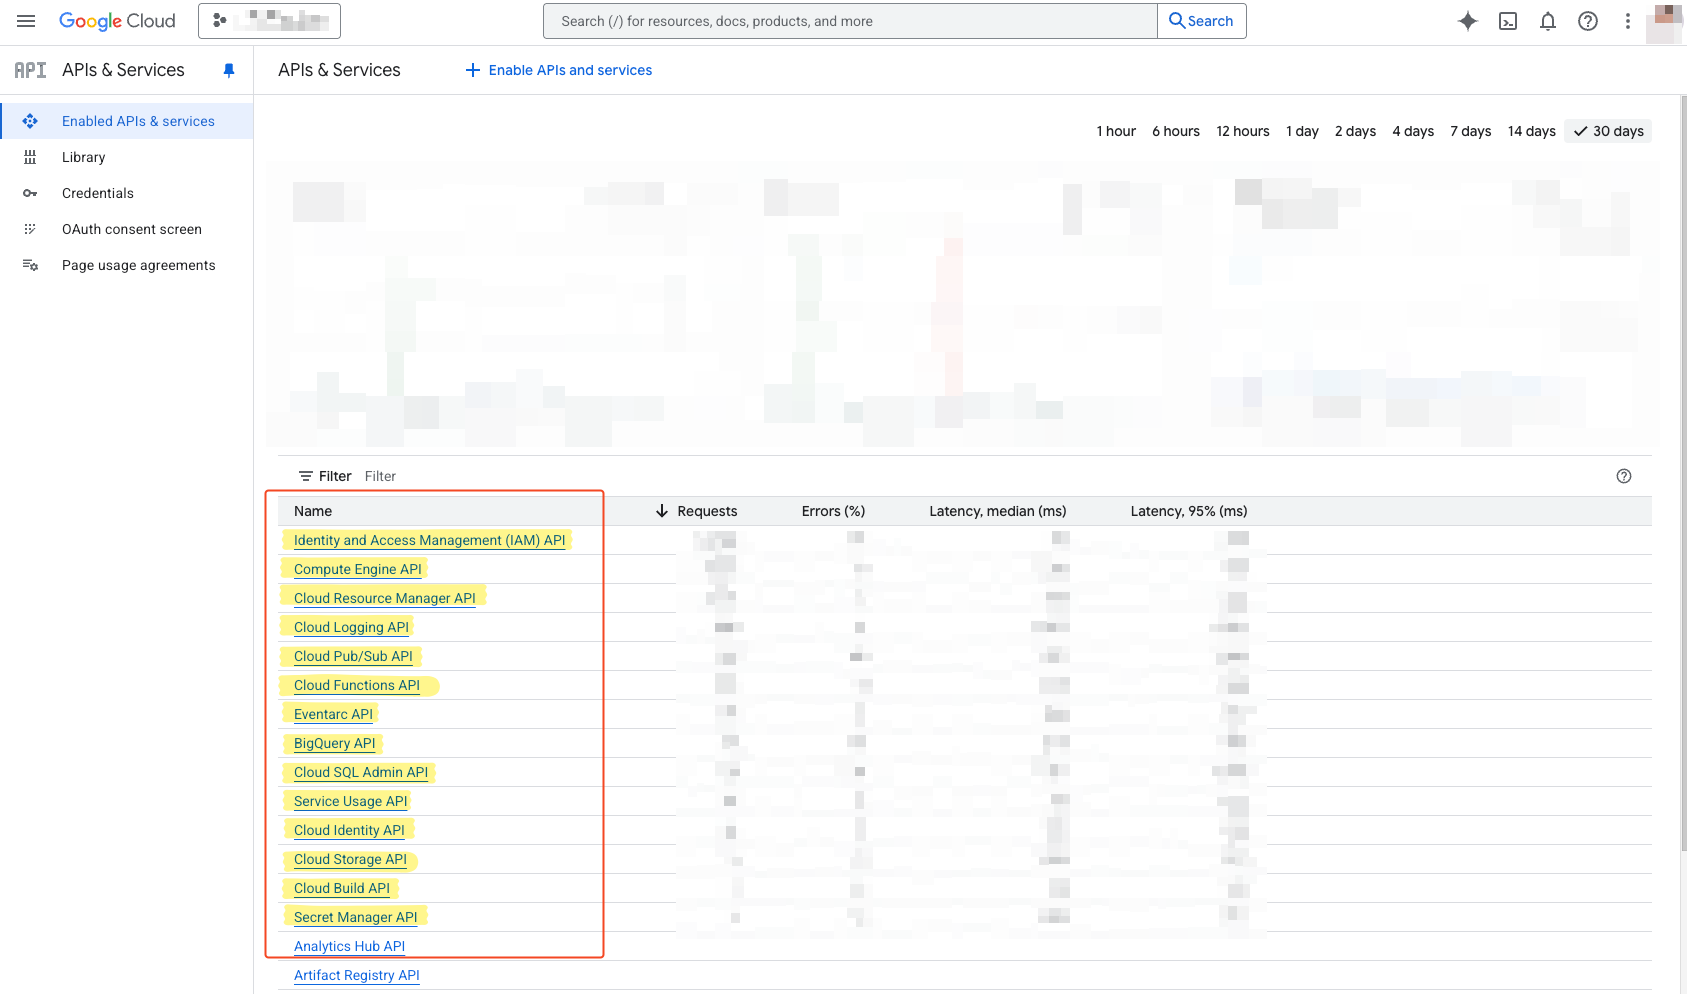 Verify that the APIs added above are activated.
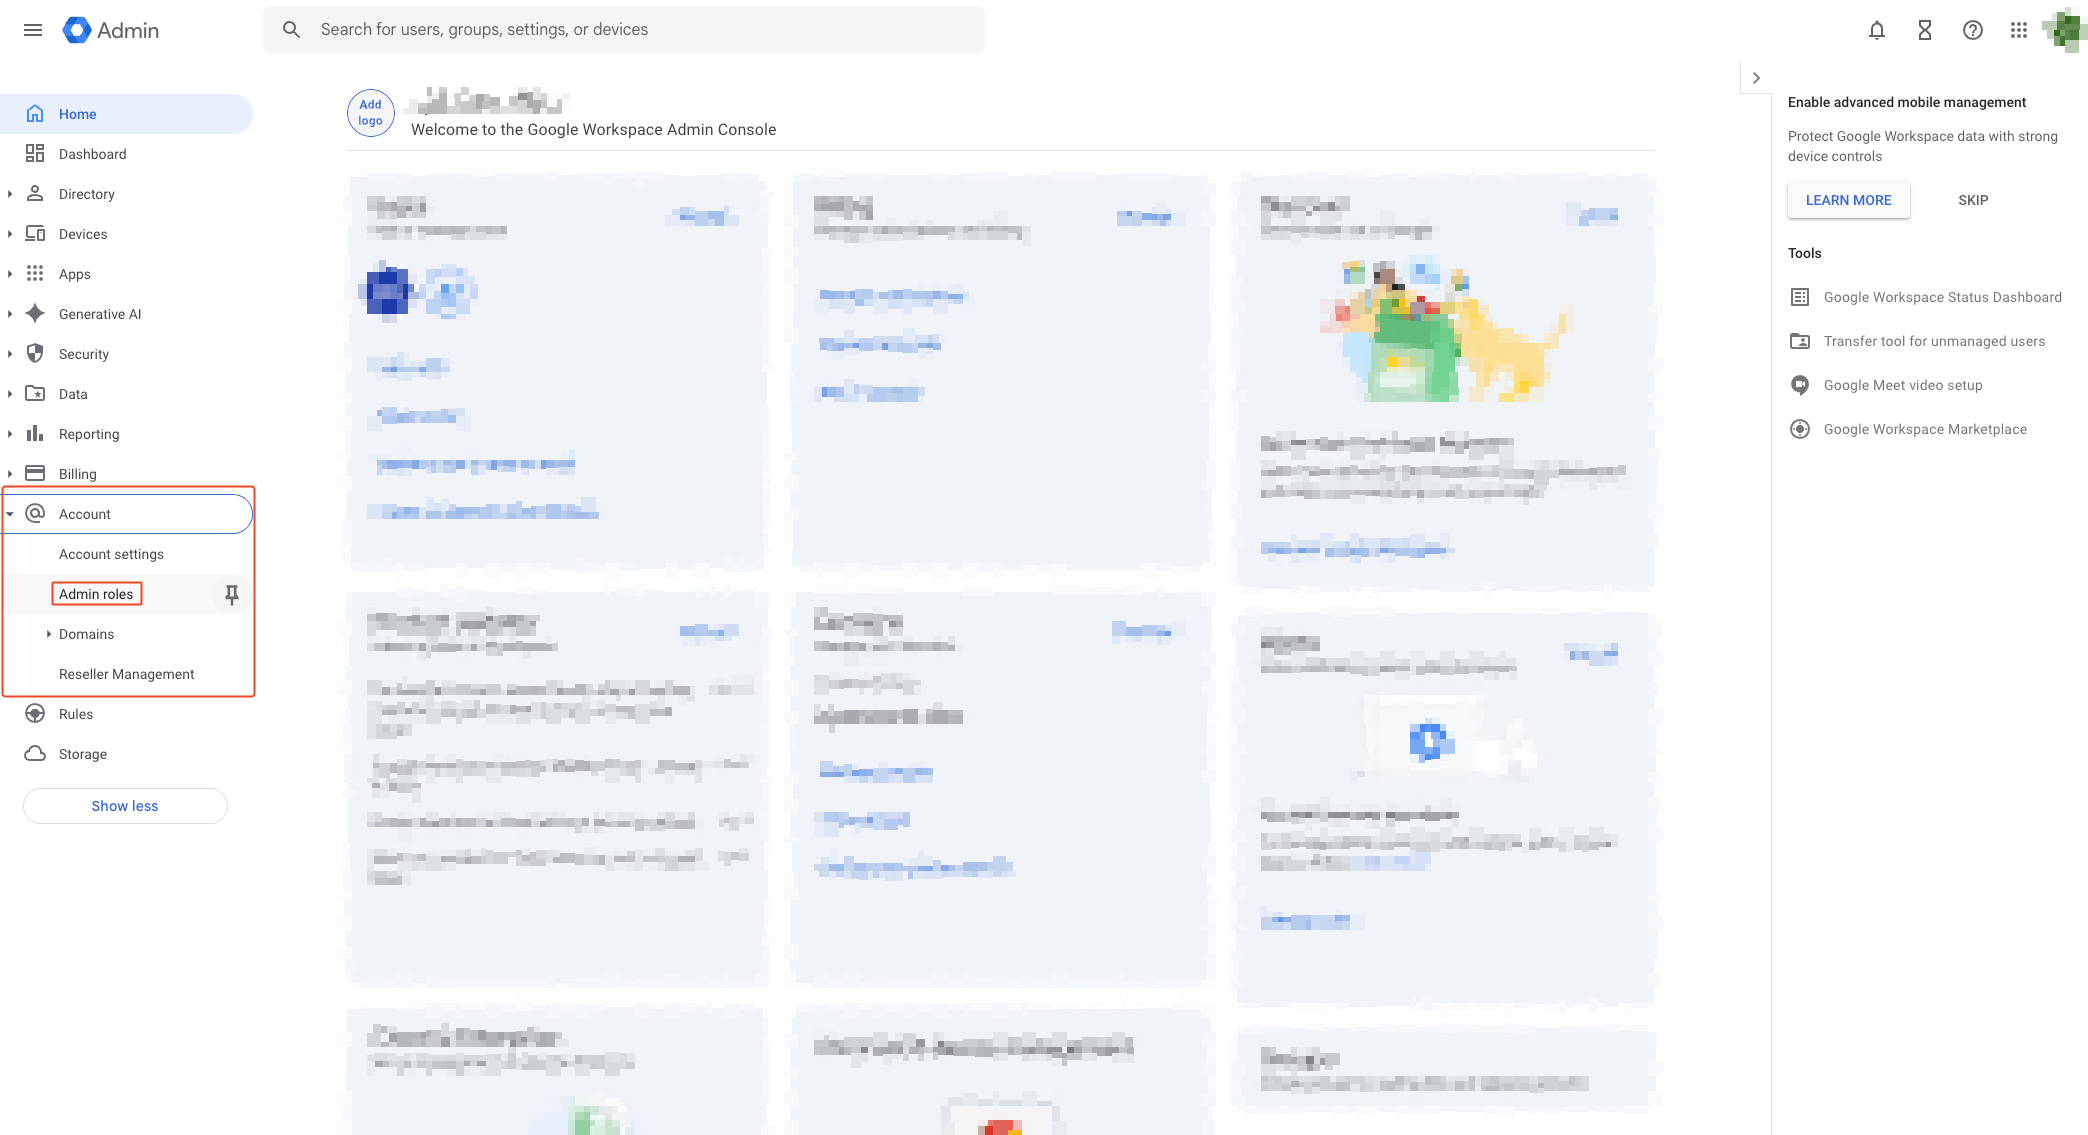
Organization Group Read Permission Grant
- Access Google Admin Console.
- You must be logged in with a Super Admin account.
- Go to Account > Admin roles from the left menu, or access this link.
- Click Assign admins from the right option of Groups Reader in the role list.
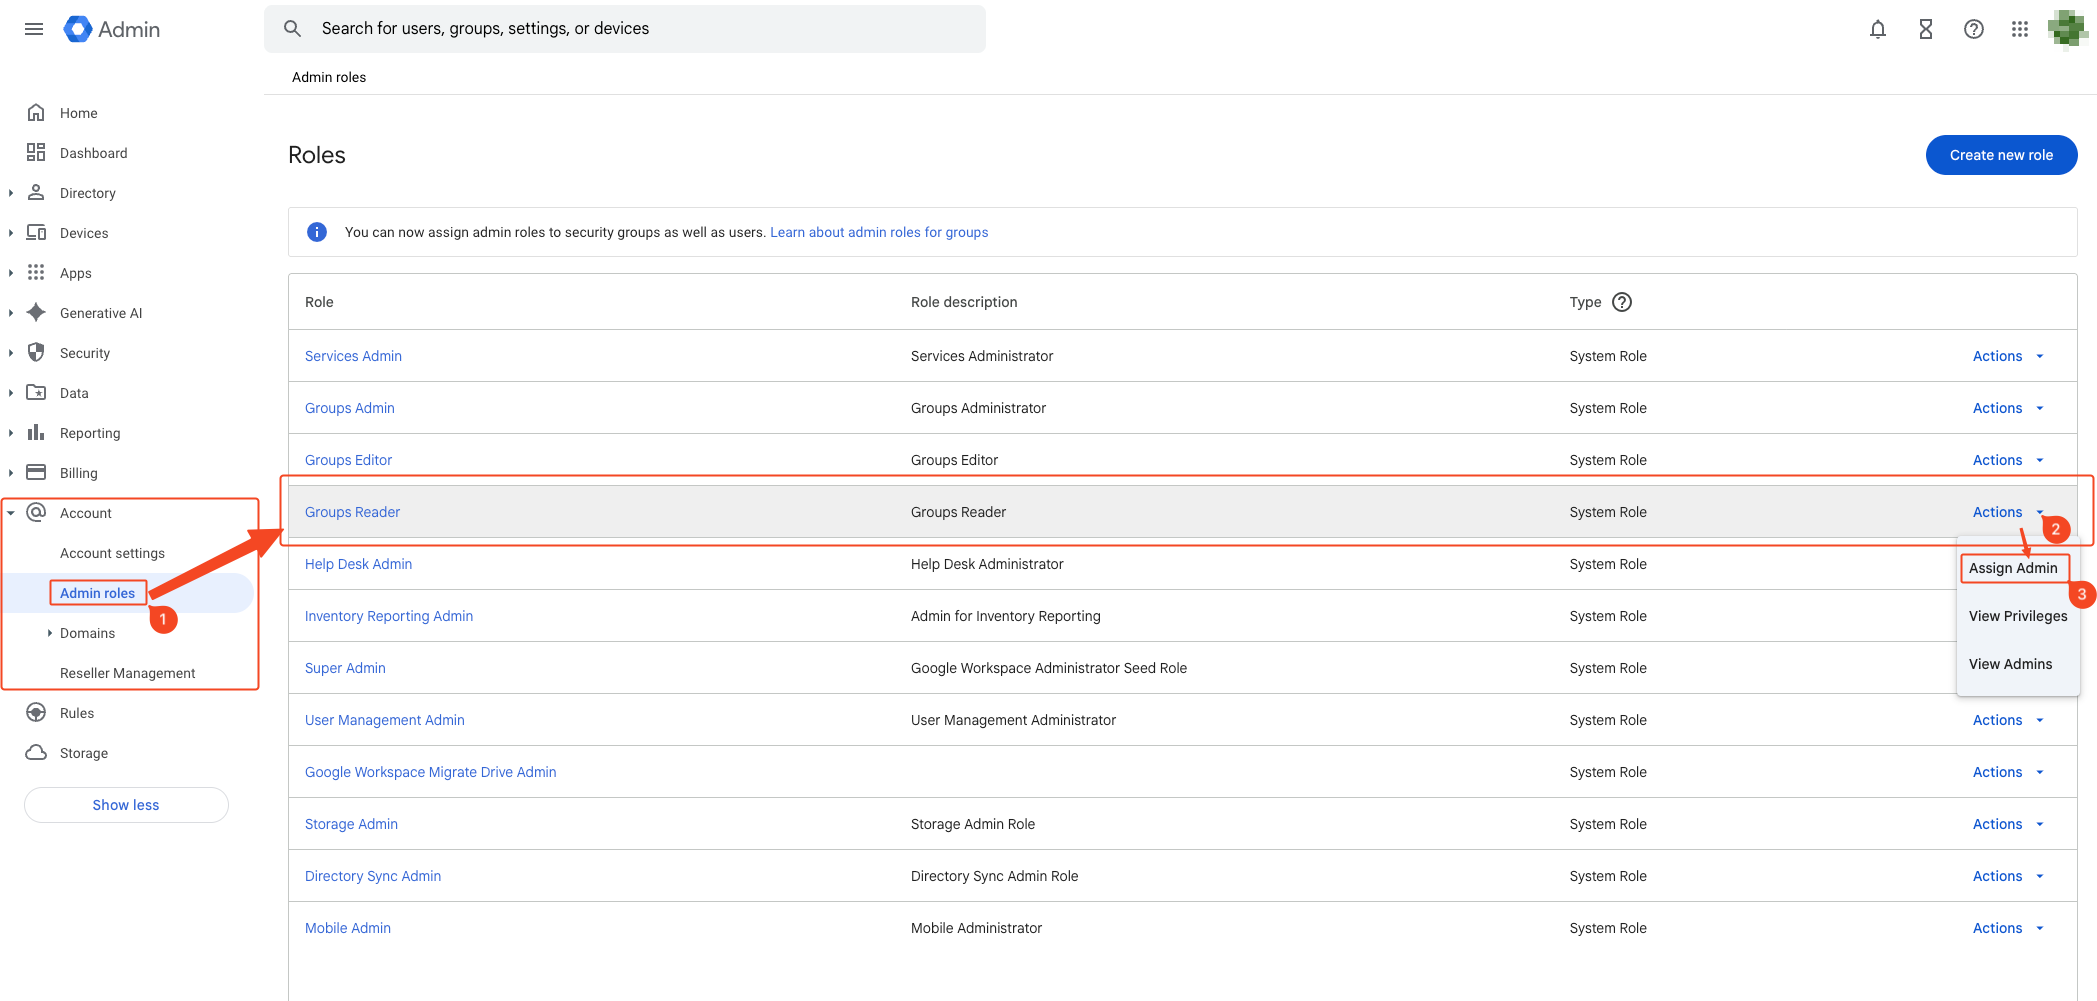
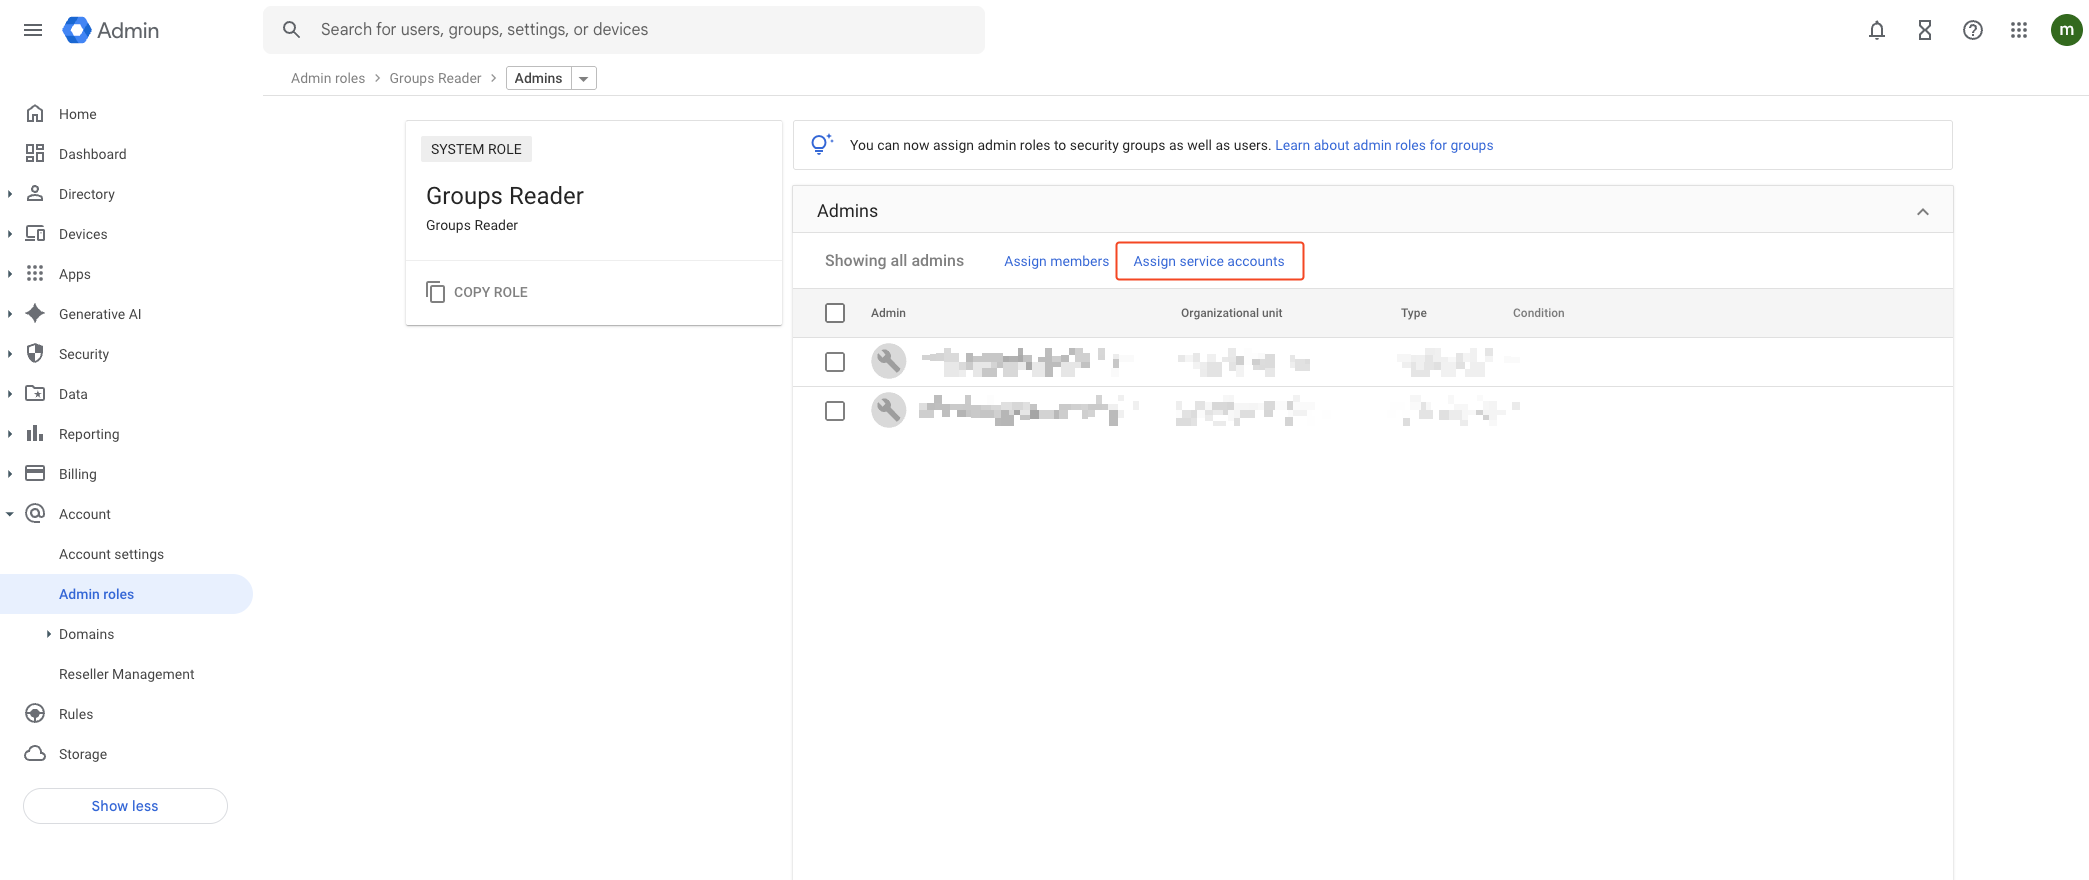
- Click Assign service accounts.
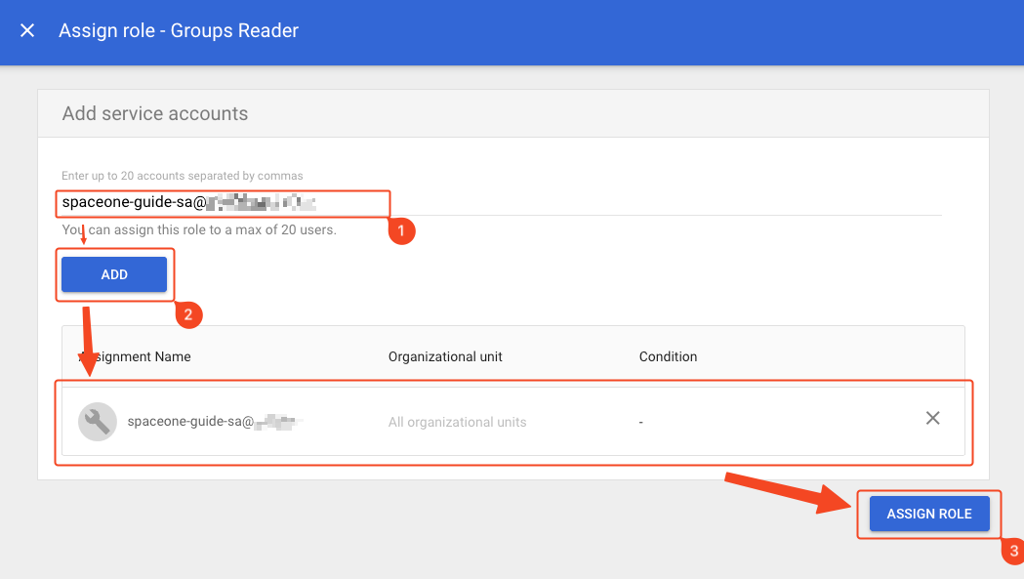
- Enter the service account email, add it, and click Assign Role to complete. You can check the service account email in the 1. Service Account Creation
step.
3. [Optional] Service Account Specific Project or Folder Permission Grant
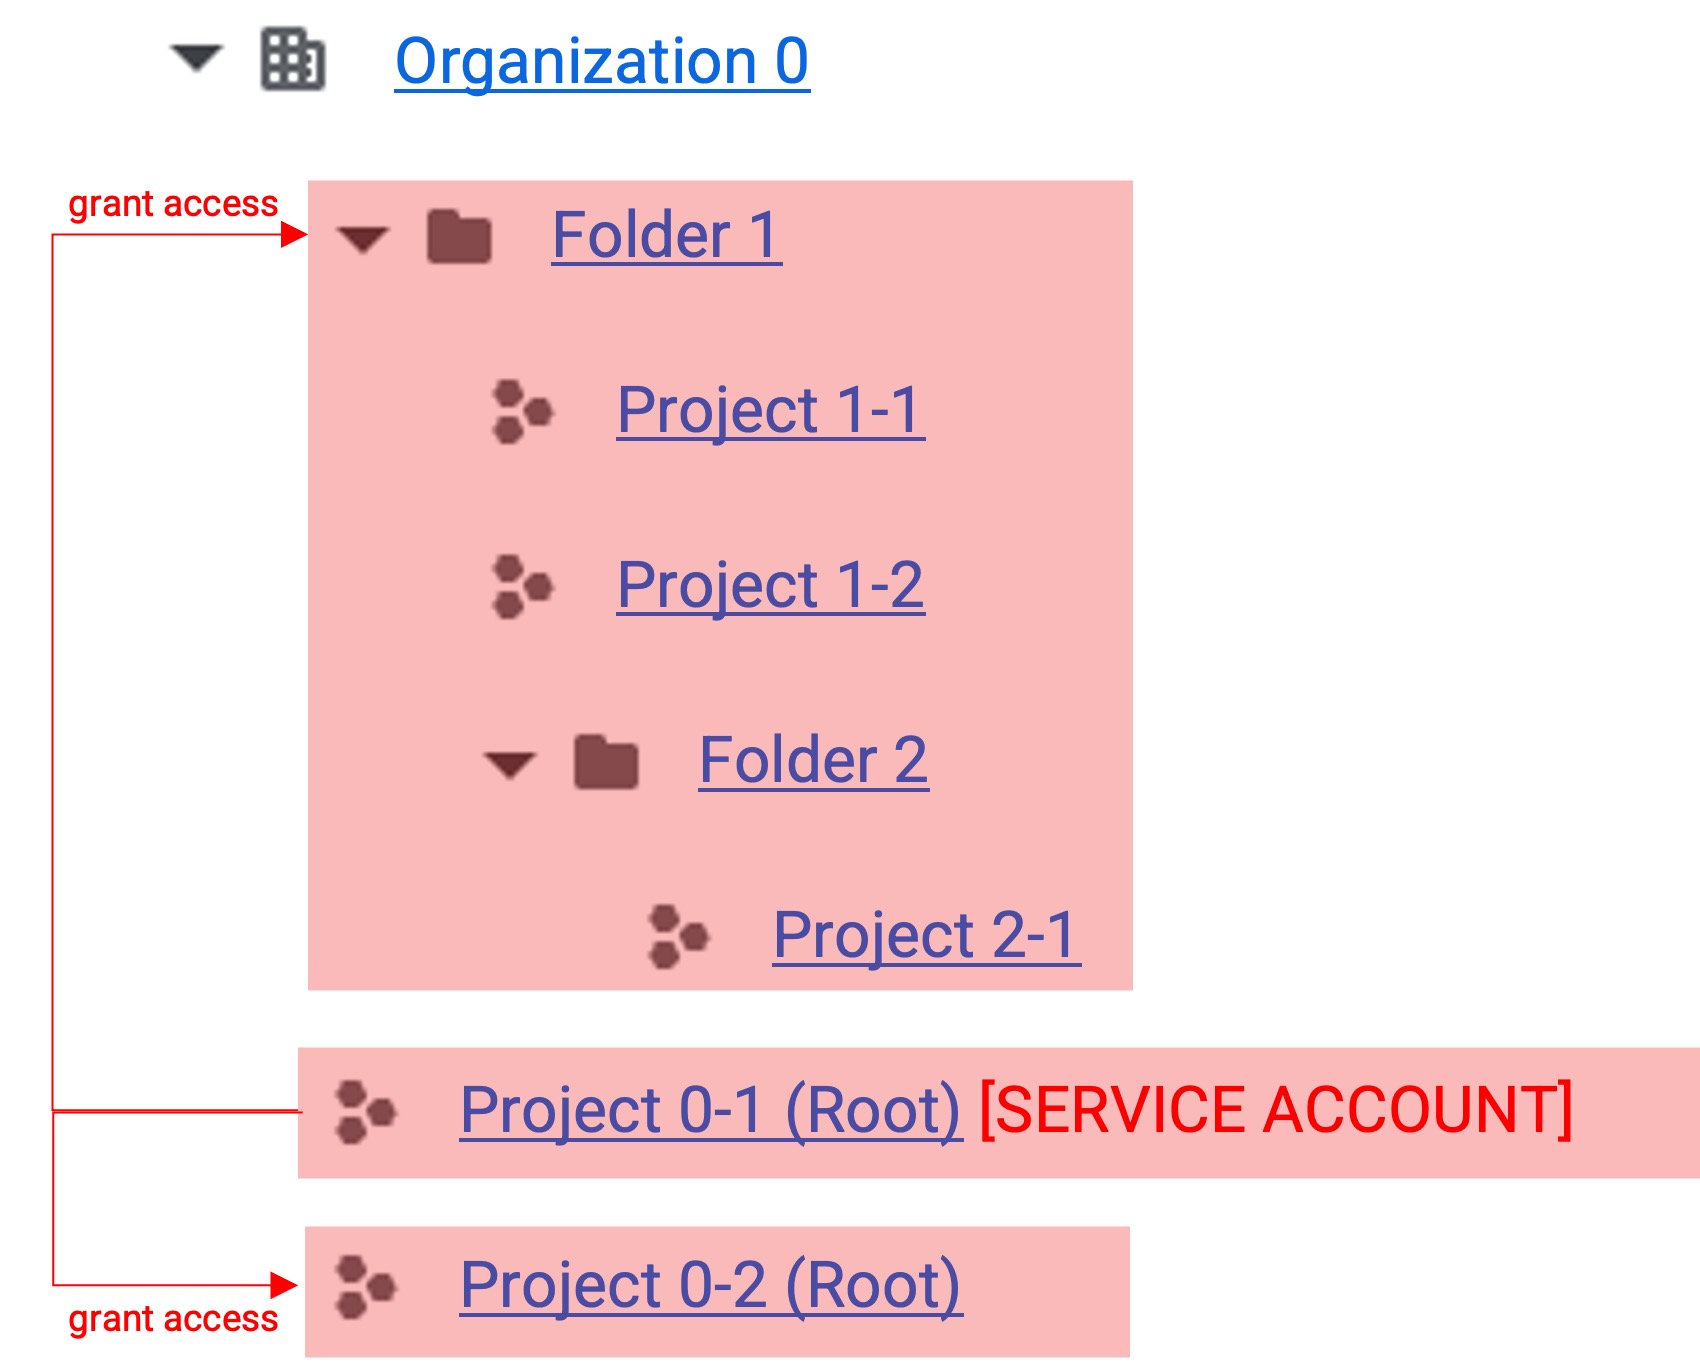
Permission Grant Concept
In gcloud, you can change the access scope of a service account according to permission grants. The red area in the figure below represents the accessible area.
Project Permission Grant
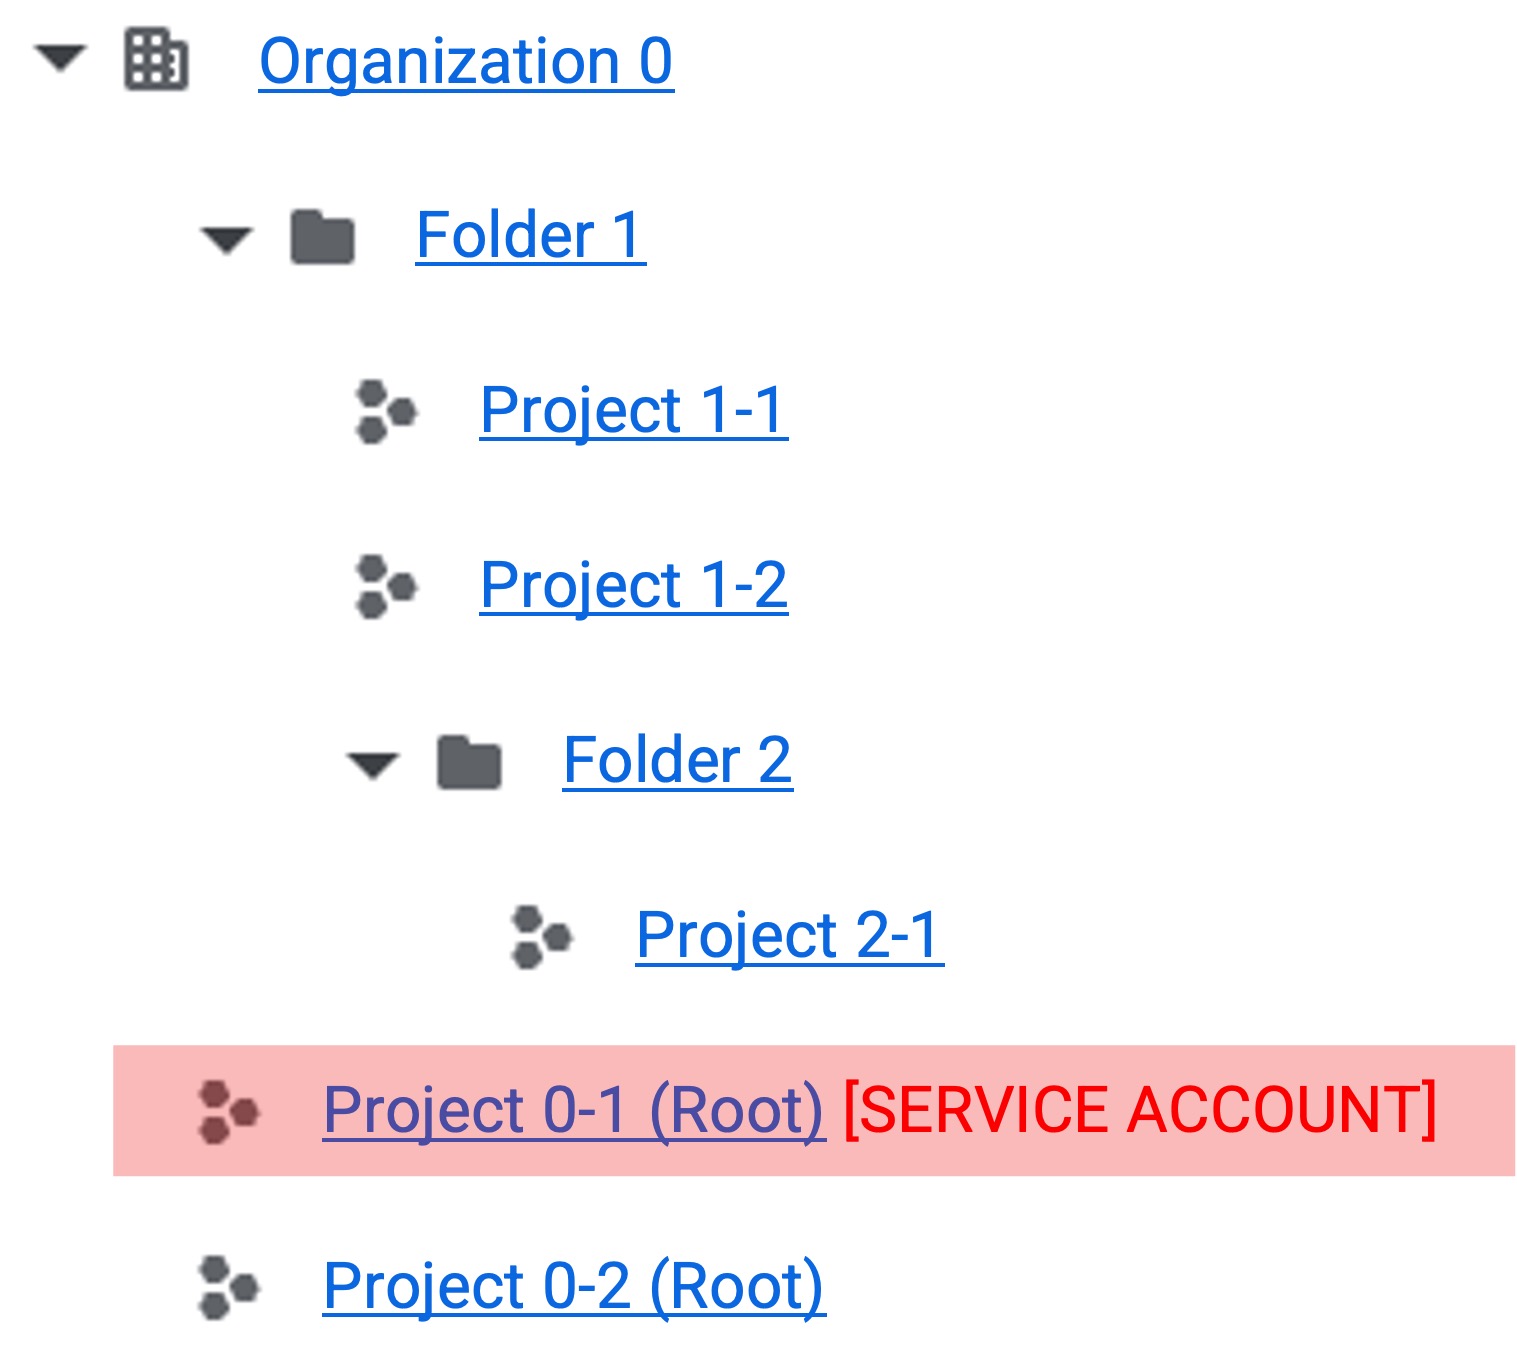 1. Root Project Service Account Creation 1. Root Project Service Account Creation | 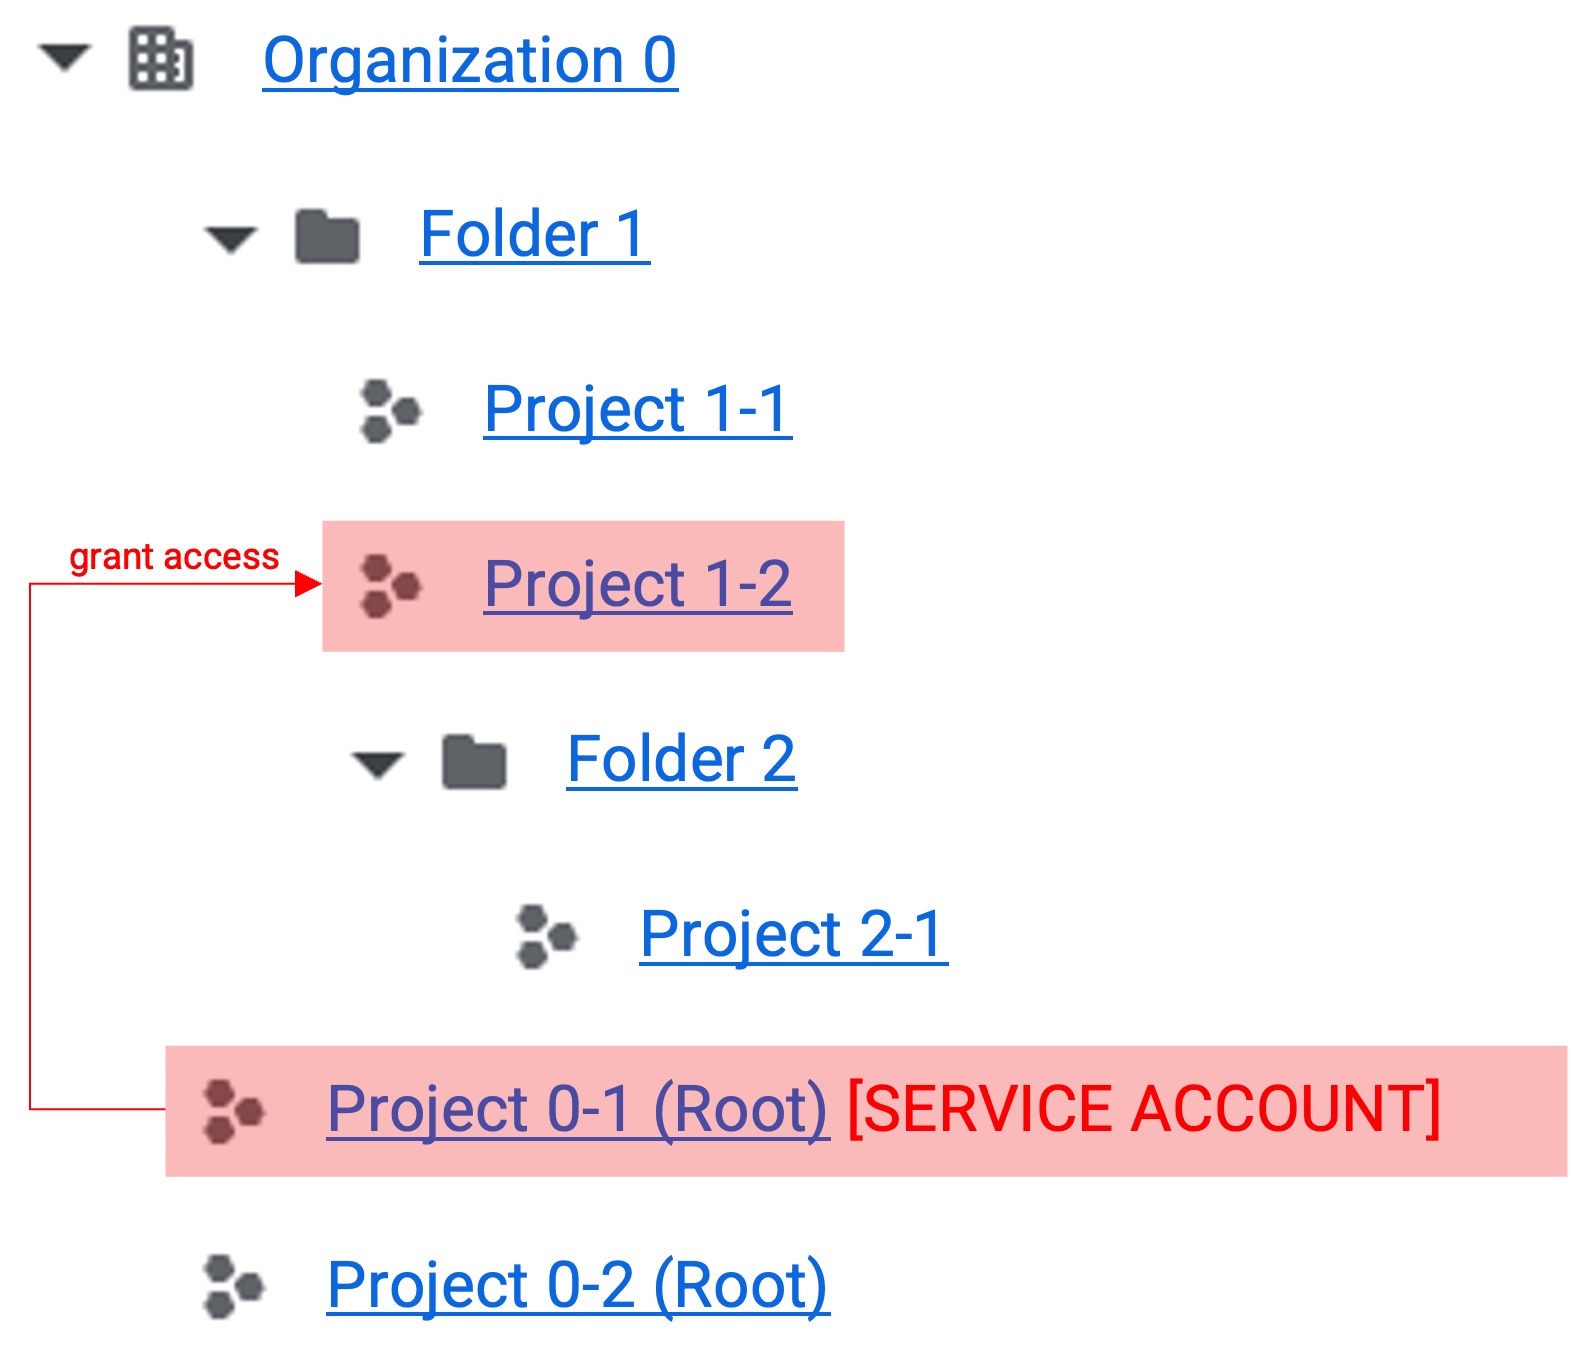 2. Single Project Permission Grant 2. Single Project Permission Grant |
|---|
- Projects can be granted permissions individually.
- This structure is used when individual integration is needed in complex tree structures.
Folder Permission Grant
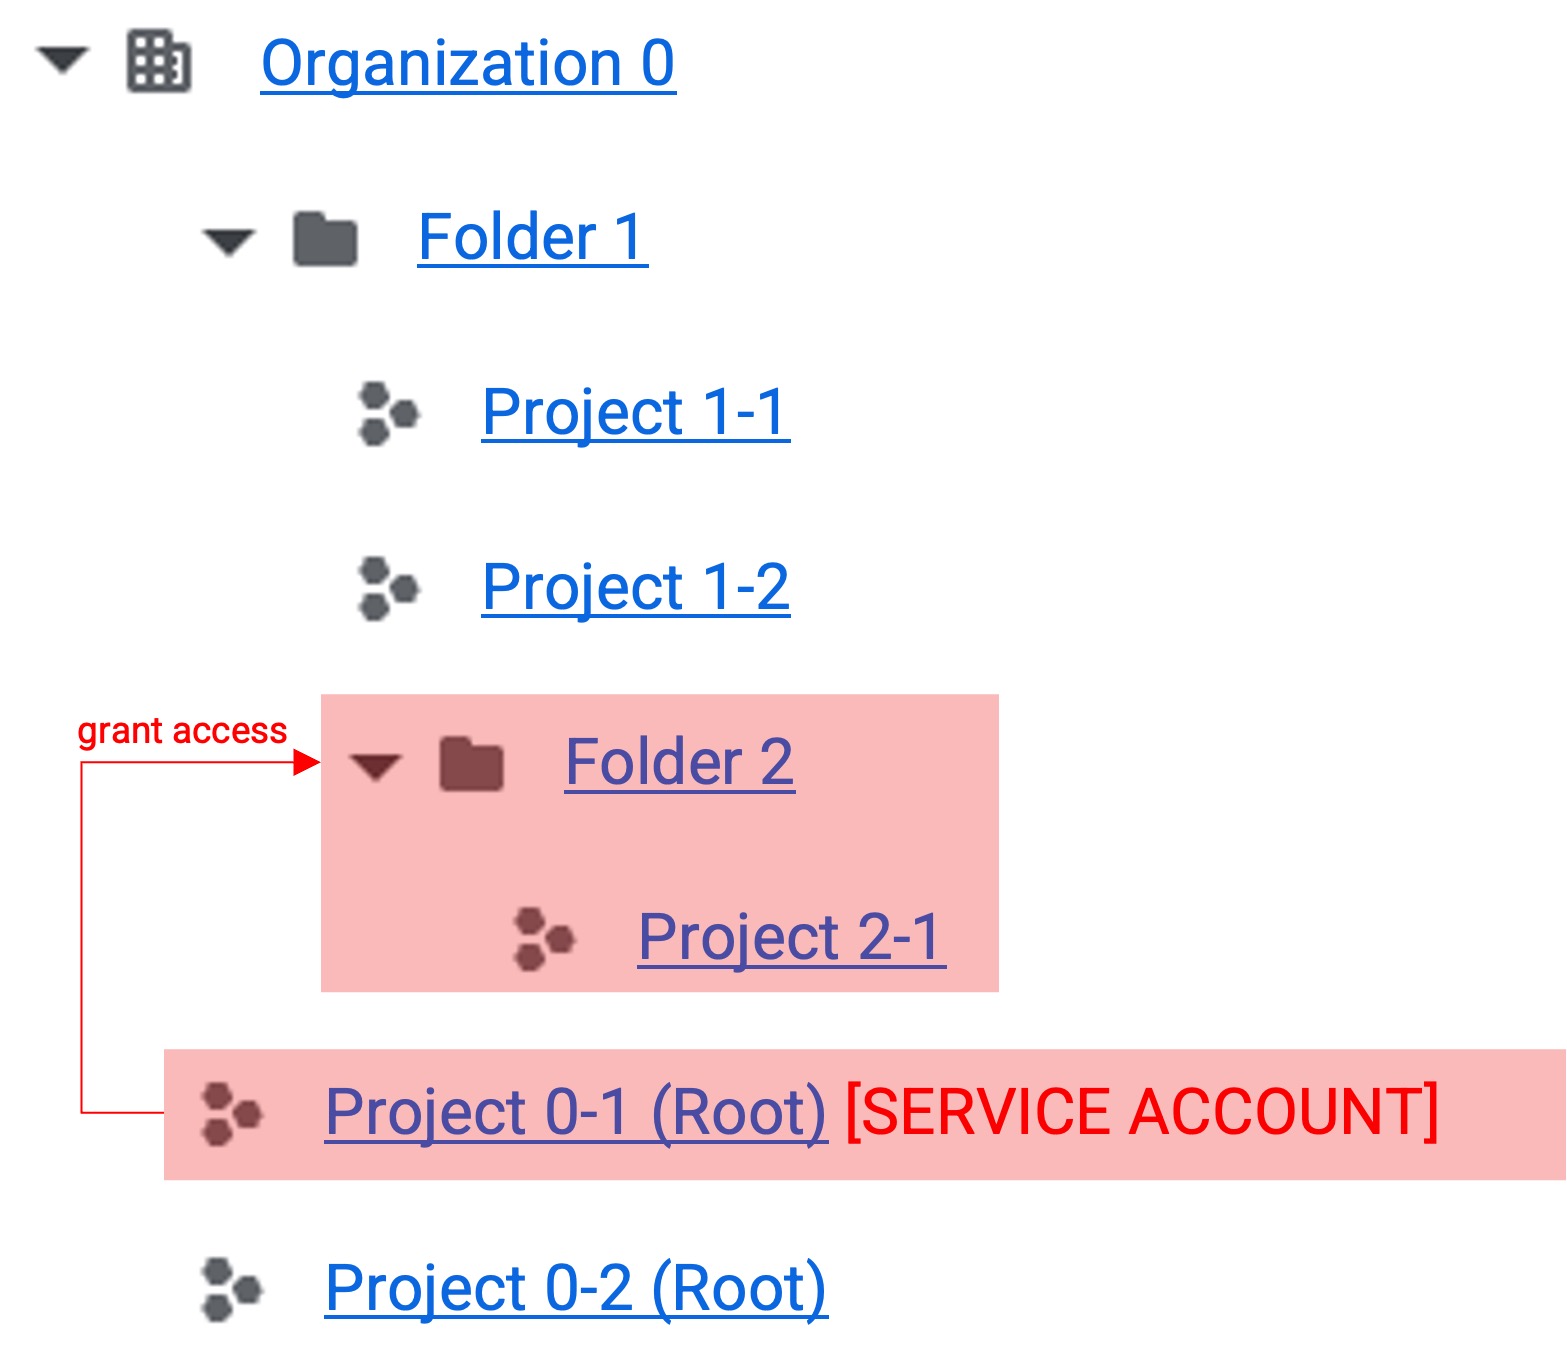 1. Folder Permission Grant 1. Folder Permission Grant | 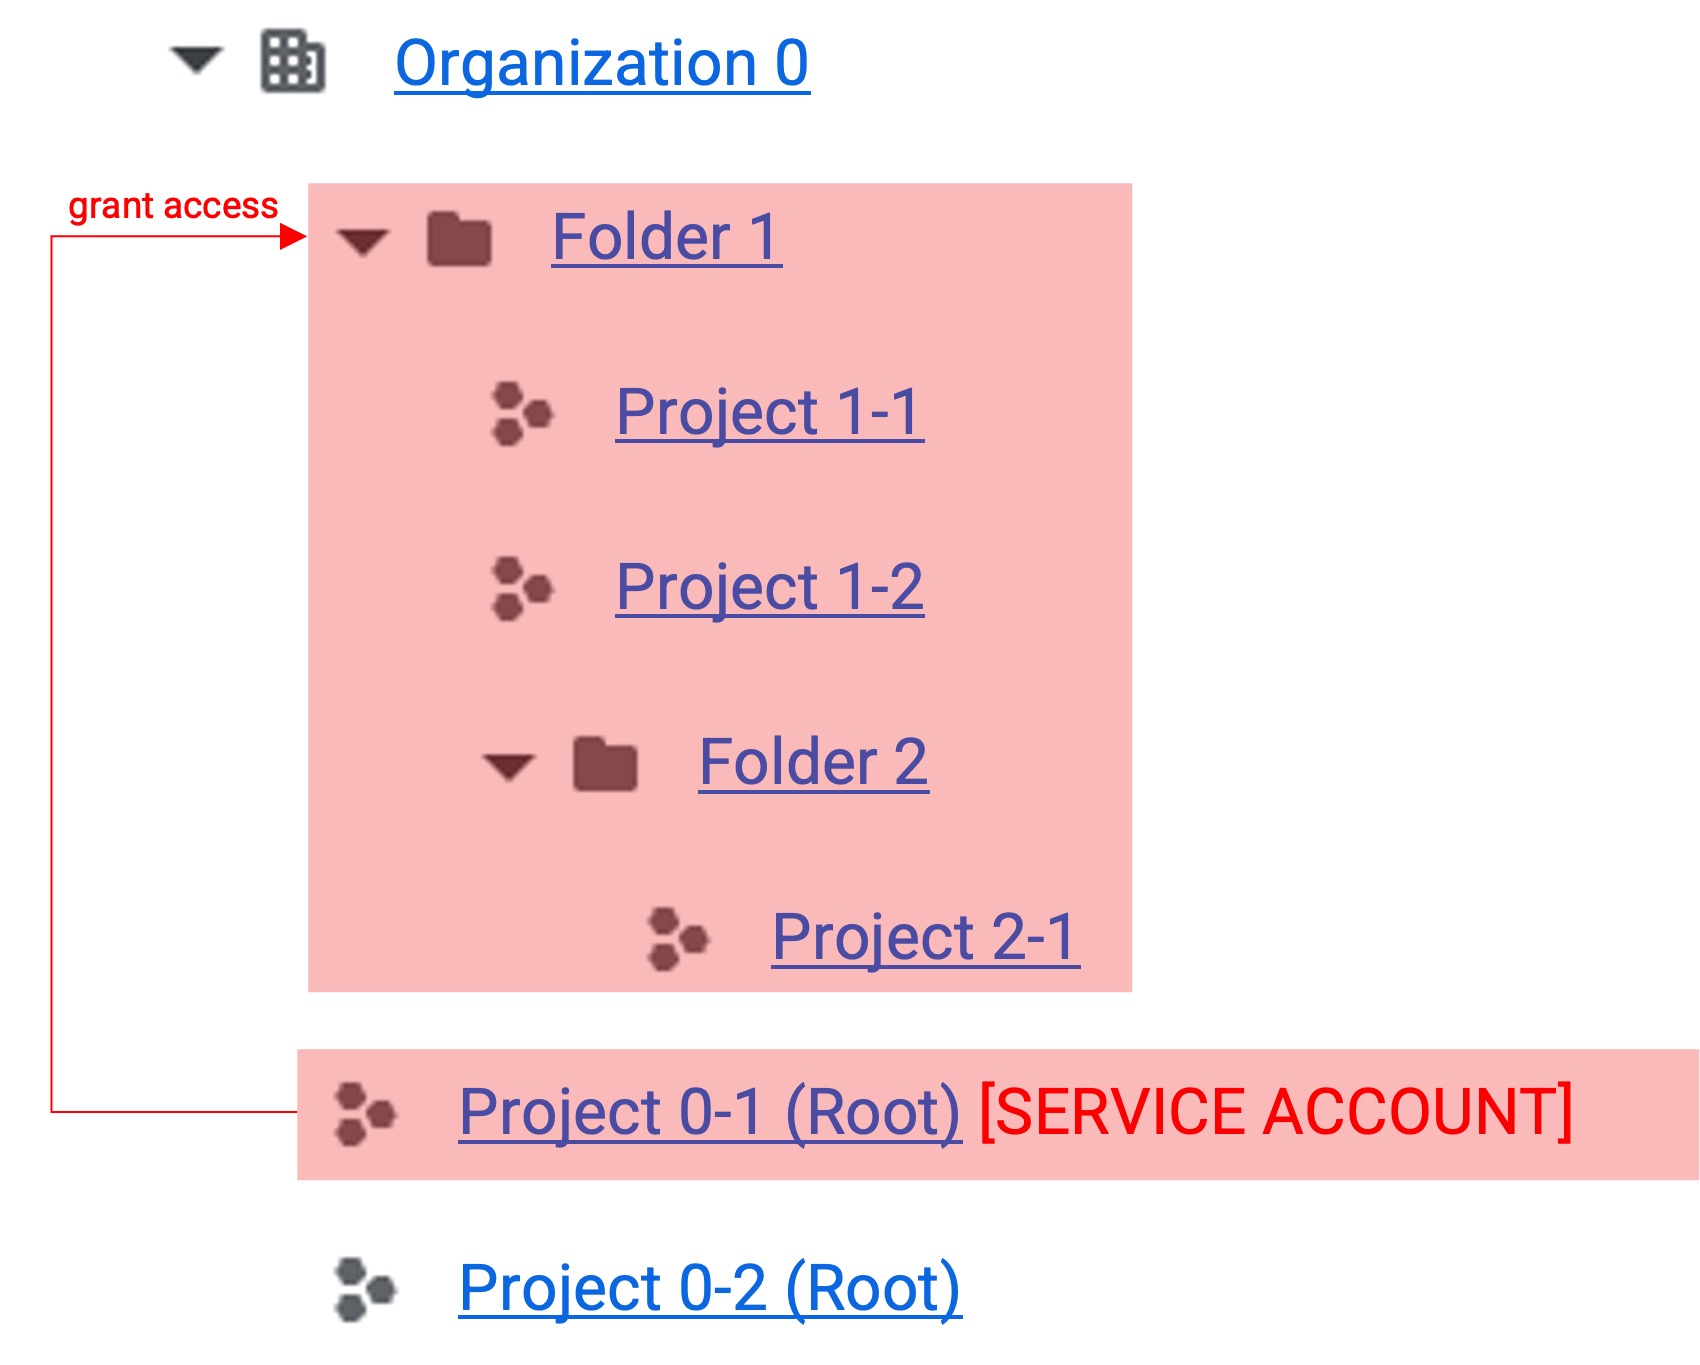 2. Folder Permission Grant Sub-folder Inheritance 2. Folder Permission Grant Sub-folder Inheritance |
|---|
- When permissions are granted to a folder, permissions are inherited by sub-projects and folders.
- This structure is used when integrating all projects in a folder.
Full Permission Grant
 1. Full Permission Grant 1. Full Permission Grant | 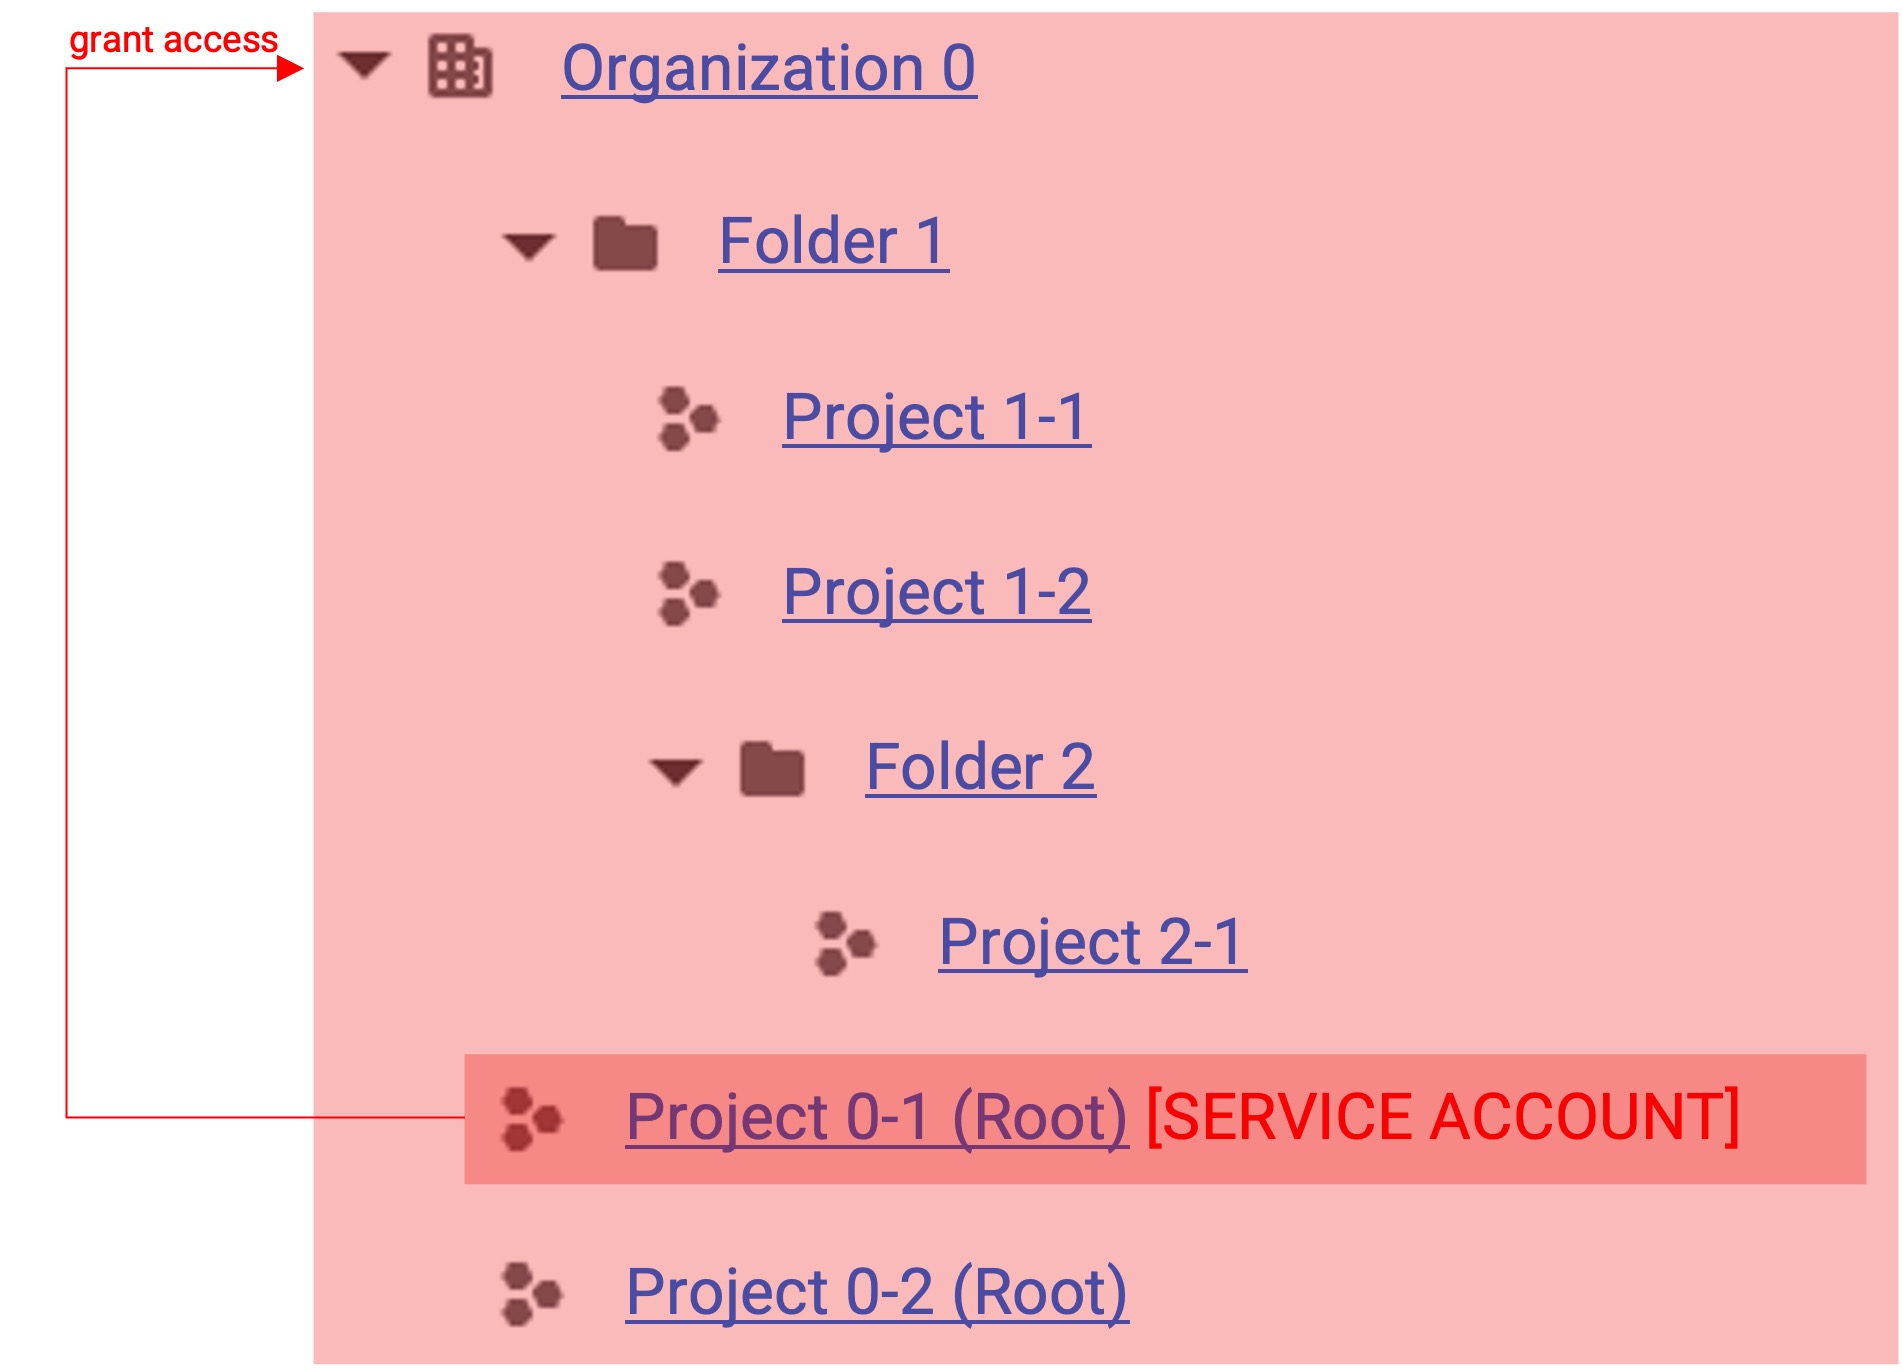 2. Organization Permission Grant 2. Organization Permission Grant |
|---|
- You can grant permissions to all folders and root projects.
- When organization permission grant is performed, you can integrate from all folders and projects.
Service Account Specific Project or Folder Permission Grant
Login and Organization, Folder, Project Selection
Complete the steps from (Common) Organization, Project Selection .
Service Account Organization Role Assignment
 Select the appropriate resource based on your understanding from the Permission Grant Concept
above.
Select the appropriate resource based on your understanding from the Permission Grant Concept
above.
 Select ‘IAM & Admin’ > ‘IAM’ from the navigation menu (☰) in the top left.
- Verify the appropriate resource selection based on your understanding from the Permission Grant Concept .
- Click ‘Grant Access’.
- Enter the target service account’s email in ‘Add Principal’. You can check this in the 1. Service Account Creation step.
- Add all roles (8 roles) added in the 2. Service Account Project Role Assignment step.
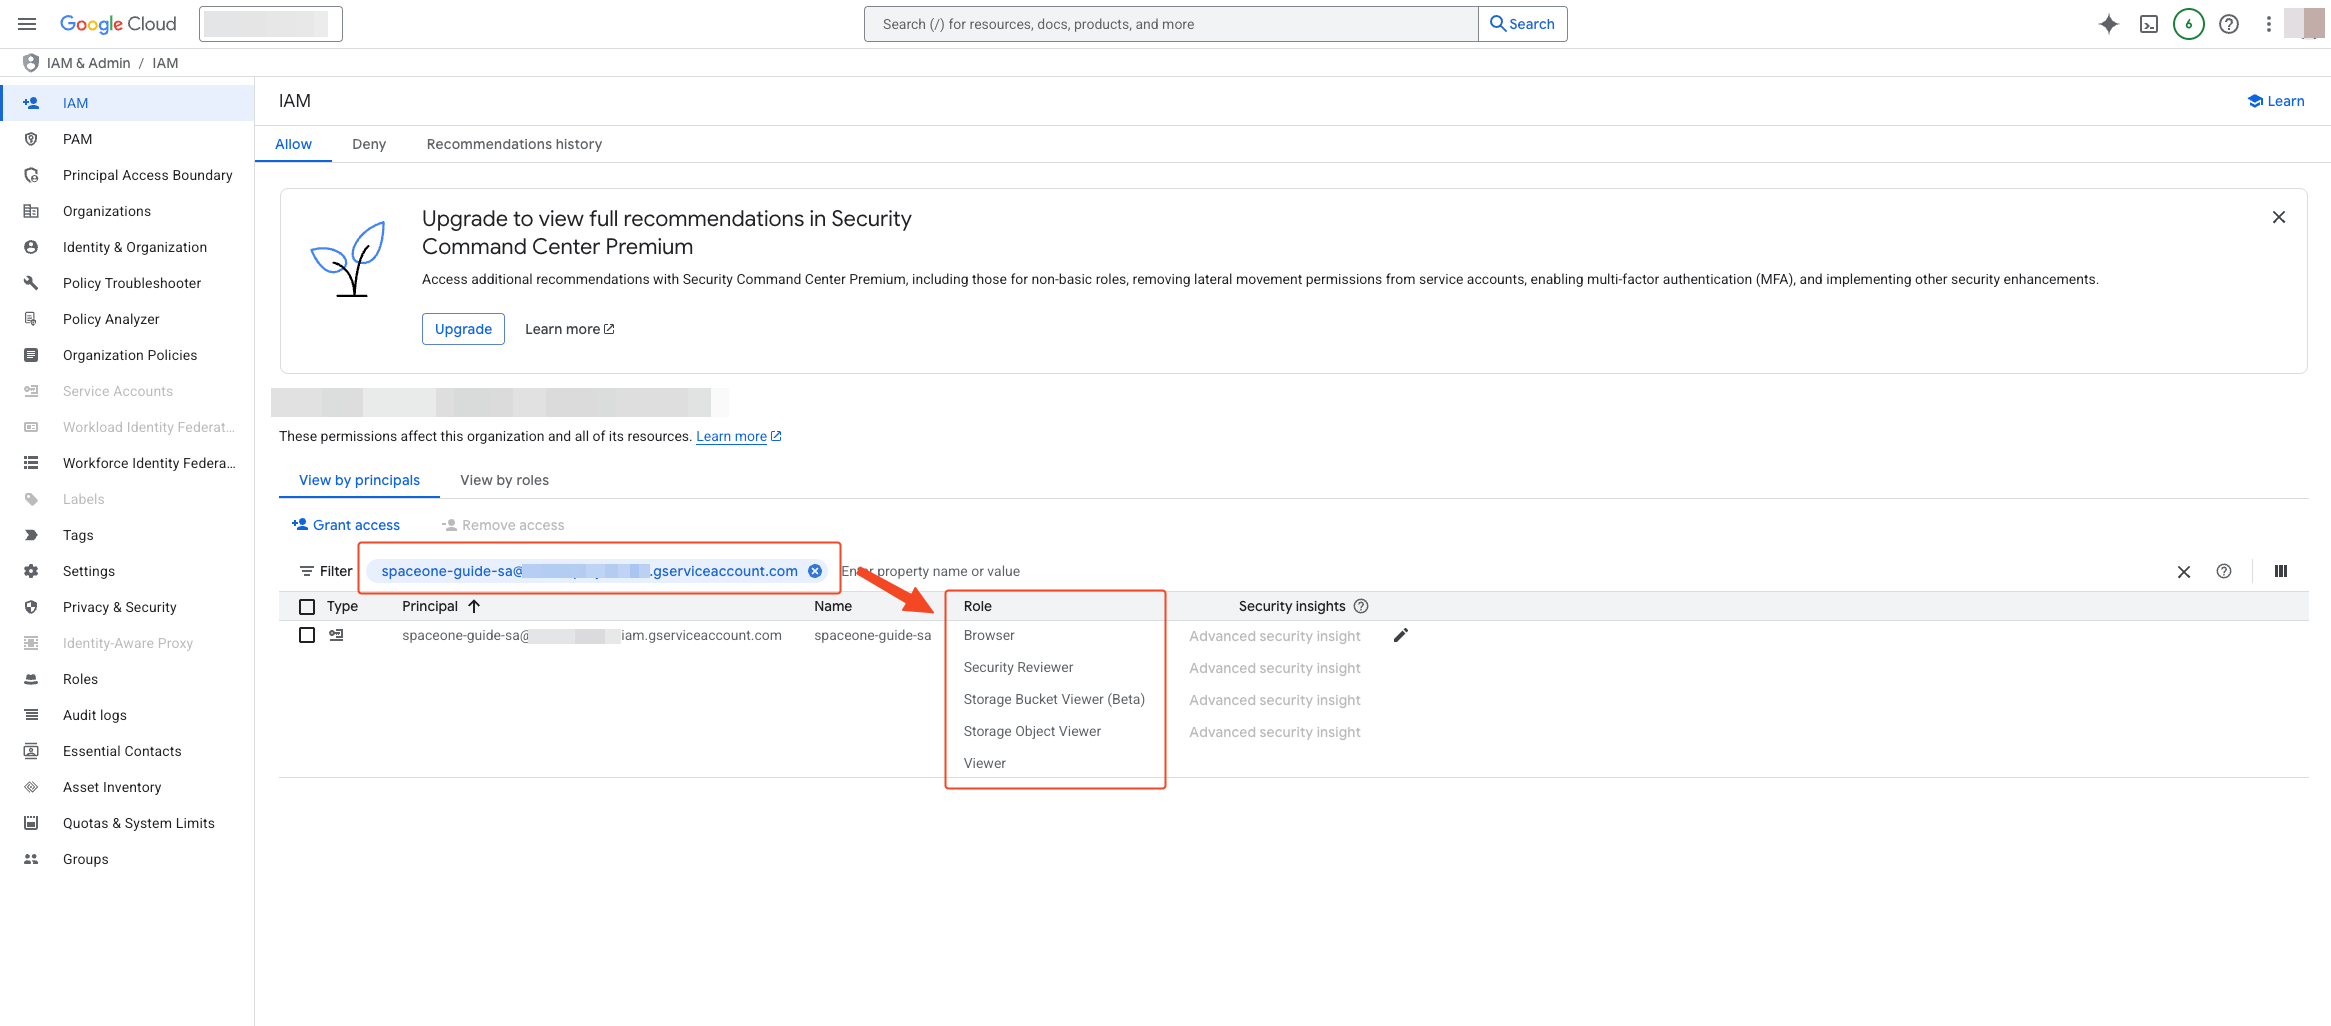 Enter the reflected email in the filter to verify that the added roles exist in the Role column.
4. [Optional] Service Account Organization Role Assignment and API Activation
Login and Organization, Project Selection
In this step, you must select the organization. The logged-in user must have the Organization Administrator role.
Check Permission Status
Select ‘IAM & Admin’ > ‘IAM’ from the navigation menu (☰) in the top left.
Select the organization resource at the top of the page. It’s important to accurately select the organization resource for which you want to check your permissions.
Find your email address in the ‘Principal members’ list. If the list is long, you can easily find it by entering your email in the ‘Filter’ field at the top. (If your email is not there, you may have been granted permissions through Google Groups. Filter by the group name.)
Check for the ‘Organization Administrator’ role in the ‘Role’ column next to your account.
Complete the steps from (Common) Organization, Project Selection .
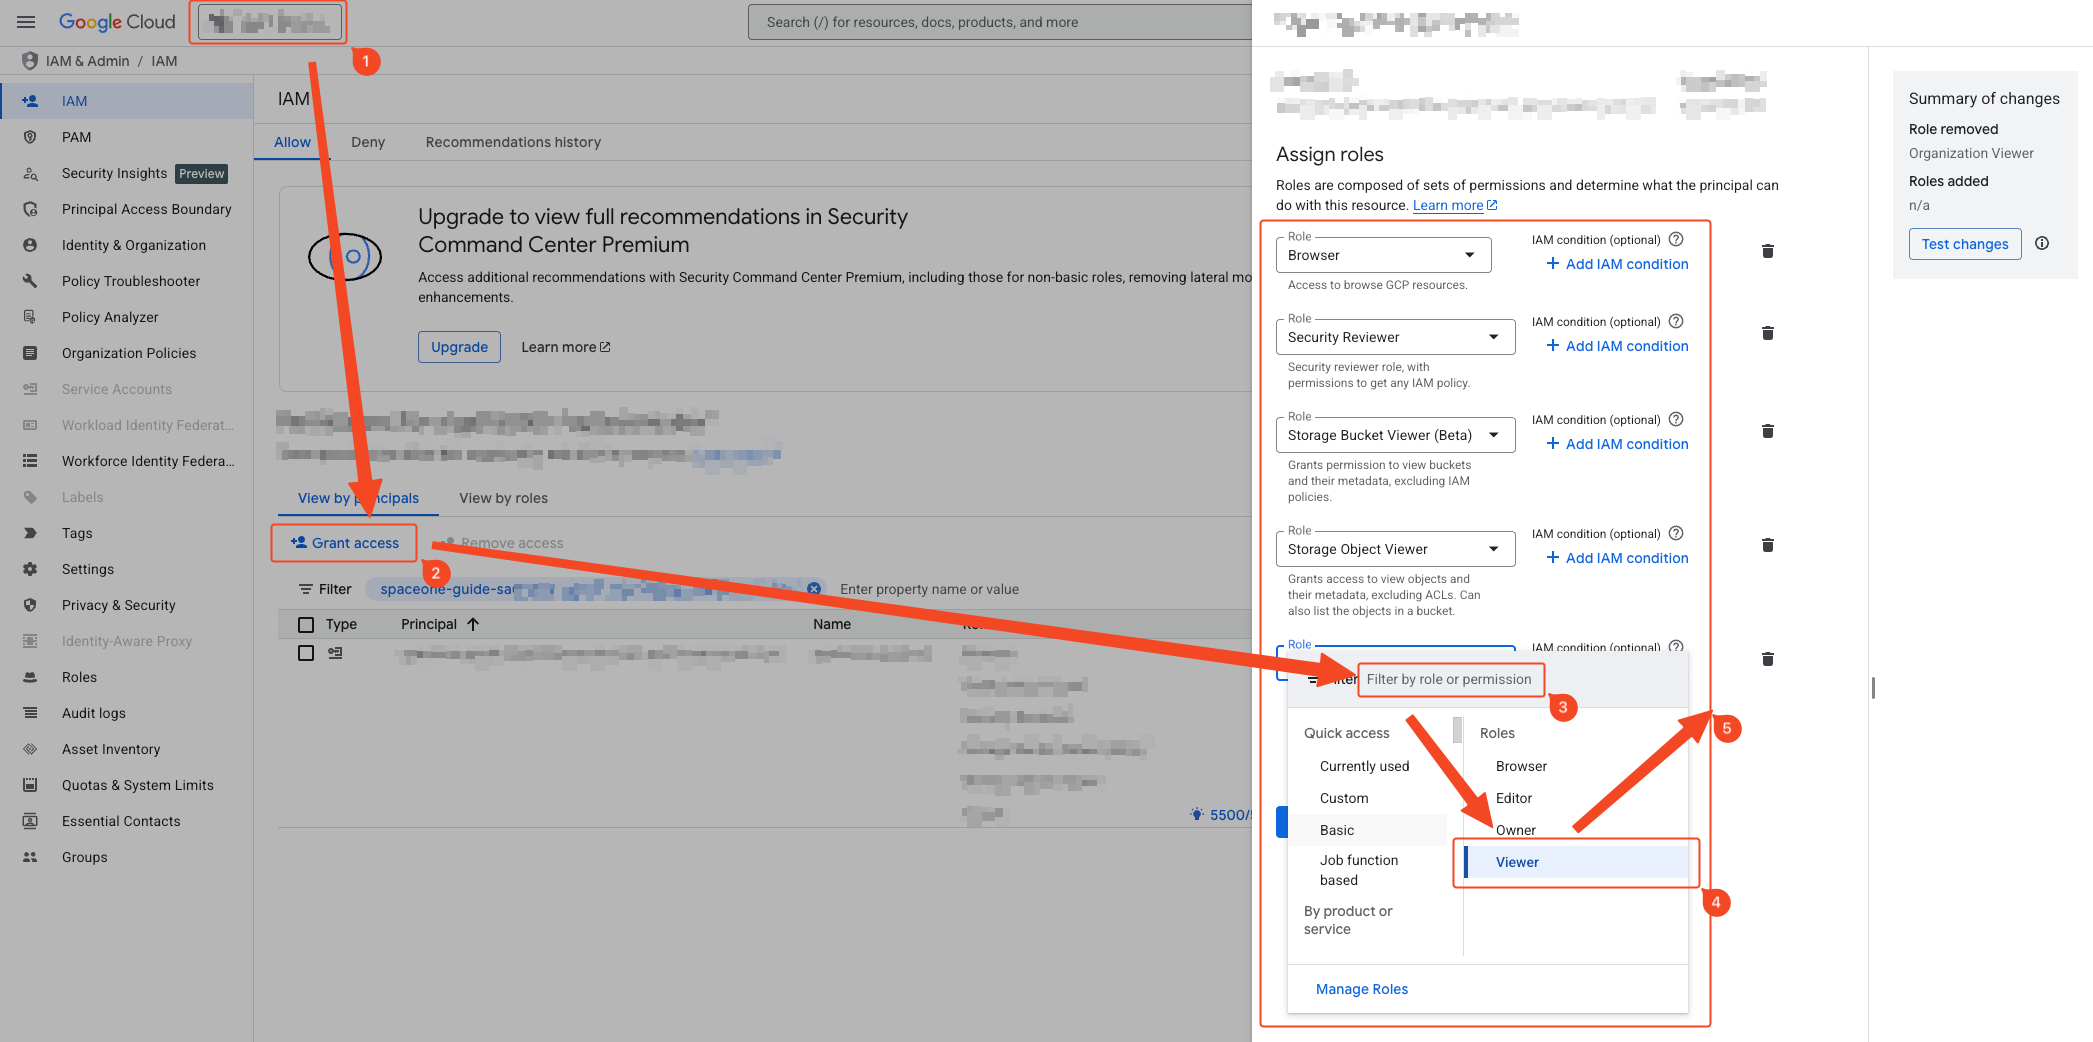
Service Account Organization Role Assignment
Verify that the organization is selected.
Select ‘IAM & Admin’ > ‘IAM’ from the navigation menu (☰) in the top left.
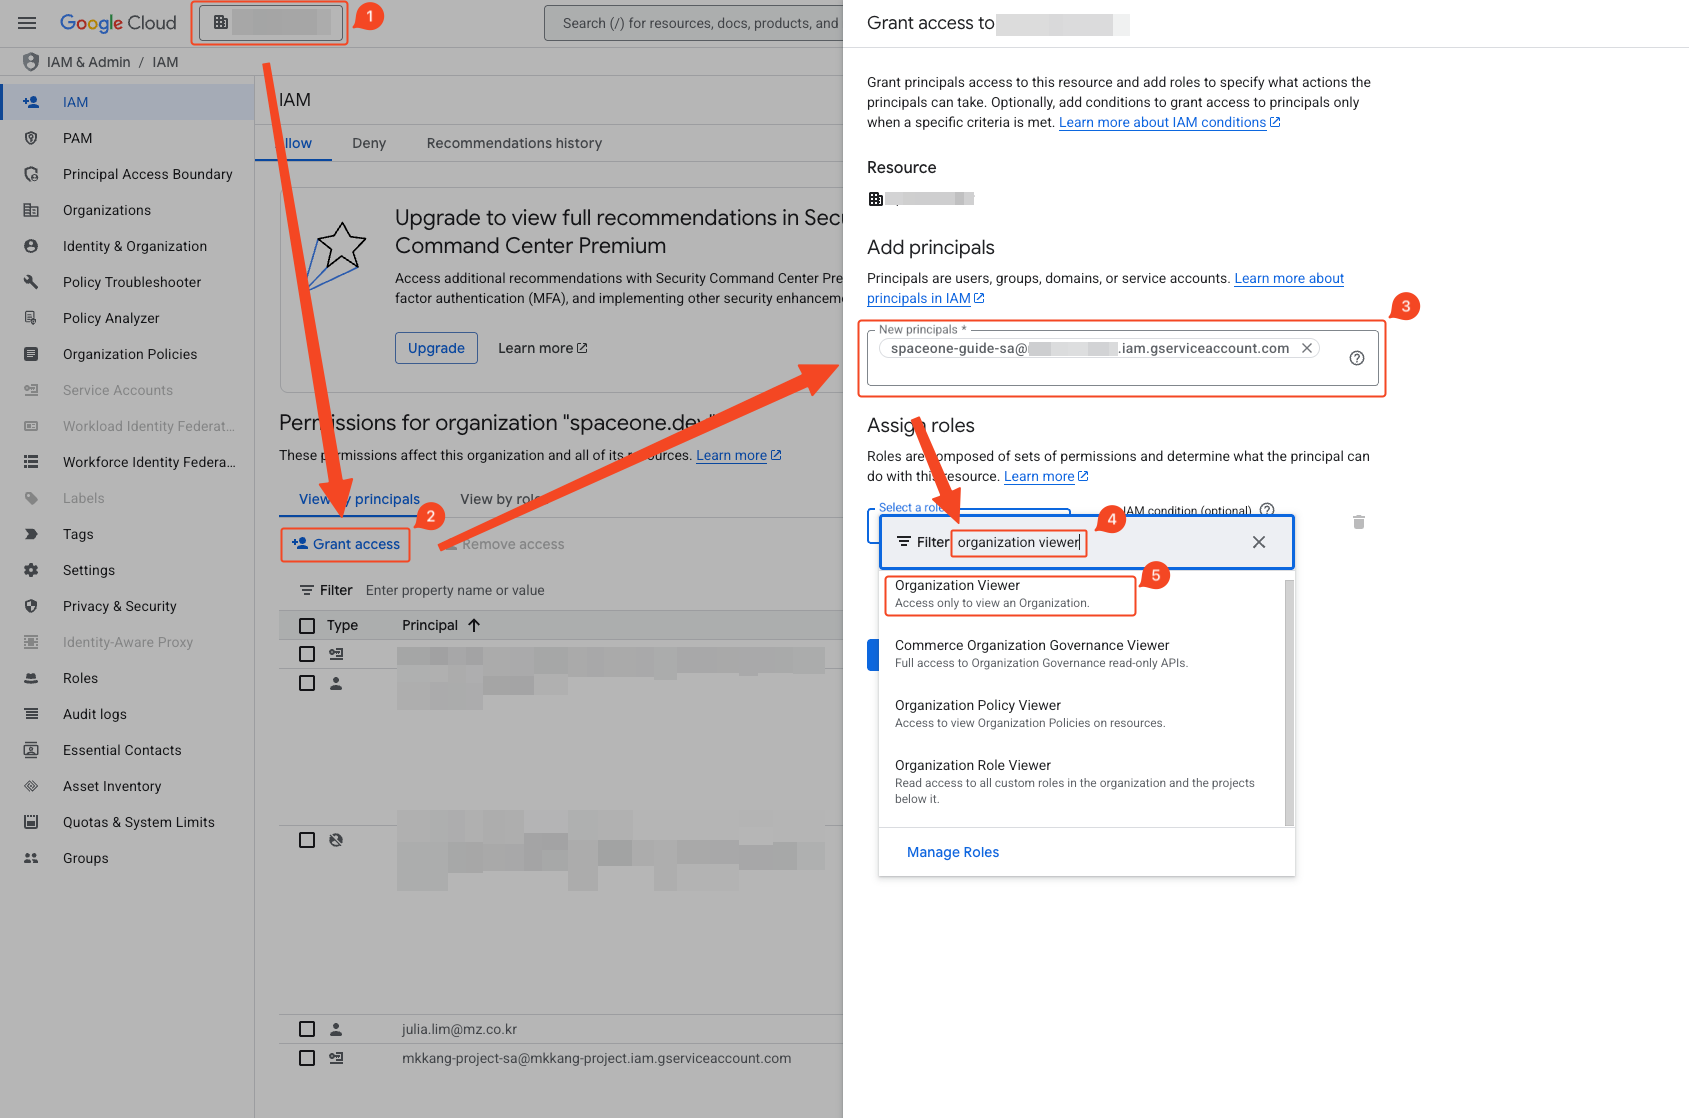
- Verify organization selection.
- Click ‘Grant Access’.
- Enter the target service account’s email in ‘Add Principal’. You can check this in the 1. Service Account Creation step.
- Enter ‘Organization Viewer’ in the filter to add the role.
 Verify that the Organization Viewer role is assigned in the Role column by entering the reflected email in the filter.
API Activation
Select ‘APIs & Services’ > ‘Library’ from the navigation menu (☰) in the top left.
- Search for Cloud Resource Manager API.
- Click Cloud Resource Manager API.
- Verify the selected project.
- Click Enable to activate the API.
Select ‘APIs & Services’ > ‘Enabled APIs & Services’ from the navigation menu (☰) in the top left.
Verify that the API added above is activated.
5. Service Account Authentication Key Issuance
Login and Organization, Project Selection
Complete the steps from (Common) Organization, Project Selection .
Service Account Authentication Key Issuance

- Verify project selection.
- Select ‘IAM & Admin’ > ‘Service Accounts’.
- Navigate to the ‘Keys’ tab.
- Click ‘Add Key’ > ‘Create New Key’.
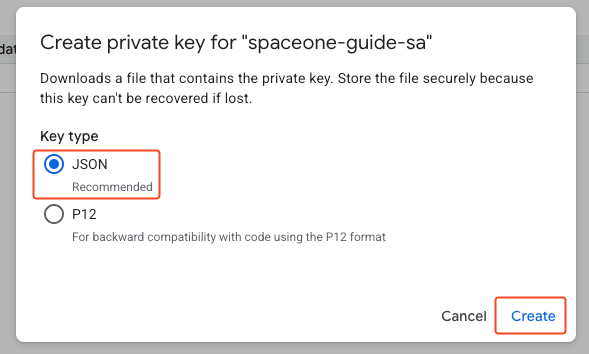 Select JSON type and create to download the JSON key. This key is used for integration with SpaceONE.