Script Automation Integration
Download Script Files
Download the following file to an appropriate location and extract it.
You will see files like the following:
gcloud-service-account-script
├── init-service-account.sh
└── README.md
Access GCP Console and Login
Log in to the GCP Console with top-level permissions and enter the console.
The console button is located in the upper right corner.
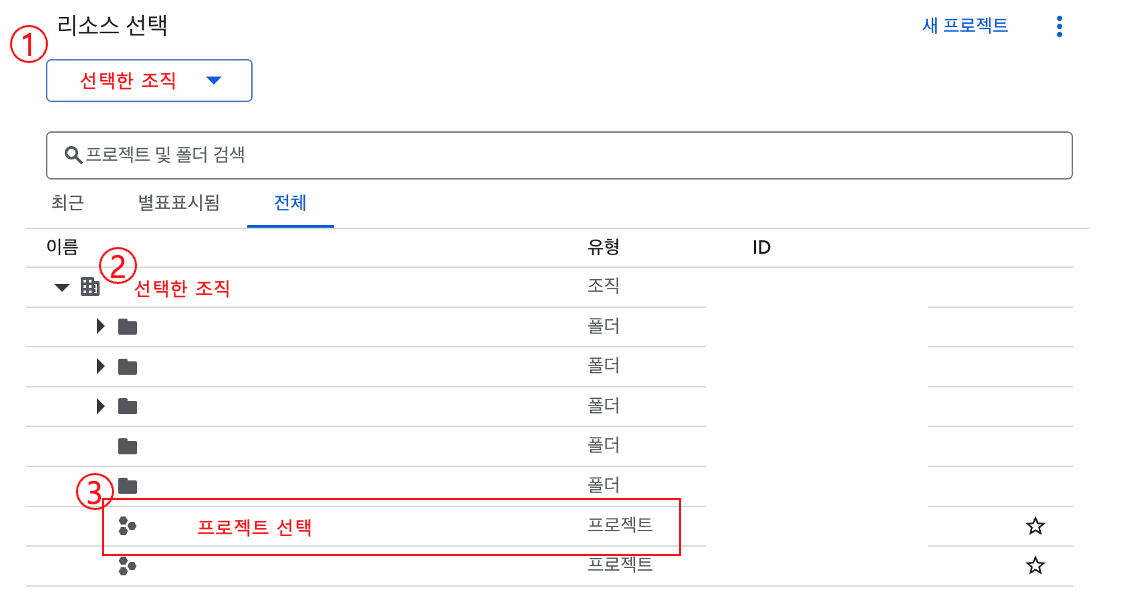
Select Organization and Project
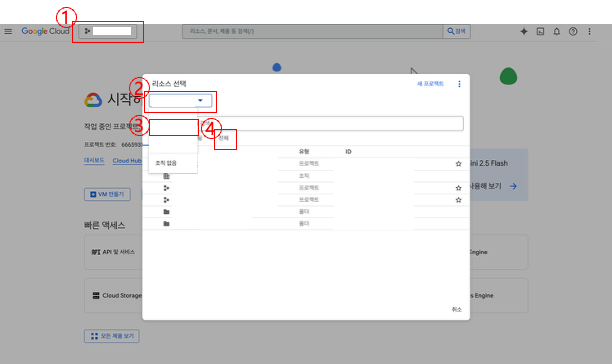
- Click the project or organization dropdown in the upper left.
- Select the organization.
- Go to the All tab.
- Select the project where you want to create the service account and assign roles.
Run Cloud Console Editor
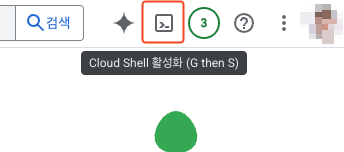
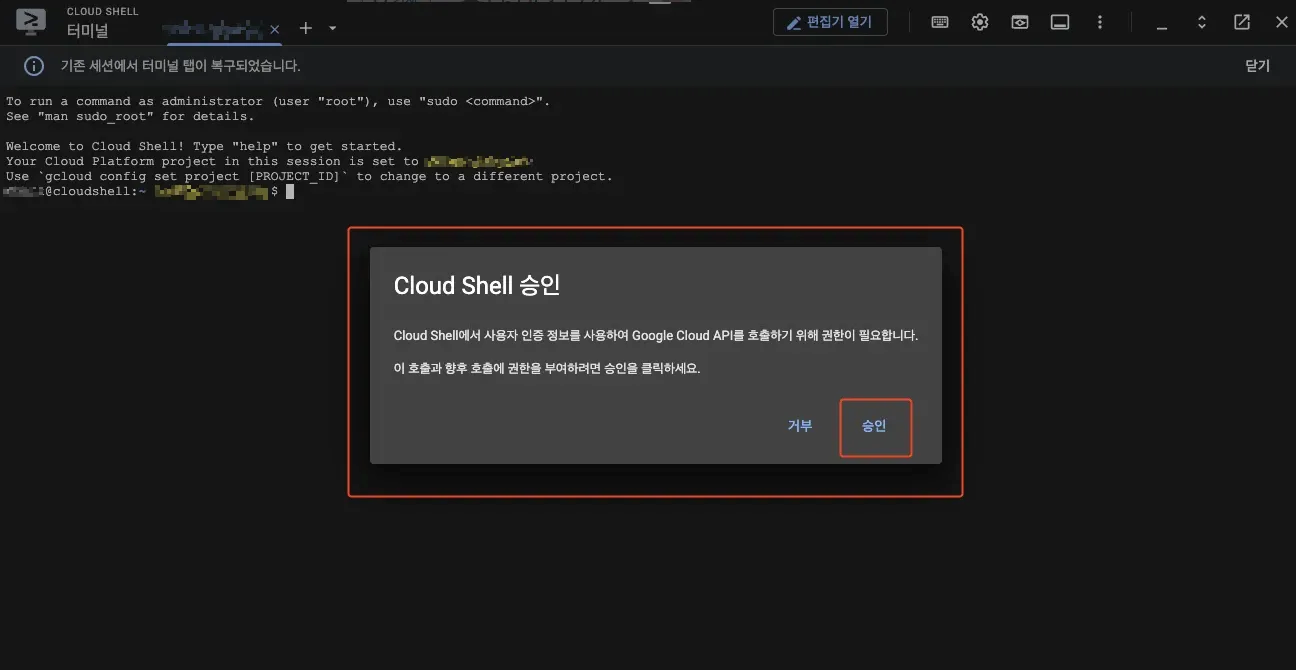
Click the Activate Cloud Shell button in the upper right of the console to activate the terminal.
When the popup window activates, proceed with approval.

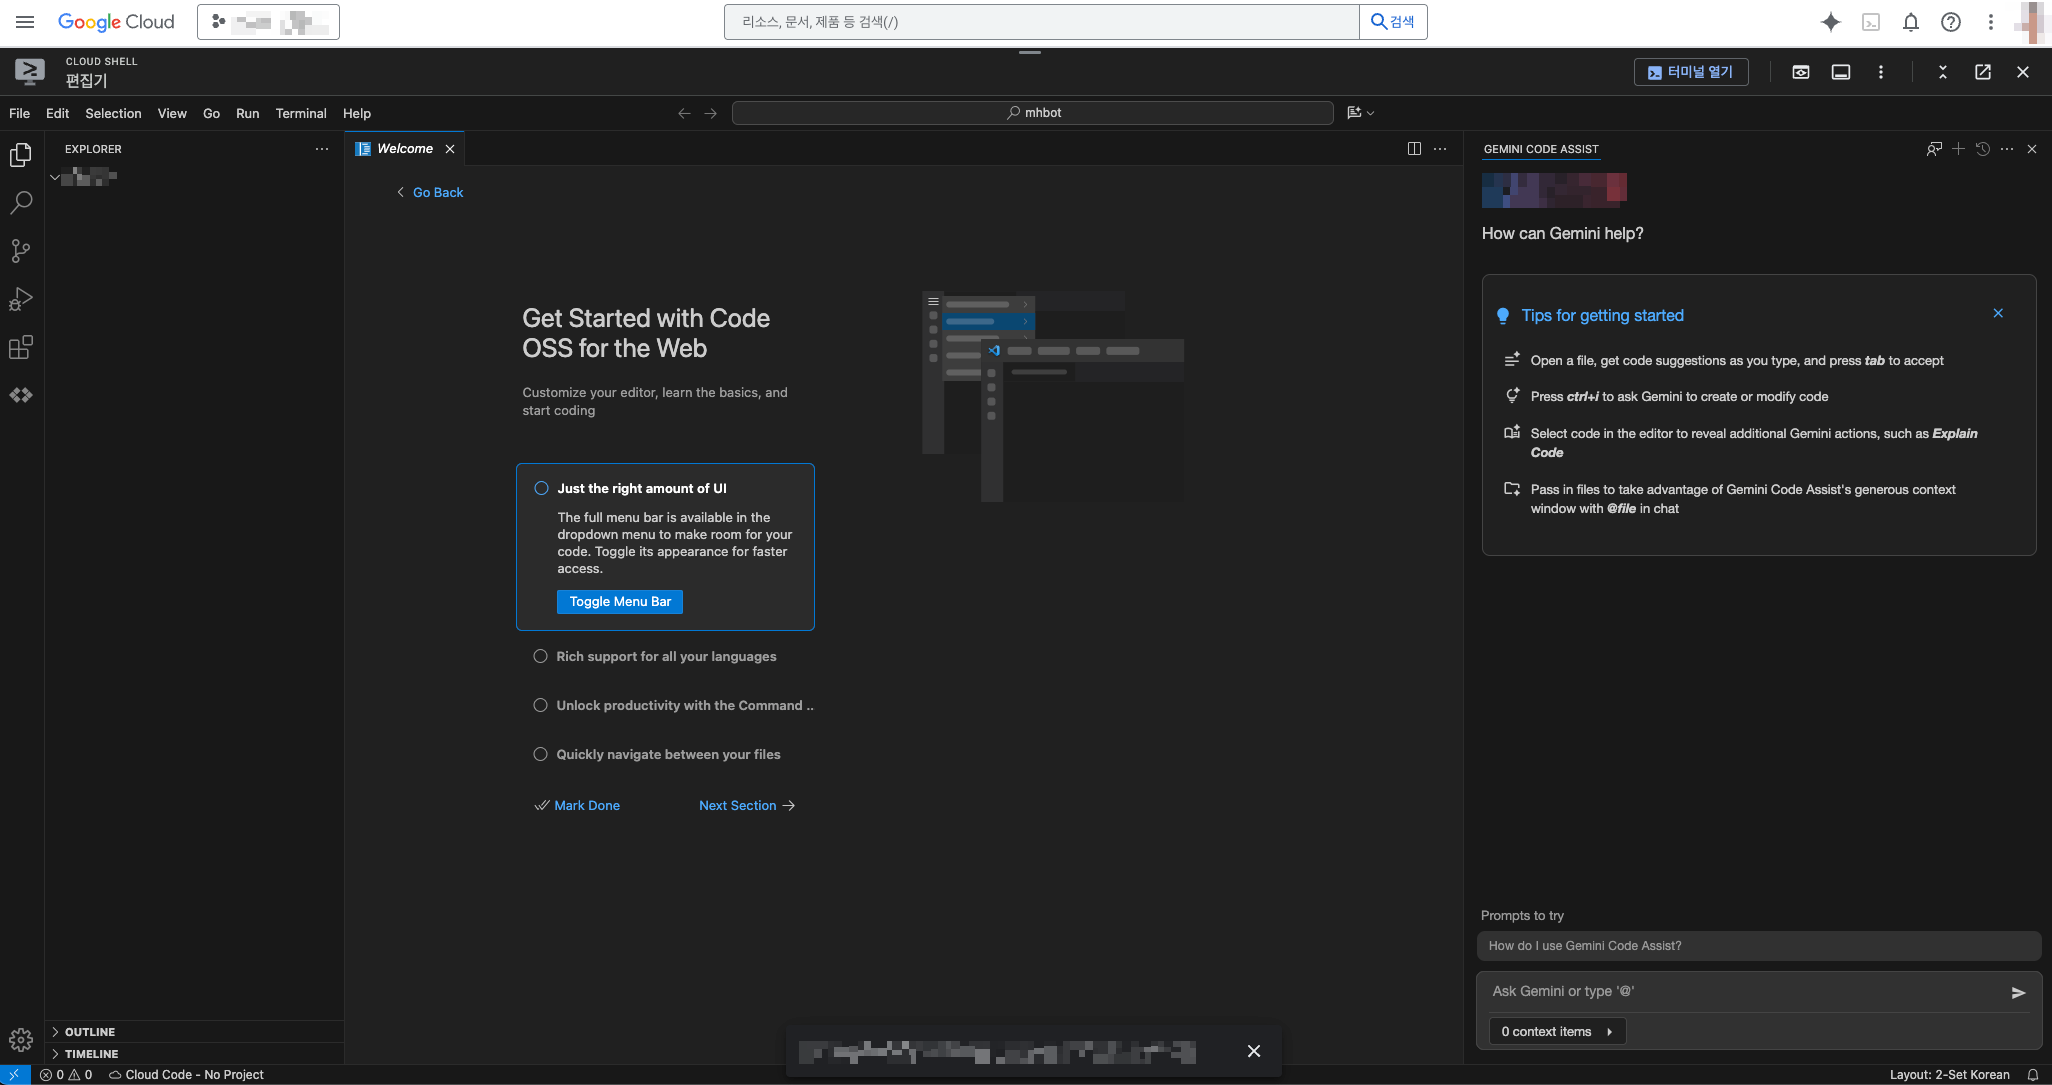
Click the Open Editor button in the upper right of the console to run the cloud console editor.
Confirm that the editor has switched normally.
Upload Script Files
Left menu bar first file icon > Open folder > Navigate to path /home/{username} (auto-filled)

Drag and drop the downloaded and extracted folder (red box) to upload
Run Terminal
Type > terminal in the top search bar and select Create New Terminal (With Profile), then select the bash profile.


Prepare Script Execution
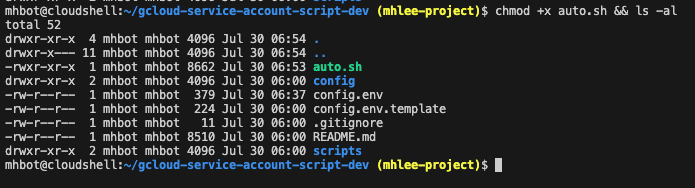
Navigate to the uploaded folder and grant execution permissions to the script files. Enter the following commands one by one and press Enter to execute.
cd gcloud-service-account-script/ && ls -alchmod +x init-service-account.sh && ls -al
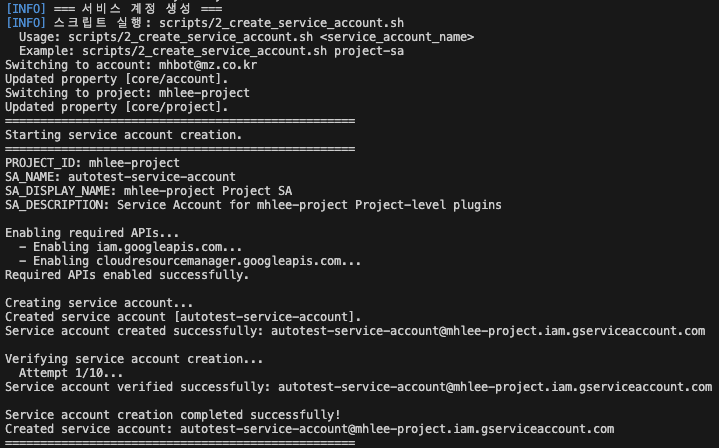
Execute Integrated Script
Run the integrated script with the ./init-service-account.sh command.
./init-service-account.shScript Start
- When running the script, you can see the connected user and the number of accessible projects.
- If the information is correct, enter Y to proceed to the next step.
- If necessary, you can change the connected user with the following commands:
gcloud auth list
gcloud config set account <USER_EMAIL>
Select Target Project
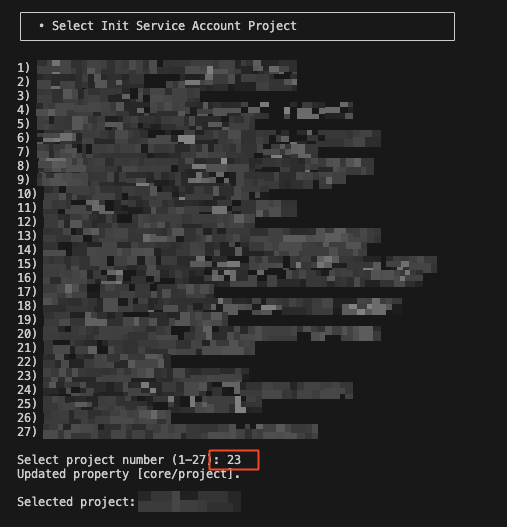
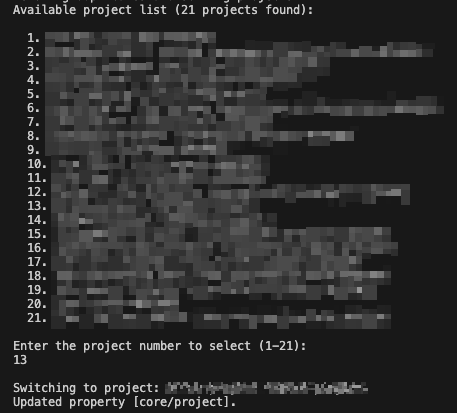
- Select the project where you want to create the service account or assign roles to the existing service account.
Select or Create Target Service Account

- Select a service account or enter 0 to create a new account.
- When creating a service account, the following rules must be followed:
- Length: 6-30 characters
- Characters: lowercase letters, numbers, hyphens only
- Cannot start or end with hyphens
- Cannot use uppercase letters, underscores, or special characters
- Must be unique within the project
Role Assignment
This script supports the following 3 types of role assignments:
- Single project assignment
- Project and folder assignment
- Organization assignment (Trusted)
Single Project Assignment
- Answer
Nto the Trusted Role assignment question. - Answer
Nto the other project Role assignment question. - The script automatically assigns the following roles to the project where the service account is created:
roles/browser
roles/iam.securityReviewer
roles/storage.bucketViewer
roles/storage.objectViewer
roles/viewer
Project and Folder Assignment
- Answer
Nto the Trusted Role assignment question. - Answer
Yto the other project Role assignment question. - The script takes some time to collect folders and projects within the organization.
- Enter the projects and folders to assign roles to from the list, separated by commas (,).
- The script automatically assigns the following roles to the project or folder:
roles/browser
roles/iam.securityReviewer
roles/storage.bucketViewer
roles/storage.objectViewer
roles/viewer
Organization Assignment (Trusted)
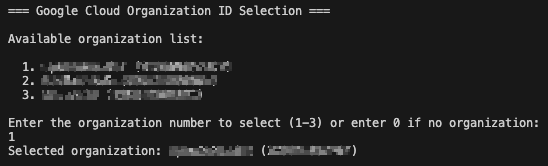
- Answer
Yto the Trusted Role assignment question. - The script automatically assigns the following roles to the project where the service account is created and the organization:
roles/resourcemanager.organizationViewer (organization level role)
roles/browser
roles/iam.securityReviewer
roles/storage.bucketViewer
roles/storage.objectViewer
roles/viewer
API Activation
- The script attempts to activate APIs by collecting all projects and role assignments that were previously created and assigned, and all projects under the folder where roles were assigned.
- API activation takes considerable time.
- The script activates the following APIs:
compute.googleapis.com
cloudresourcemanager.googleapis.com
logging.googleapis.com
pubsub.googleapis.com
cloudfunctions.googleapis.com
sqladmin.googleapis.com
cloudidentity.googleapis.com
storage.googleapis.com
cloudbuild.googleapis.com
iam.googleapis.com
secretmanager.googleapis.com
serviceusage.googleapis.com
eventarc.googleapis.com
bigquery.googleapis.com
Completion
If you have completed all the steps so far, the newly created service account will inherit Google Cloud service accounts and roles (Role) to all projects within the organization.
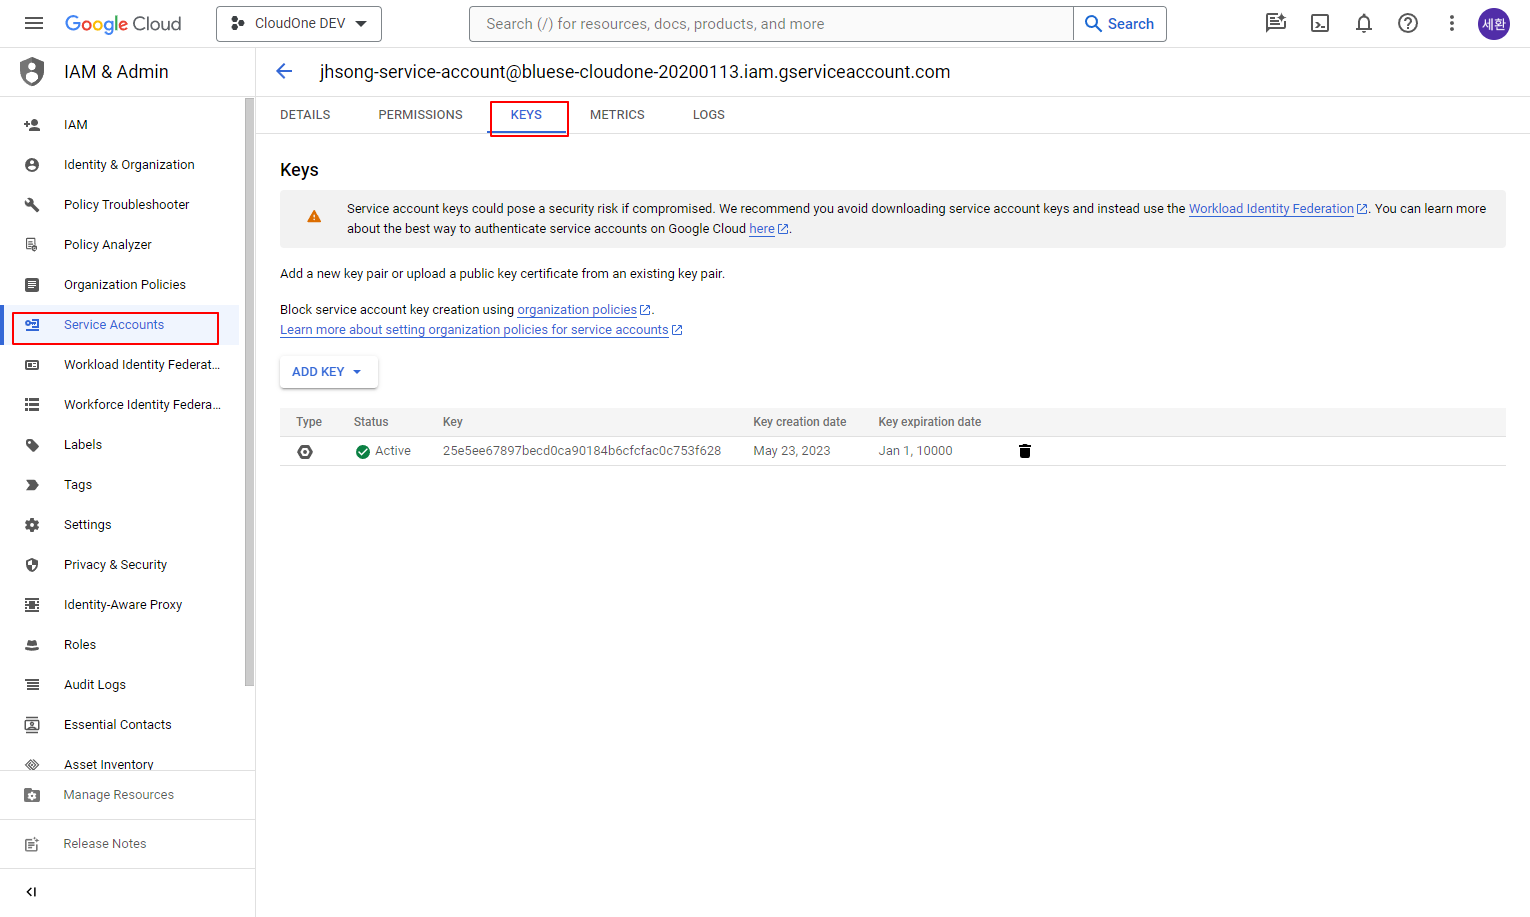
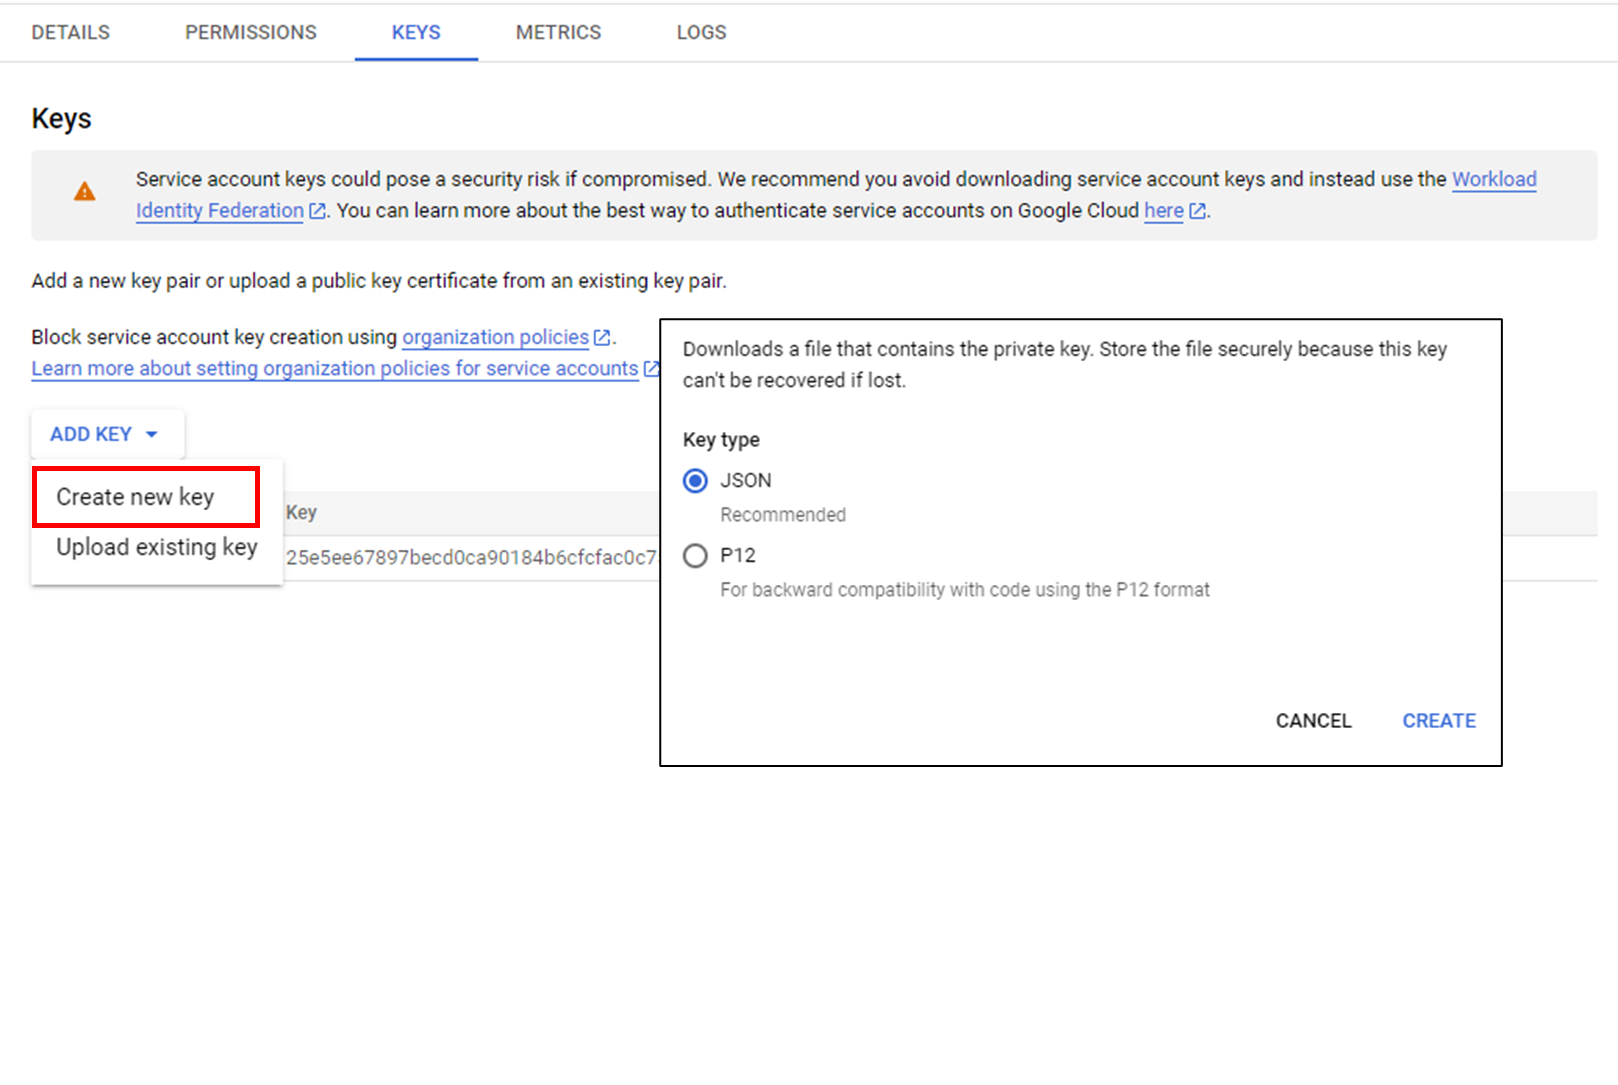
Download the authentication key of the created service account in JSON format from [(Created Project) > Service Account > KEYS].
This is used when registering a Trusted Account in SpaceONE.