Permission Settings for Resource Collection
The SpaceONE resource collector requires minimum permission settings to collect data from your Google Cloud service account. SpaceONE supports the google_oauth2_credentials method based on OAuth2.0 for Google Cloud integration, which requires the following information:
- Client Email
- Client ID
- Private Key
- Private Key ID
- Project ID
- client_x509_cert_url
To obtain this information, you need to configure your account in the following order:
Create a Google Cloud Service Account
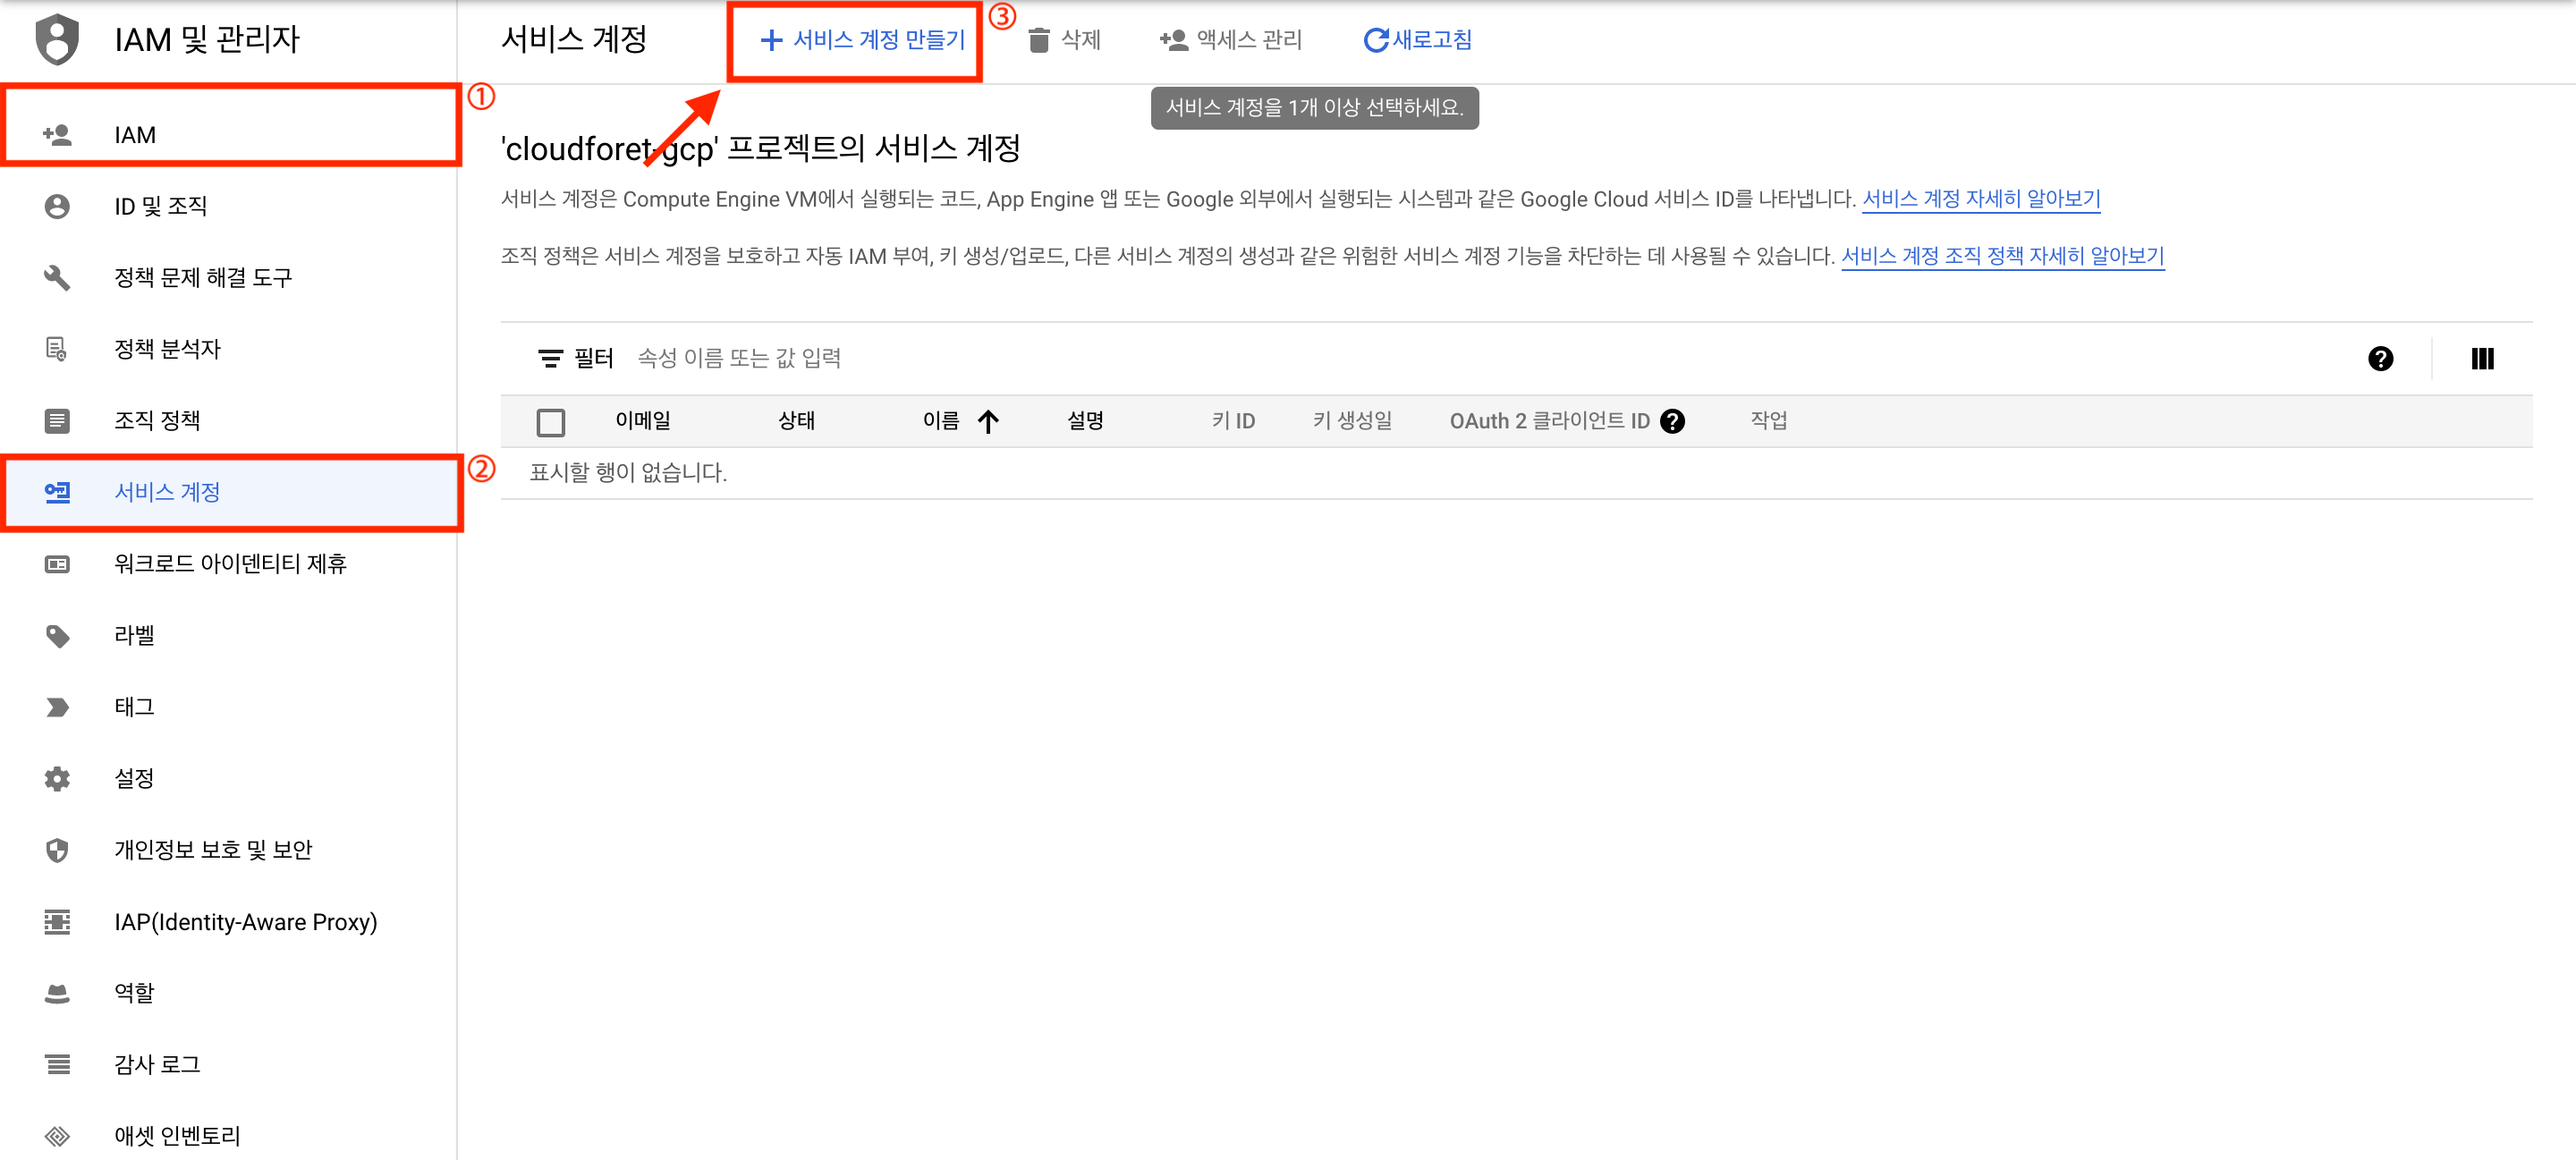
After logging into Google Cloud, go to IAM Console and click on your project.
In the [IAM & Admin > Service Accounts] menu, click [Create Service Account].
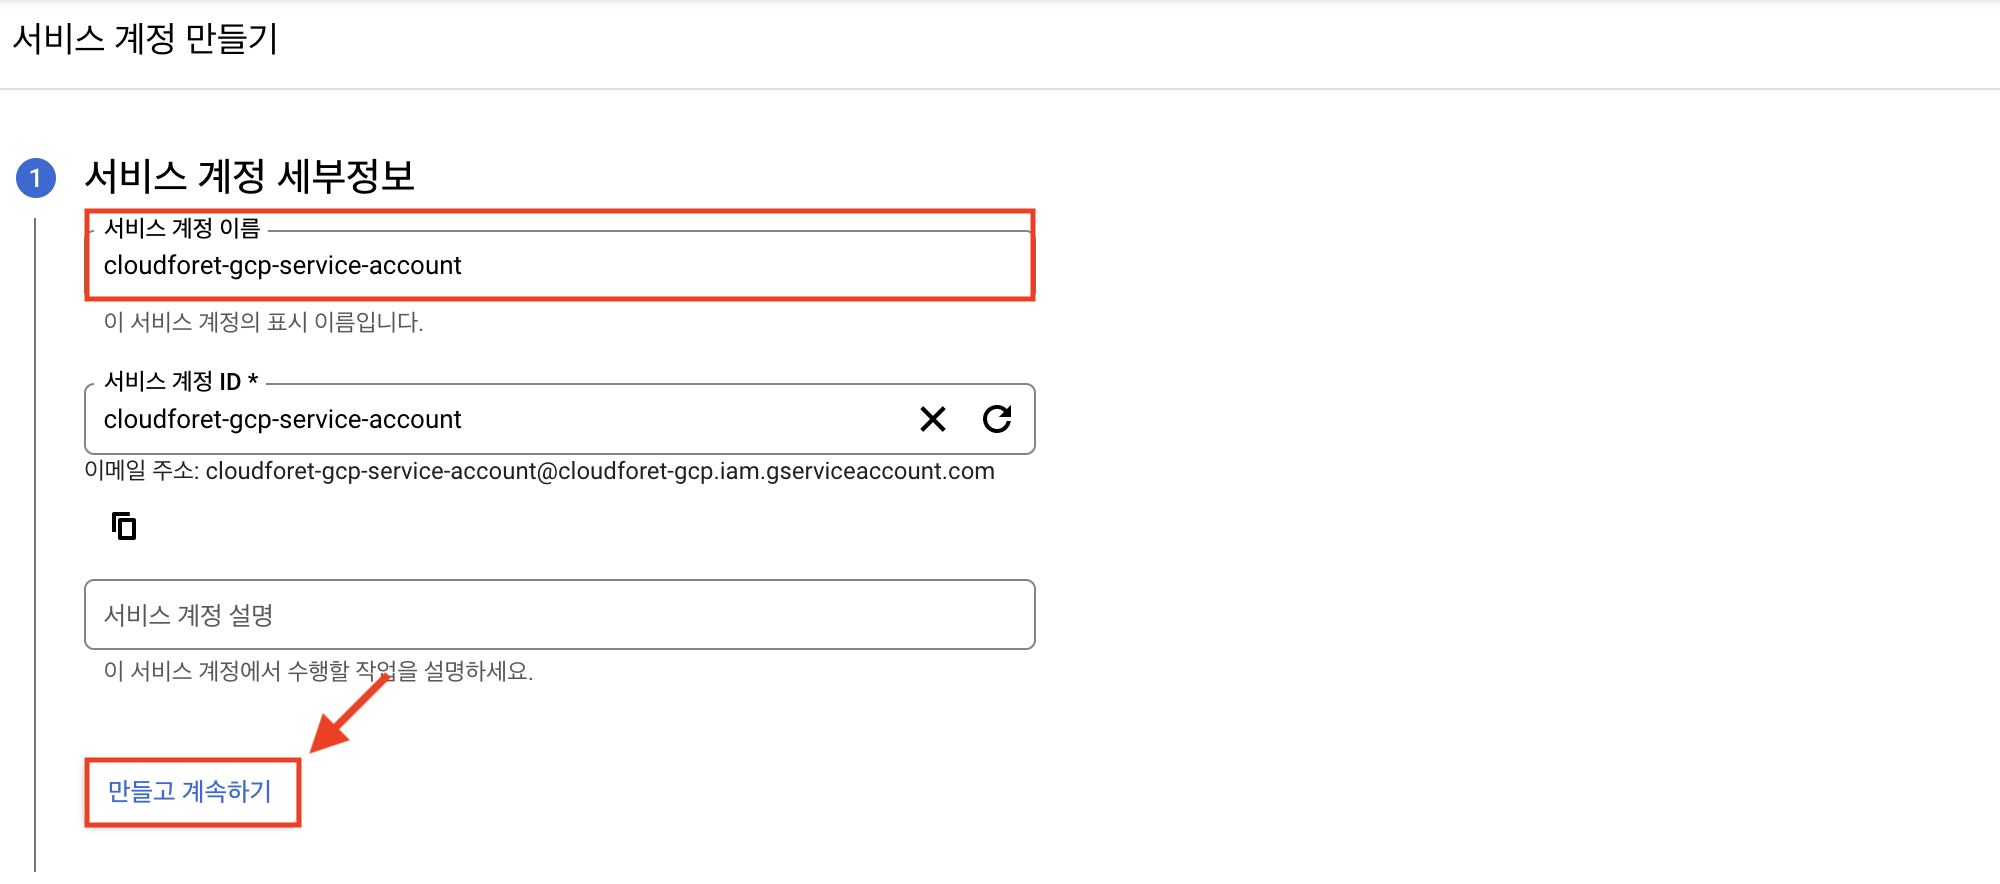
Enter the service account details and click [Create and Continue].
Create and Add Roles to Service Account
A Role contains permissions to perform specific actions on Google Cloud resources. When you assign a role to a service account, it receives the permissions included in that role.
You need to set appropriate permissions for the service account so that the Google Cloud plugin can collect resource information. The collector plugin requires only read permissions and no other permissions.
Below is a list of Google Cloud services that the collector plugin can collect and the permissions required. The Google collector plugin collects from 8 services in total, and you need to create roles with the necessary permissions accordingly.
Managed Role
The Required Role in the table below indicates the permissions needed for each service, and each role corresponds to the Managed Role provided by Google Cloud.
Note that Storage Viewer (Custom) is not supported as a Managed Role.
| Service | Required Role | URL |
|---|---|---|
| Compute Engine | Compute Viewer | GitHub Link |
| Networking | Compute Viewer | GitHub Link |
| Cloud SQL | Cloud SQL Viewer | GitHub Link |
| Storage | 1) Storage Viewer(Custom) 2) Environment and Storage Object Viewer 3) Monitoring Viewer | GitHub Link |
| BigQuery | BigQuery Resource Viewer | GitHub Link |
| Cloud Pub/Sub | Pub/Sub Viewer | GitHub Link |
| Cloud Functions | Cloud Functions Viewer | GitHub Link |
| Recommender | 1) Cloud Asset Viewer 2) Recommender Viewer | GitHub Link |
Custom Role (Storage)
Since Storage Viewer is not supported as a Managed Role, you need to create a Custom Role. Below is the list of permissions required for Storage Viewer (Custom):
| Service | Name |
|---|---|
| Cloud Storage | storage.buckets.get |
| Cloud Storage | storage.buckets.getIamPolicy |
| Cloud Storage | storage.buckets.list |
| Cloud Storage | storage.objects.get |
| Cloud Storage | storage.objects.getIamPolicy |
| Cloud Storage | storage.objects.list |
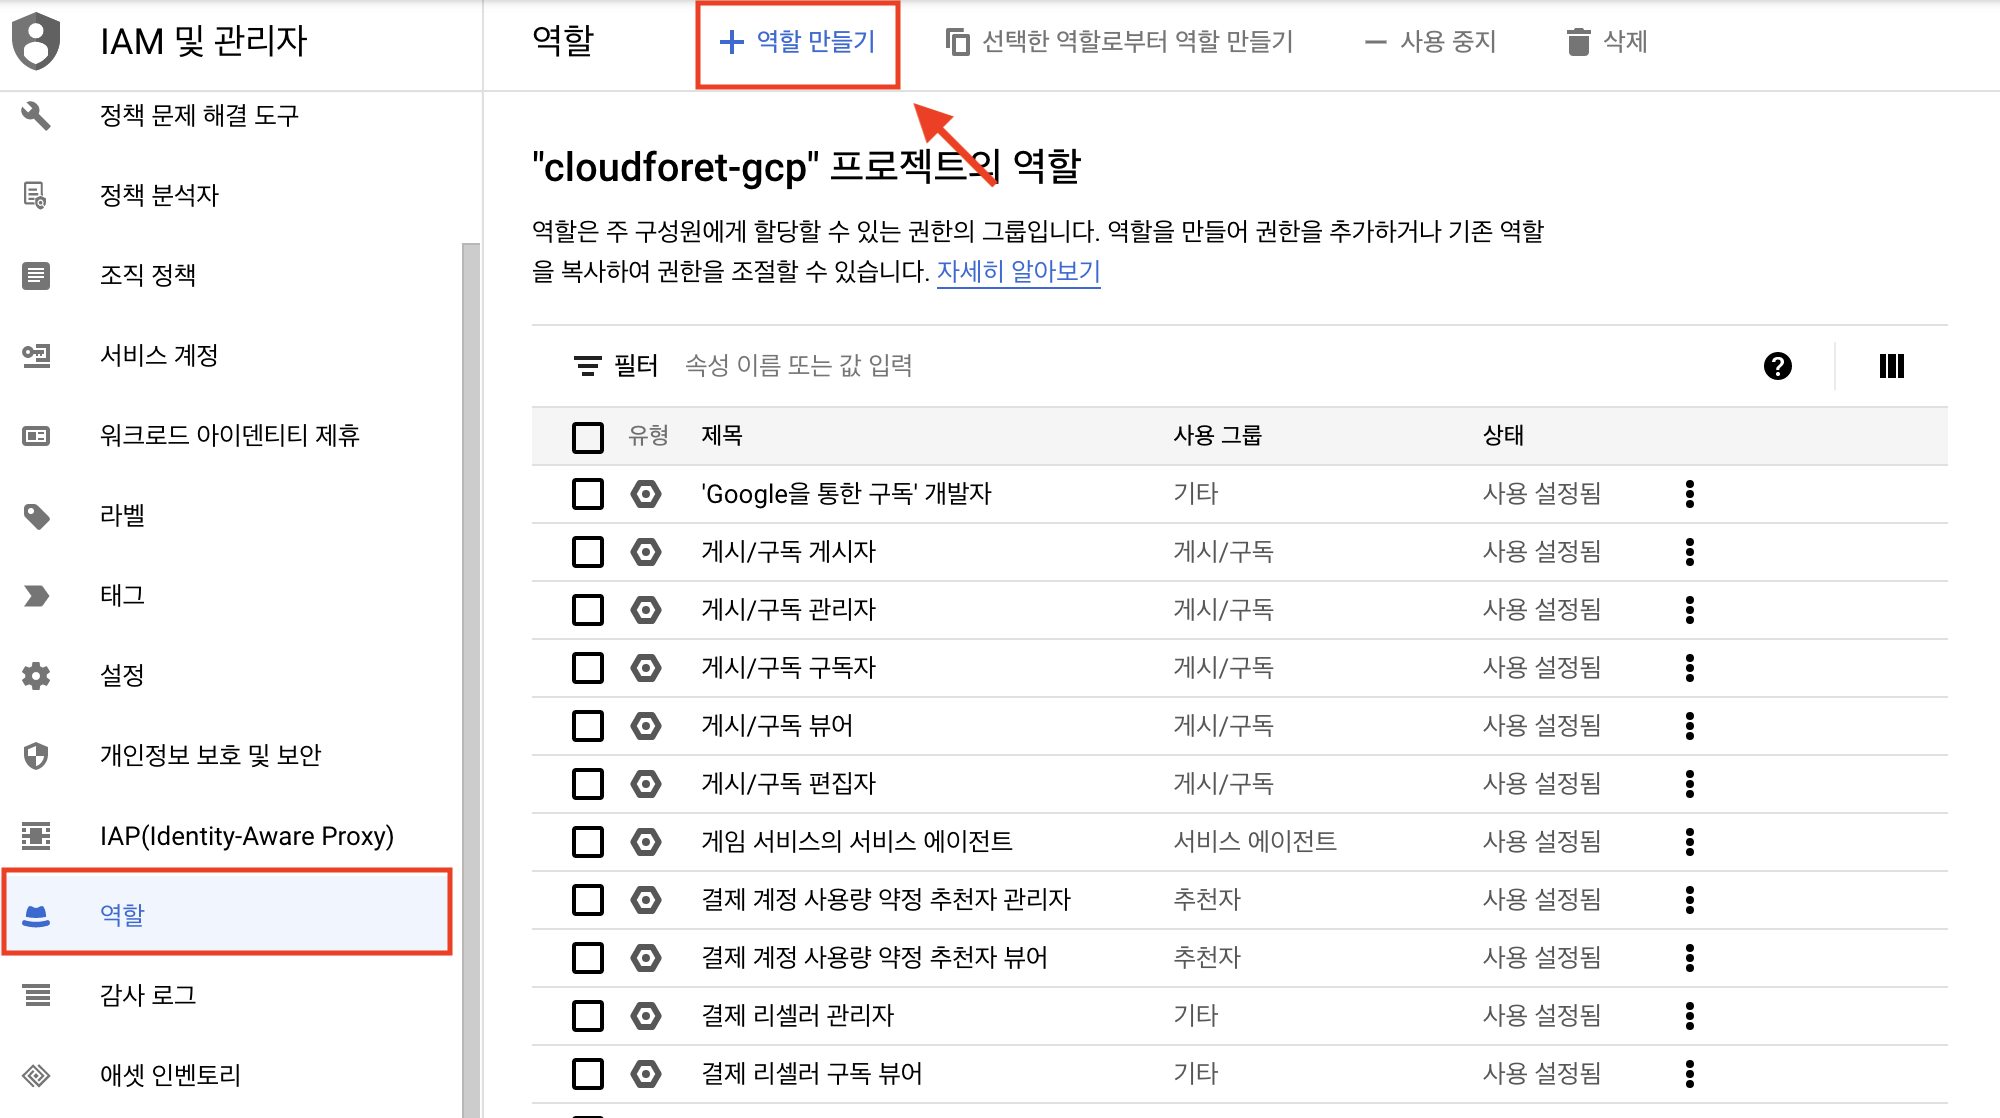
Create Custom Role
Go to [IAM & Admin > Roles] menu and click [Create Role].
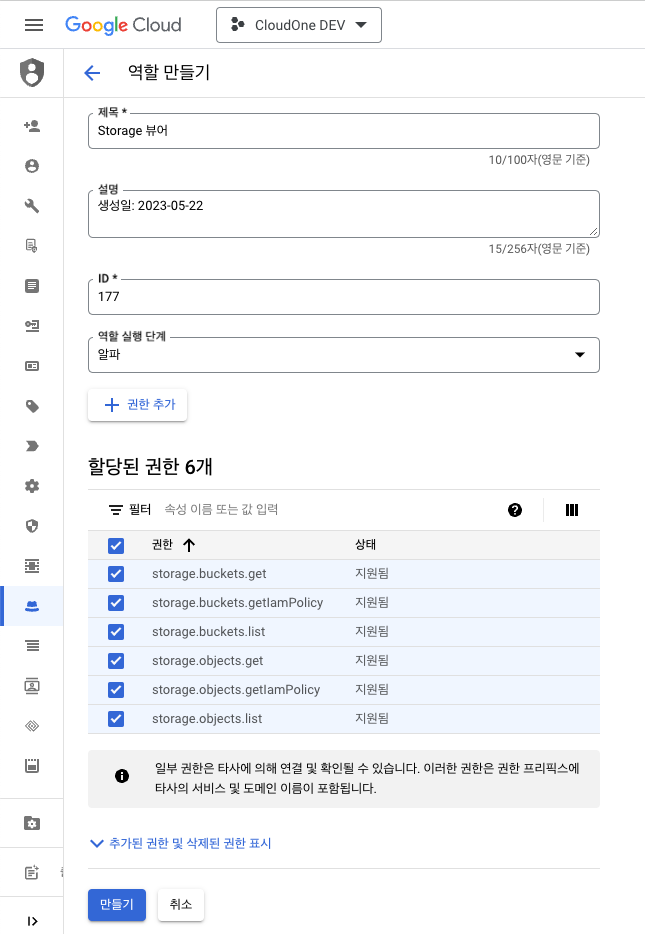
Enter a title and click [Add Permissions].
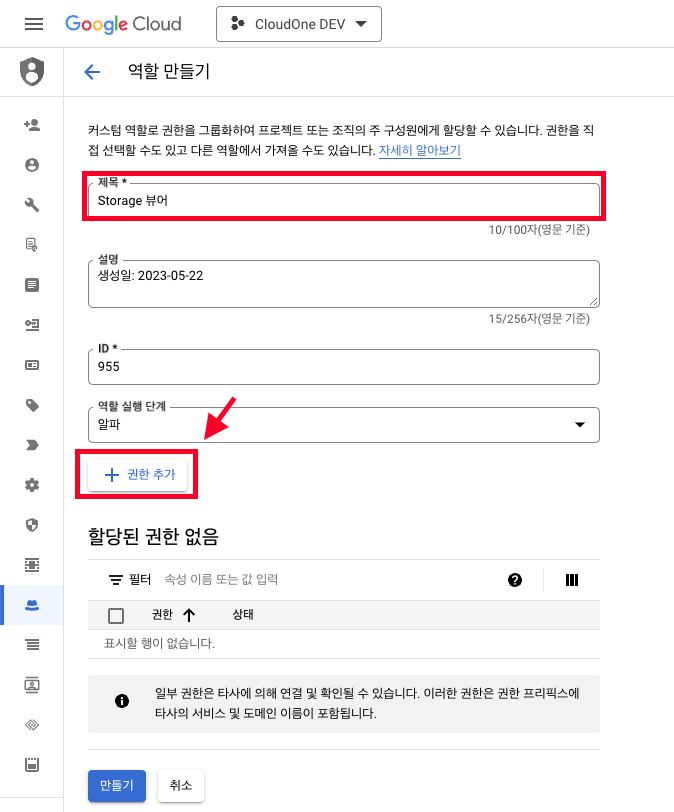
Search for and add the permissions listed in the Storage Viewer requirements using the [Name].
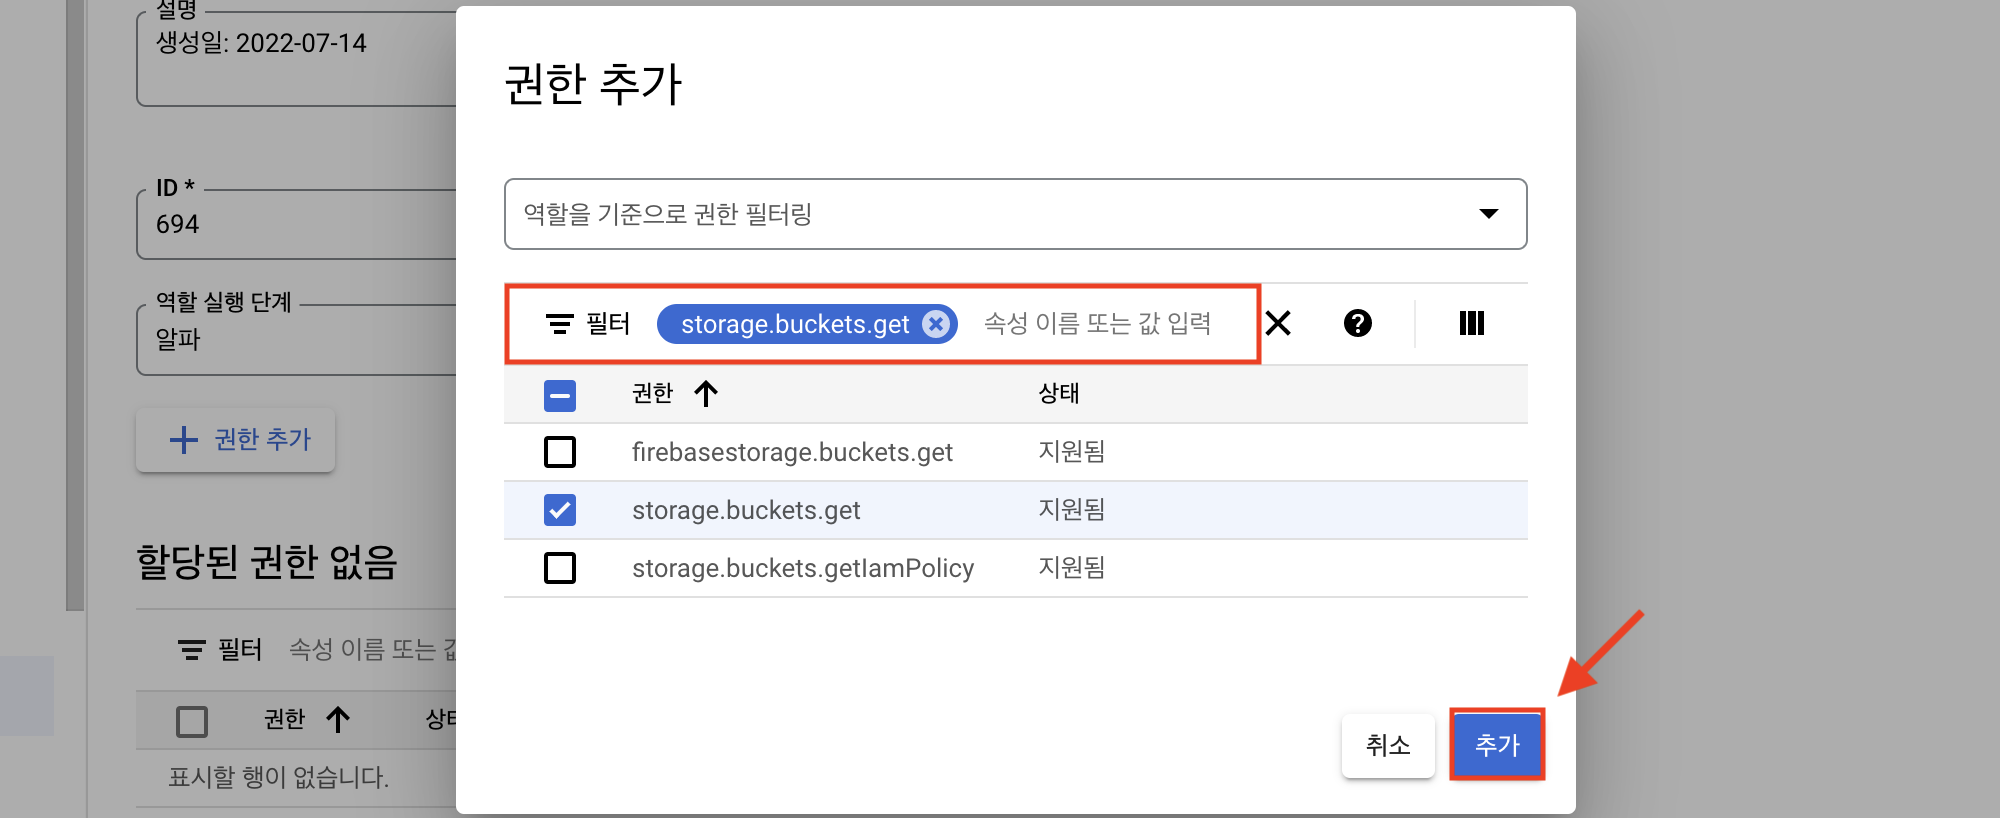
Verify the added permissions and click [Create] to complete the role creation.
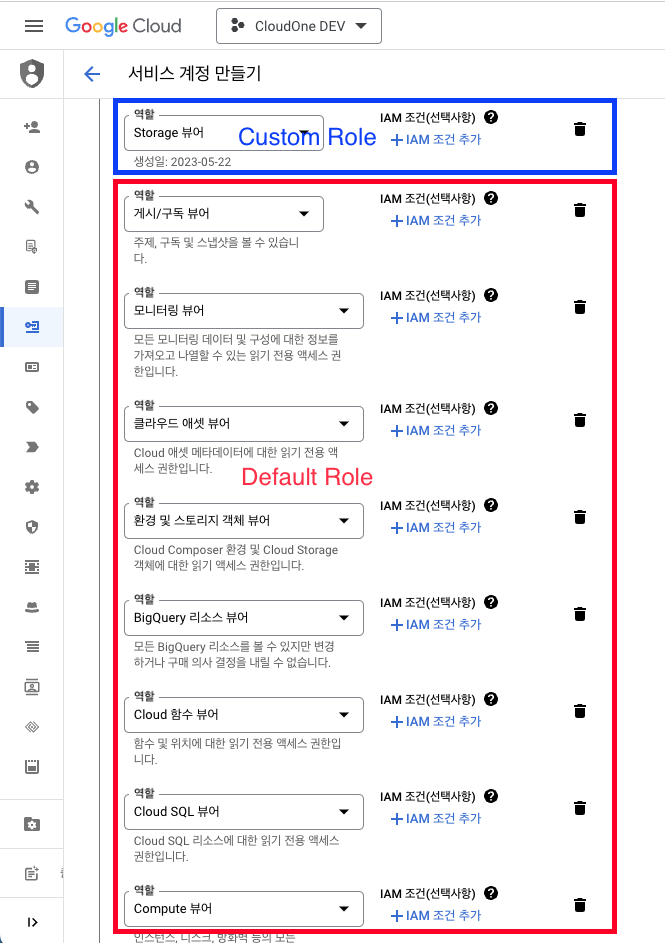
Add Managed/Custom Role to Google Cloud Service Account
Select the permissions to grant to the service account.
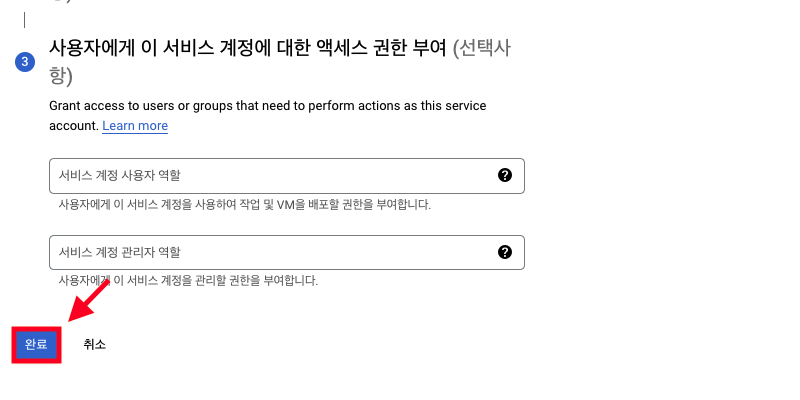
Click [Done] to complete the role assignment.
Generate Authentication Key
The authentication key contains credential information needed to access Google Cloud resources.
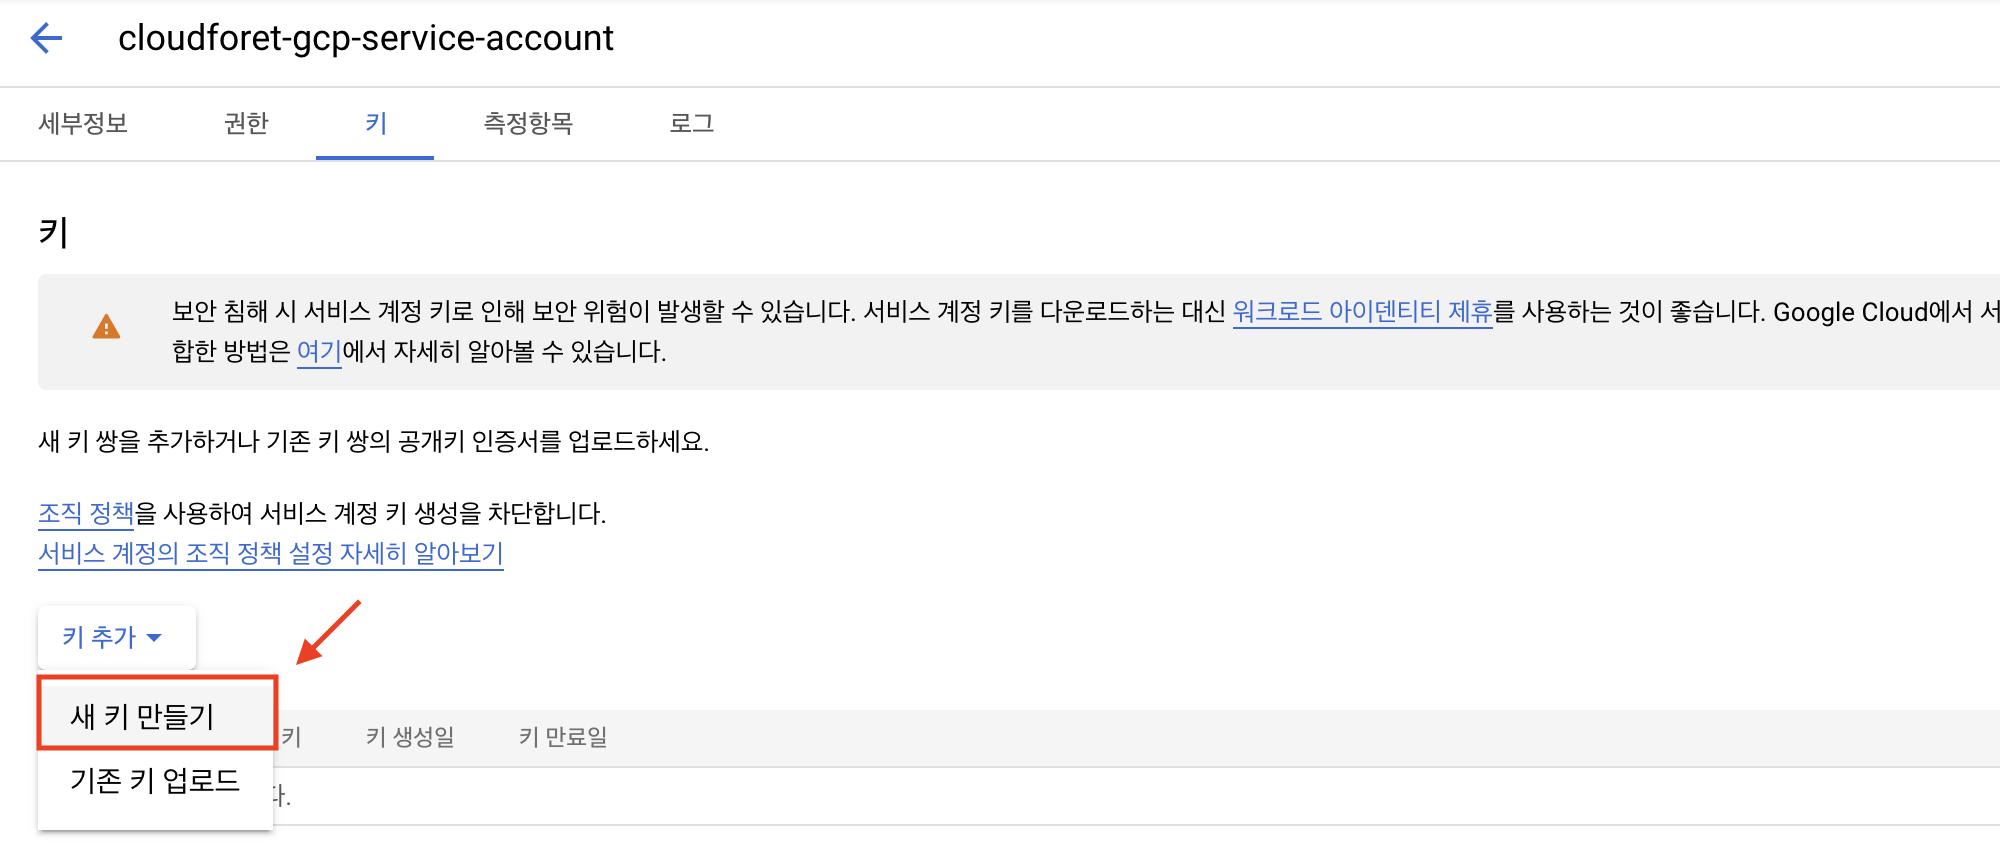
Click on the service account email in the [IAM & Admin > Service Accounts] menu.

Go to the [Keys] tab and click [Add Key > Create new key].
Select JSON as the key type and click [Create].
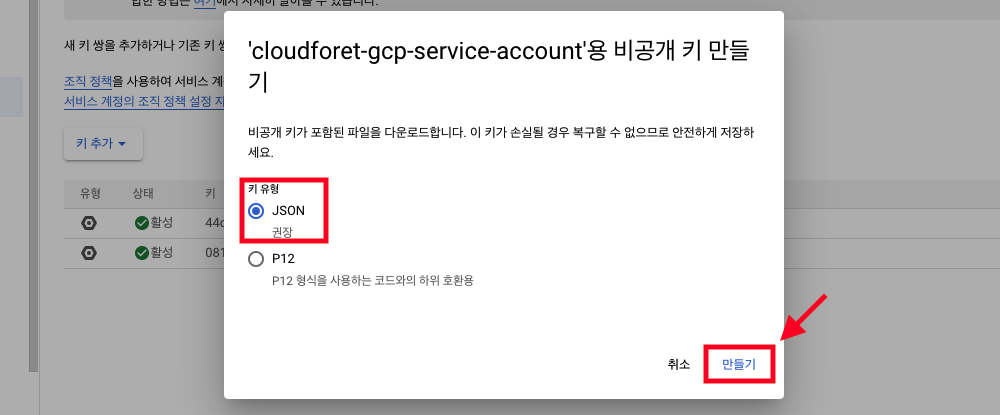
A private key will be saved as a JSON file on your local computer. This JSON file contains the configuration information needed when registering a service account in SpaceONE.
Verify Information for SpaceONE Service Account Registration
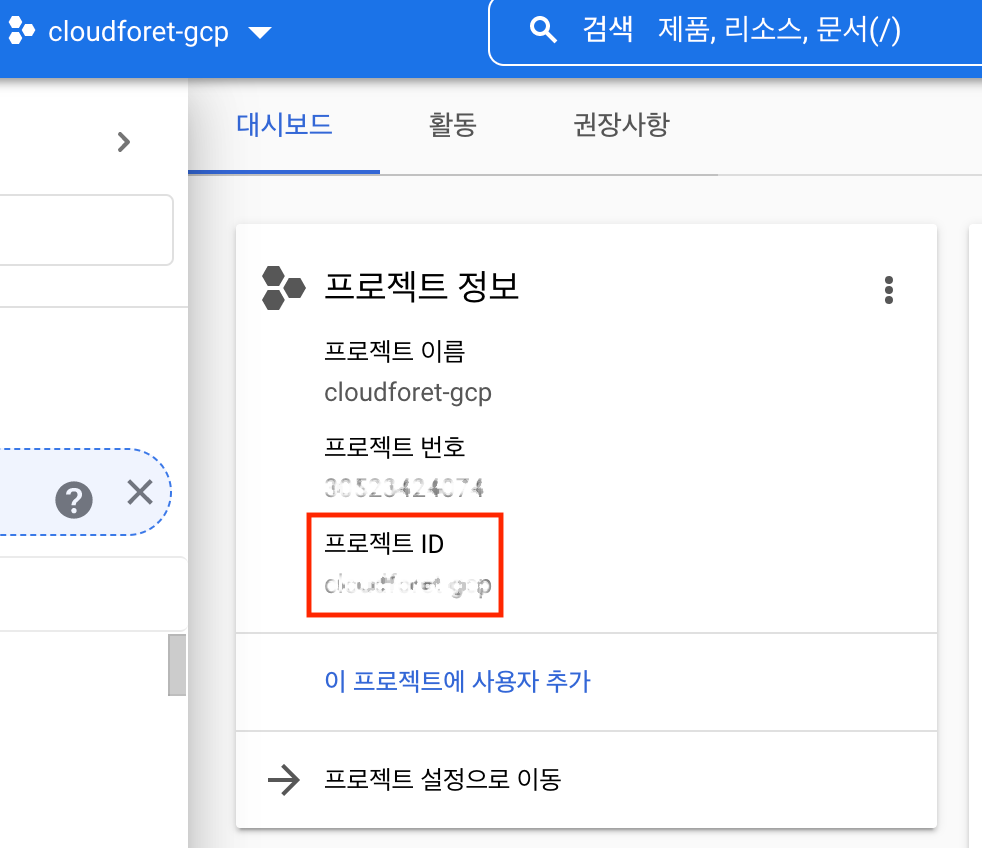
Check Project ID Configuration
Go to the Google Cloud dashboard, select your project, and click [Open].

You can find the Project ID in the project details.
Verify google_oauth2_credentials Registration Information
Open the JSON file downloaded in 3. Generate Authentication Key and check the following information:
- Client Email
- Client ID
- Private Key
- Private Key ID
- Project ID
- client_x509_cert_url