CSP Billing Settings
SpaceONE supports using Credential
to query Azure Billing data.
The Credential
method requires the following 4 key values:
- Billing Account ID(Azure Docs )
The Billing Account ID is created when you sign up for Azure. You can use the billing account to manage invoices, payments, and track costs across multiple billing accounts.
- Owner:
Partner(Access Azure Portal withPartneraccount)- Azure Account Setup Process:
Partner
- Tenant ID
Tenant ID is a unique identifier for your organization provided by Azure Active Directory(AD). Azure AD is a cloud-based identity and access management service used to manage users at the organizational level.
- Client ID
Client ID is the Application ID issued when creating an Azure app. Azure App is used to manage application credentials and IAM users.
- Client Secret
Client Secret key obtained through Azure app registration. It is required for token issuance to use Azure’s API and support access.
Now we will guide you through the process of creating or confirming these 4 values. You can skip any steps for information or services that have already been created.
1. Create Active Directory Enterprise App
Create an Active Directory App in the Root Tenant by accessing Azure Portal with a Partner account.
Navigate to [App registrations] page
Access Azure Portal
,
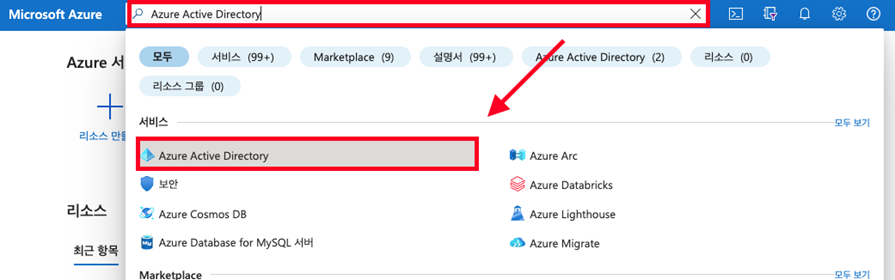
Enter ‘Azure Active Directory’ in the search bar and click [Azure Active Directory] service.
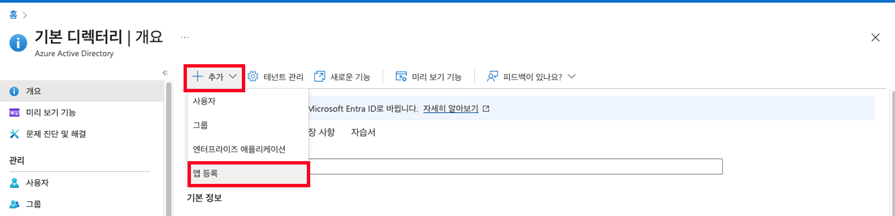
Click [Add] button and select [App registrations]
Proceed with app registration
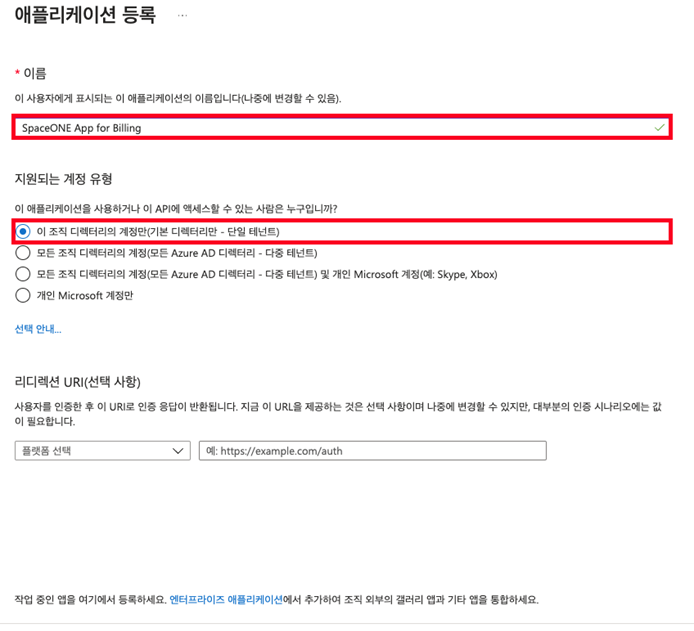
(1) Enter a name (e.g., SpaceONE App for Billing)
(2) Select the supported account type
(3) Click the [Register] button at the bottom
2. Assign Cost Viewing Role
Navigate to [Cost Management + Billing] page
Enter [Cost Management + Billing] in the search bar and click [Cost Management + Billing] service.

Add role assignment in [Access control (IAM)] menu
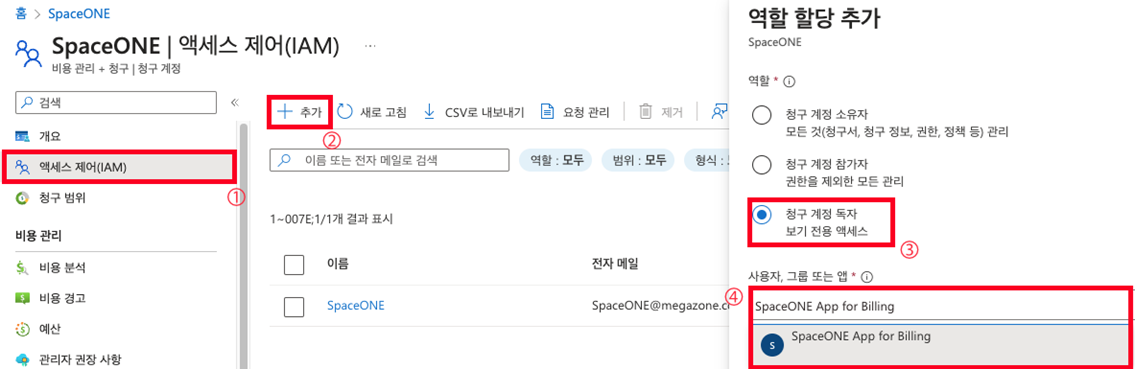
(1) Click the [Add] button (2) Select the [Billing Account Reader] role from the roles menu on the right (3) Search and select [SpaceONE App for Billing] that you created earlier in the search box for users, groups, or apps (4) Click the [Add] button at the bottom right
3. Create and View Client ID, Client Secret
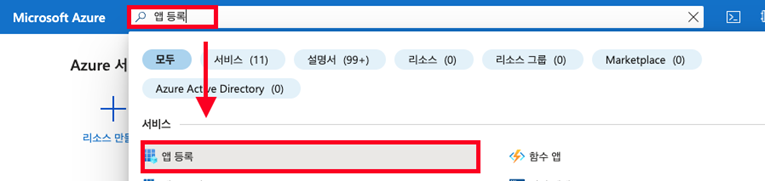
Navigate to [App registrations] page
Enter ‘App registrations’ in the search bar and click [App registrations] service
Select [All applications] category
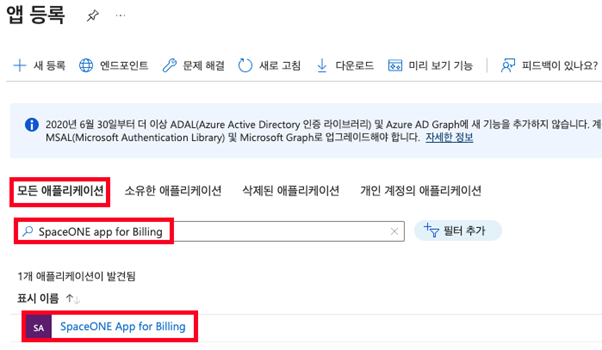
(1) Search for ‘SpaceONE App for Billing’ in the search box below the category
(2) Click the application that matches the search term
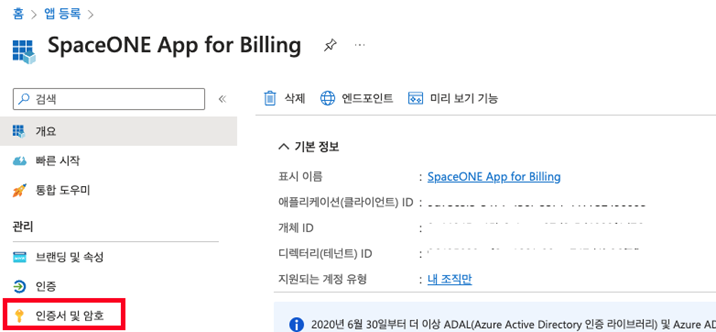
Navigate to [Certificates & secrets] menu
Add client secret in [Client secrets] menu
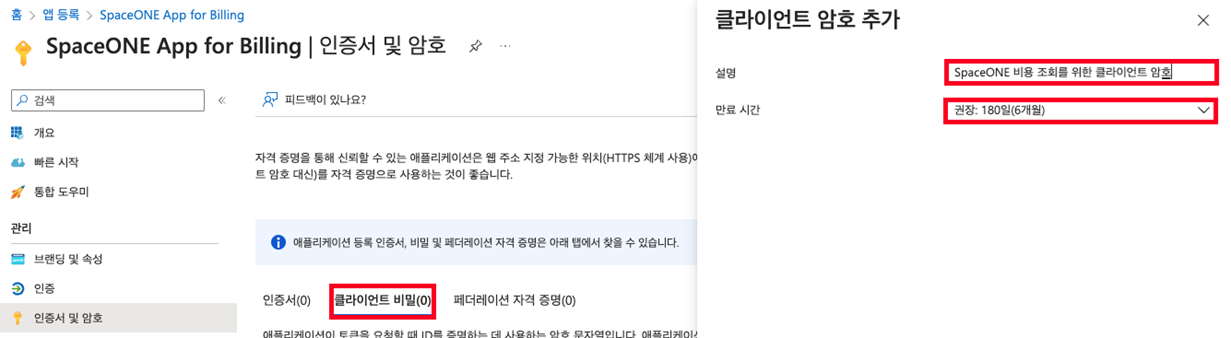
(1) After clicking, enter a description and set expiration time in the right menu
(2) Click the [Add] button at the bottom right
Copy client secret value
Copy the client secret value as it can only be viewed once upon creation. This value is the Client Secret that needs to be forwarded to your SpaceONE representative.

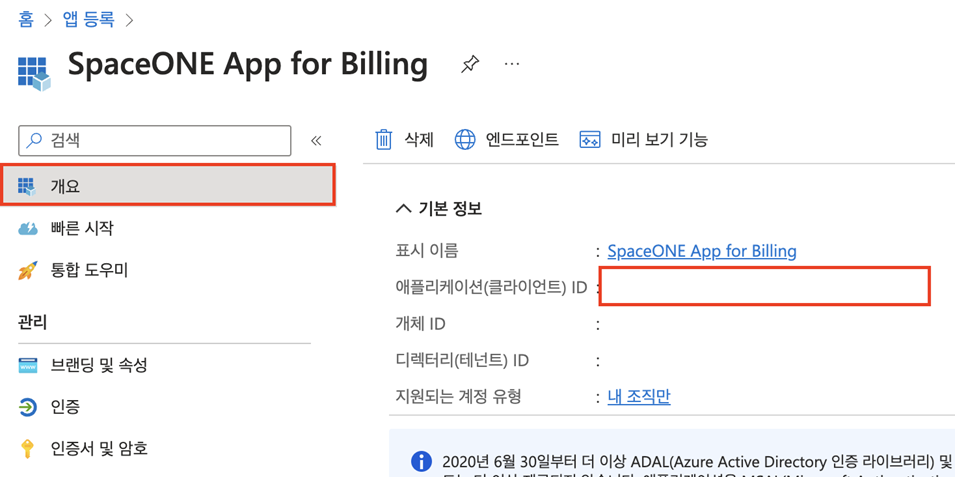
View Client ID in [Overview] menu
Check the Application (client) ID value. This value is the Client ID that needs to be forwarded to your SpaceONE representative.
4. View Tenant ID
Navigate to [Azure Active Directory] page
Enter ‘Azure Active Directory’ in the search bar and click [Azure Active Directory] service.
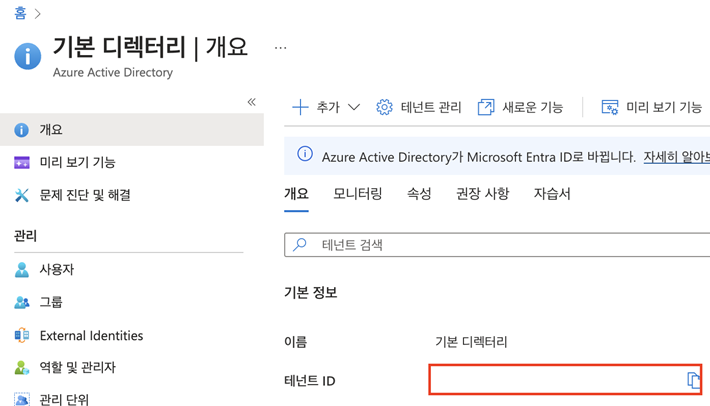
View Tenant ID in [Overview] menu
Check the [Tenant ID] value. This value is the Tenant ID that needs to be forwarded to your SpaceONE representative.
5. View Billing Account ID
Navigate to [Cost Management + Billing] page
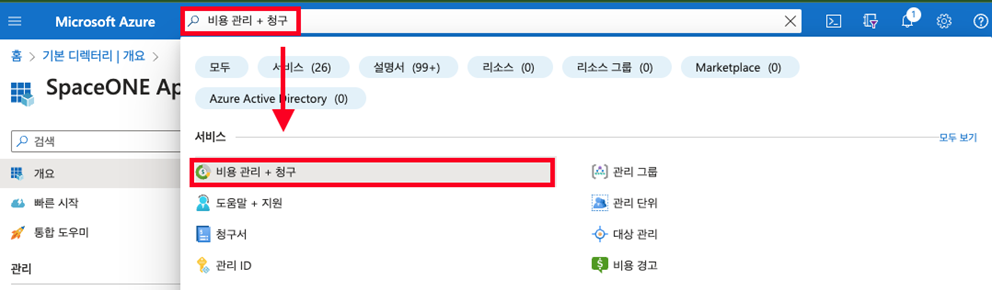
Enter ‘Cost Management + Billing’ in the search bar and click [Cost Management + Billing] service.
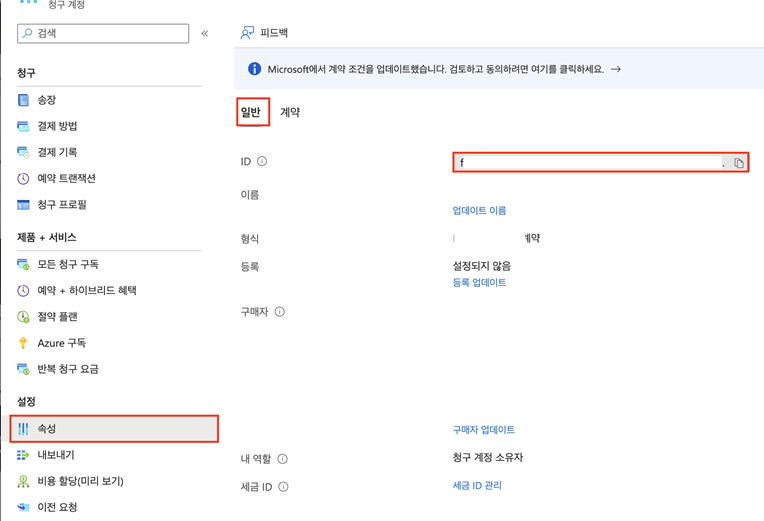
View Billing Account ID in [Properties] menu
Navigate to [Properties] menu and check the [ID] or [Billing Account ID] value in the [General] tab.
This value is the Billing Account ID that needs to be forwarded to your SpaceONE representative.
6. View Cost Information for Specific Customers (Optional)
After completing steps [1-5], you can view information for all customer tenants you manage.
If you want to view cost information for specific customers only, please provide the additional information below.
Option 1) If you want to view cost information for all customer tenants you manage
- Information to provide: Required 4 key values
Option 2) If you want to view costs for one specific customer tenant among the customer tenants you manage
- Information to provide: Required 4 key values + Customer Tenant ID
- Provide the Customer Tenant ID value after confirming the customer’s Tenant ID (e.g., Customer Tenant ID: xxxxxx-xxxx-xxxx-xxxxxxxxxxx)
Option 3) If you want to view costs for more than one customer tenant among the customer tenants you manage
- Information to provide: Required 4 key values + Multiple Customer Tenant IDs
- e.g., A Customer Tenant ID / B Customer Tenant ID / C Customer Tenant ID ···