Subscription Account Registration
This document guides you through the setup process for querying resource information from individual Azure subscription accounts.
Through this process, you can obtain the following information:
- Subscription ID
- Tenant ID
- Client ID
- Client Secret
1. App Registration
Client ID and Tenant ID information.Navigate to [App registrations] page in Azure Portal
Enter ‘App registrations’ in the search bar and click [App registrations].

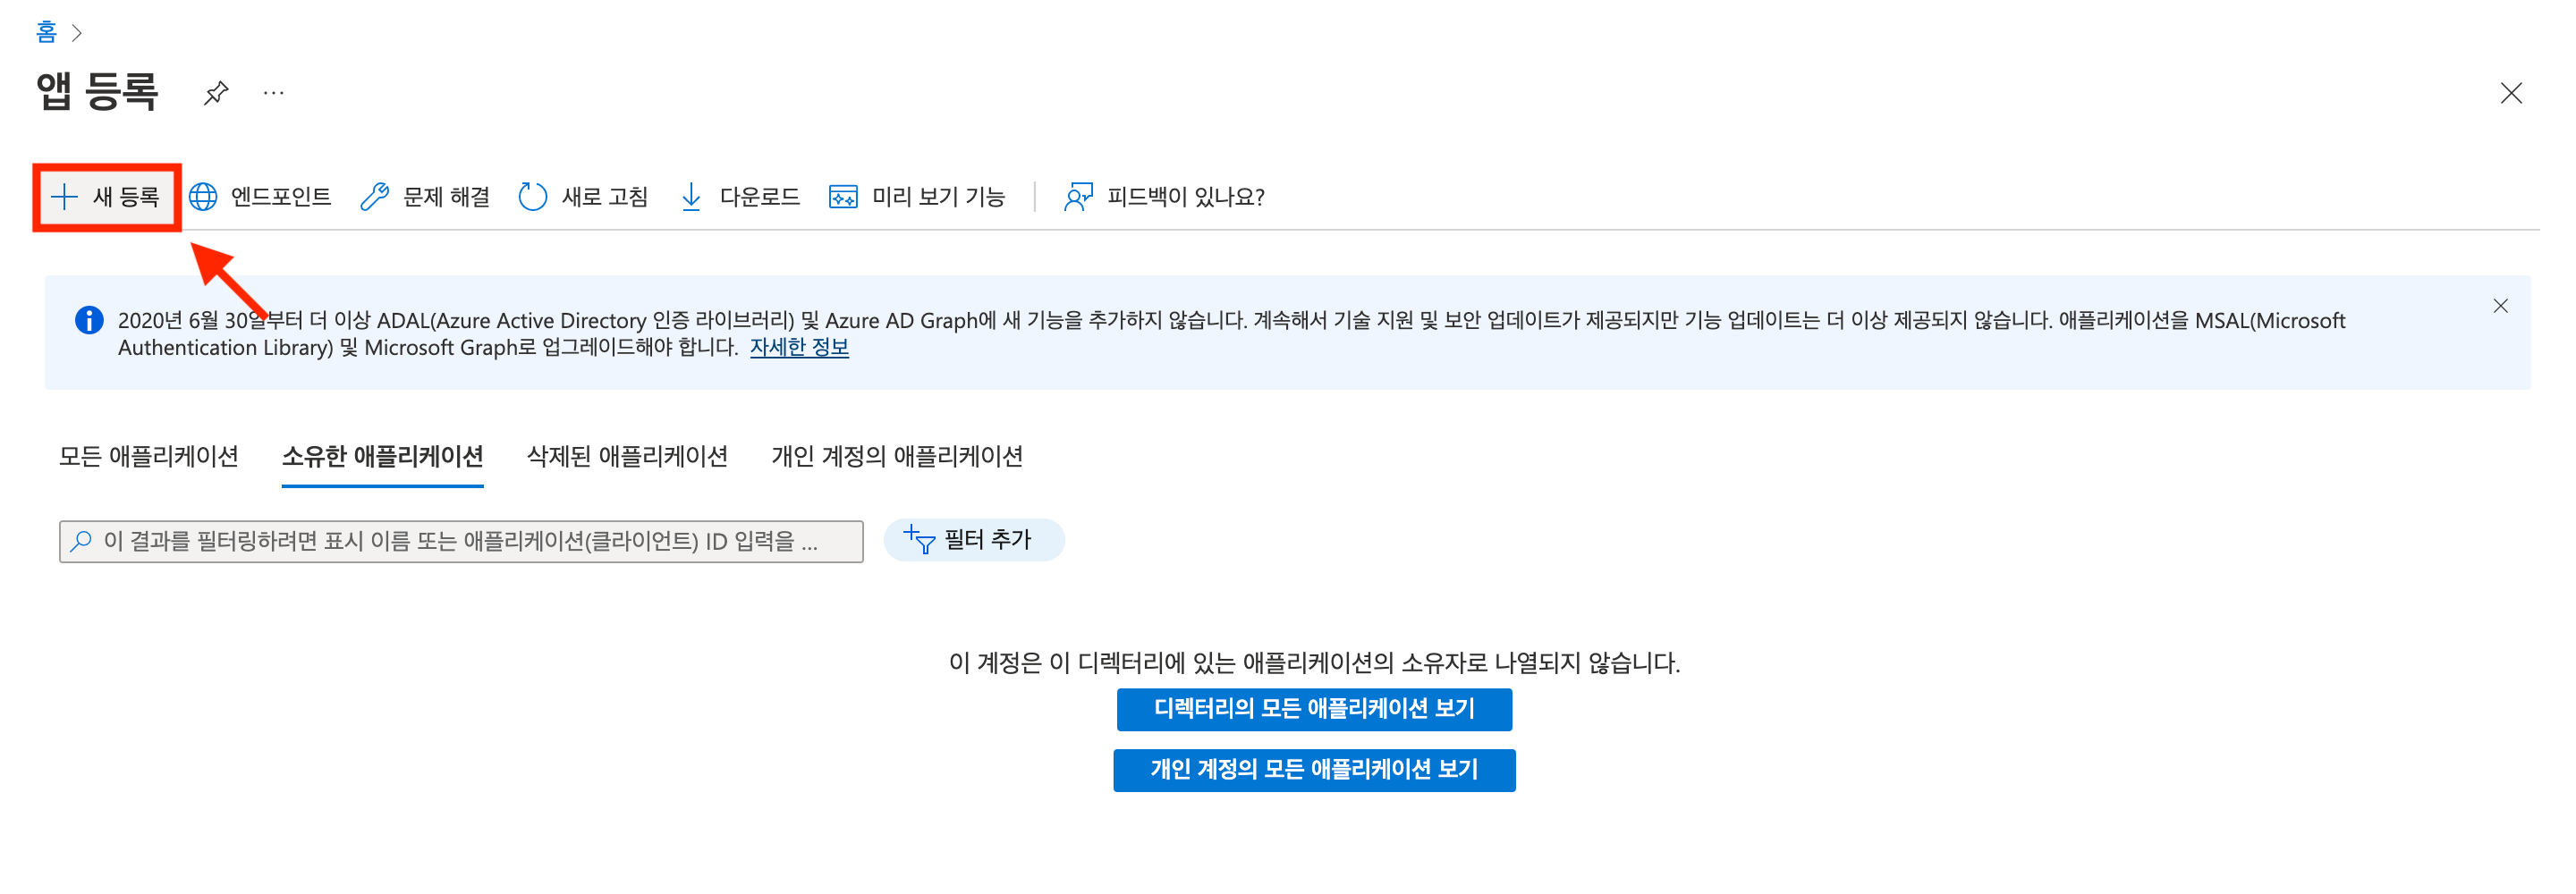
Click [New registration] button

Enter app registration information
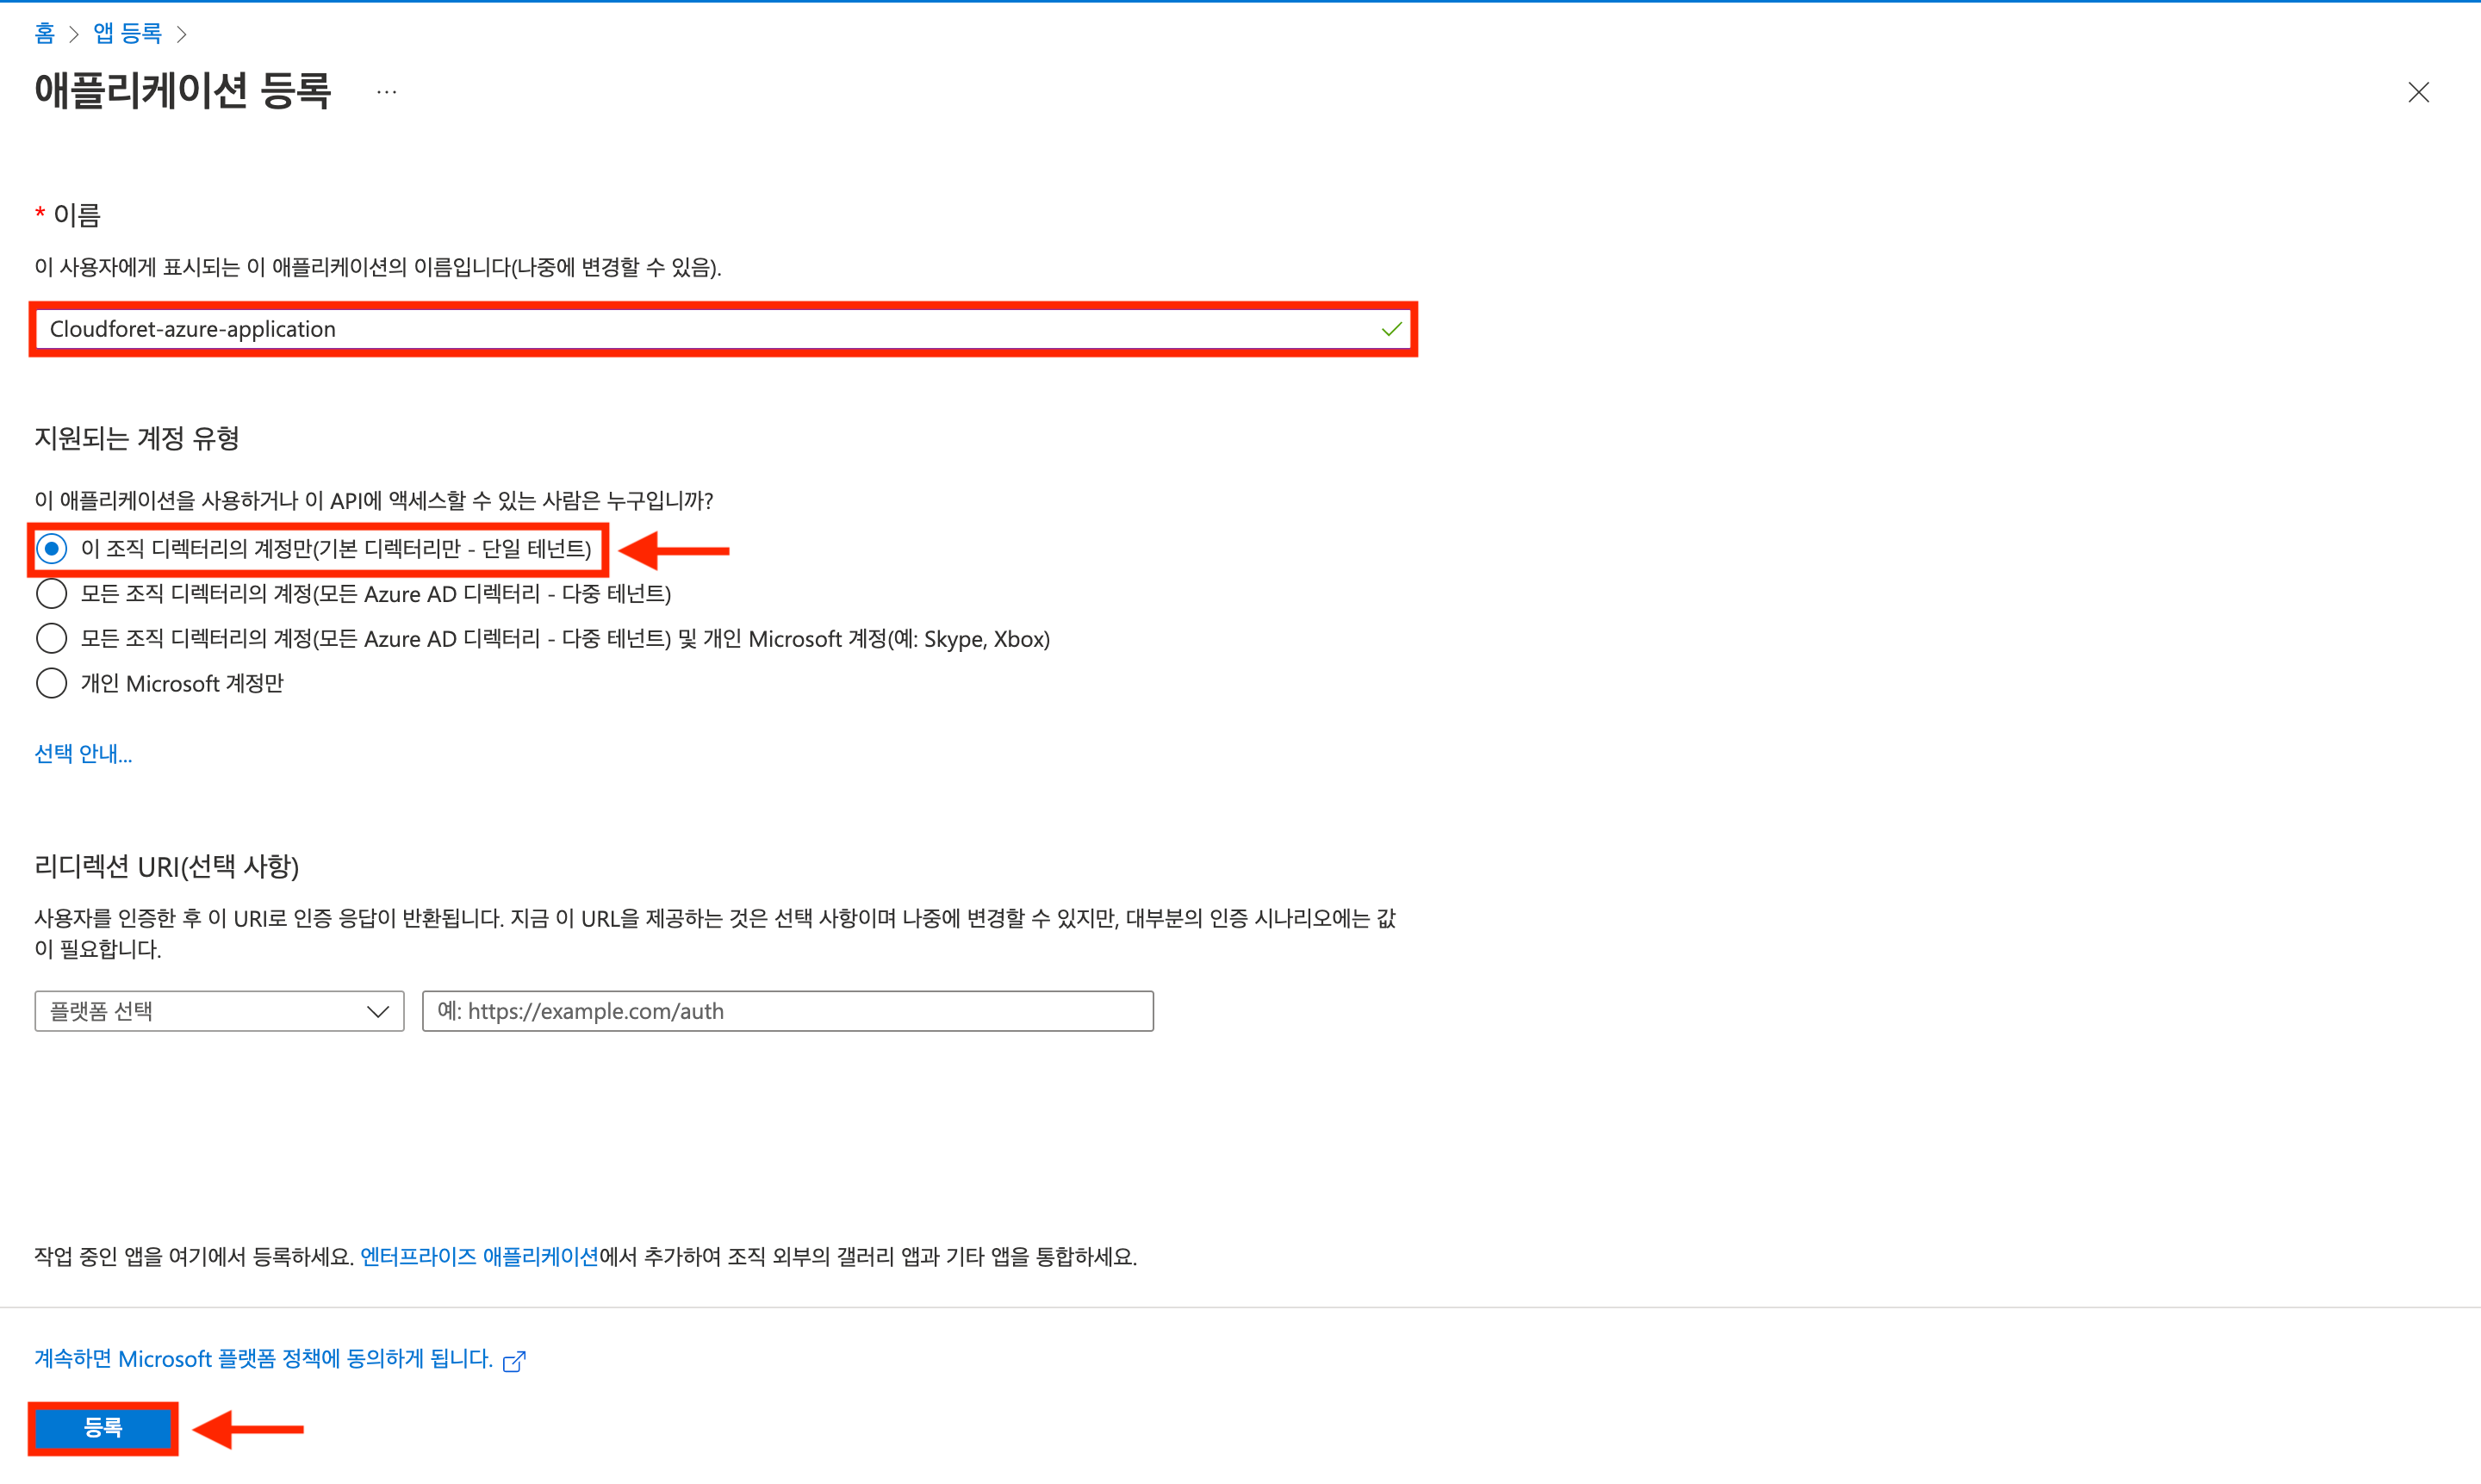
(1) Enter a name for your application.
(2) Select [Accounts in this organizational directory only].
(3) Click [Selection guide] to choose accounts that can access APIs suitable for your organization’s structure.
(4) Click the [Register] button.
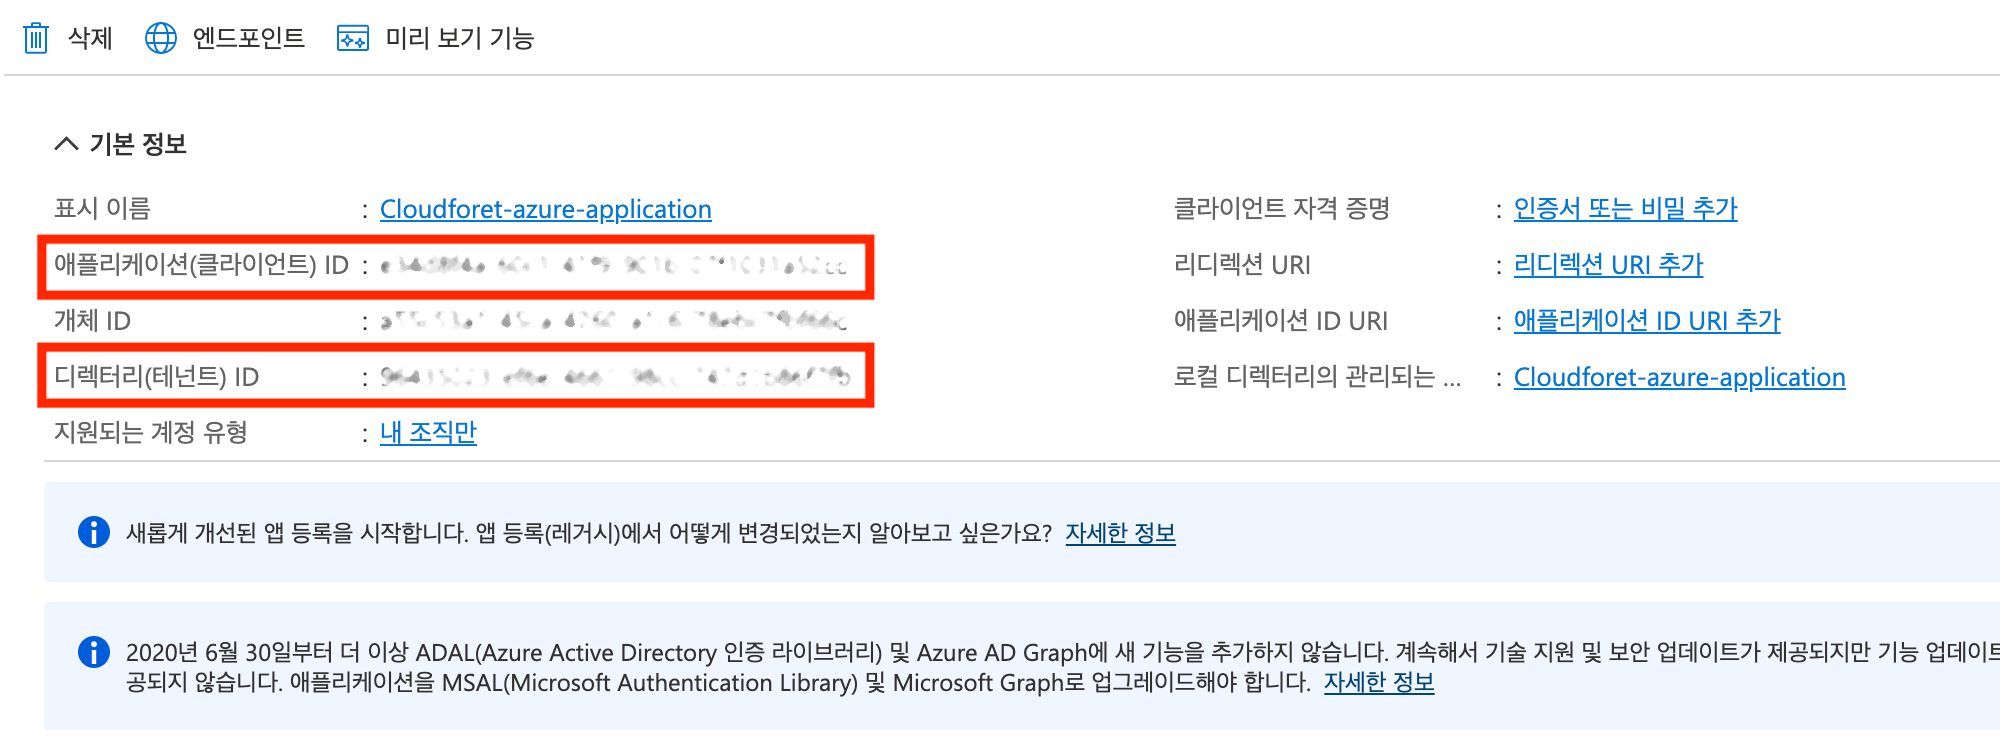
Complete app registration
After completion, you can check the Client ID and Tenant ID setup information in the [Overview] menu.
2. Resource Group Creation (Optional)
Resource group is a group for managing resources in Azure, with a 1:N relationship with subscription.
Navigate to [Resource groups] page in Azure Portal
Enter ‘Resource groups’ in the search bar and click on the [Resource groups] in the service list.

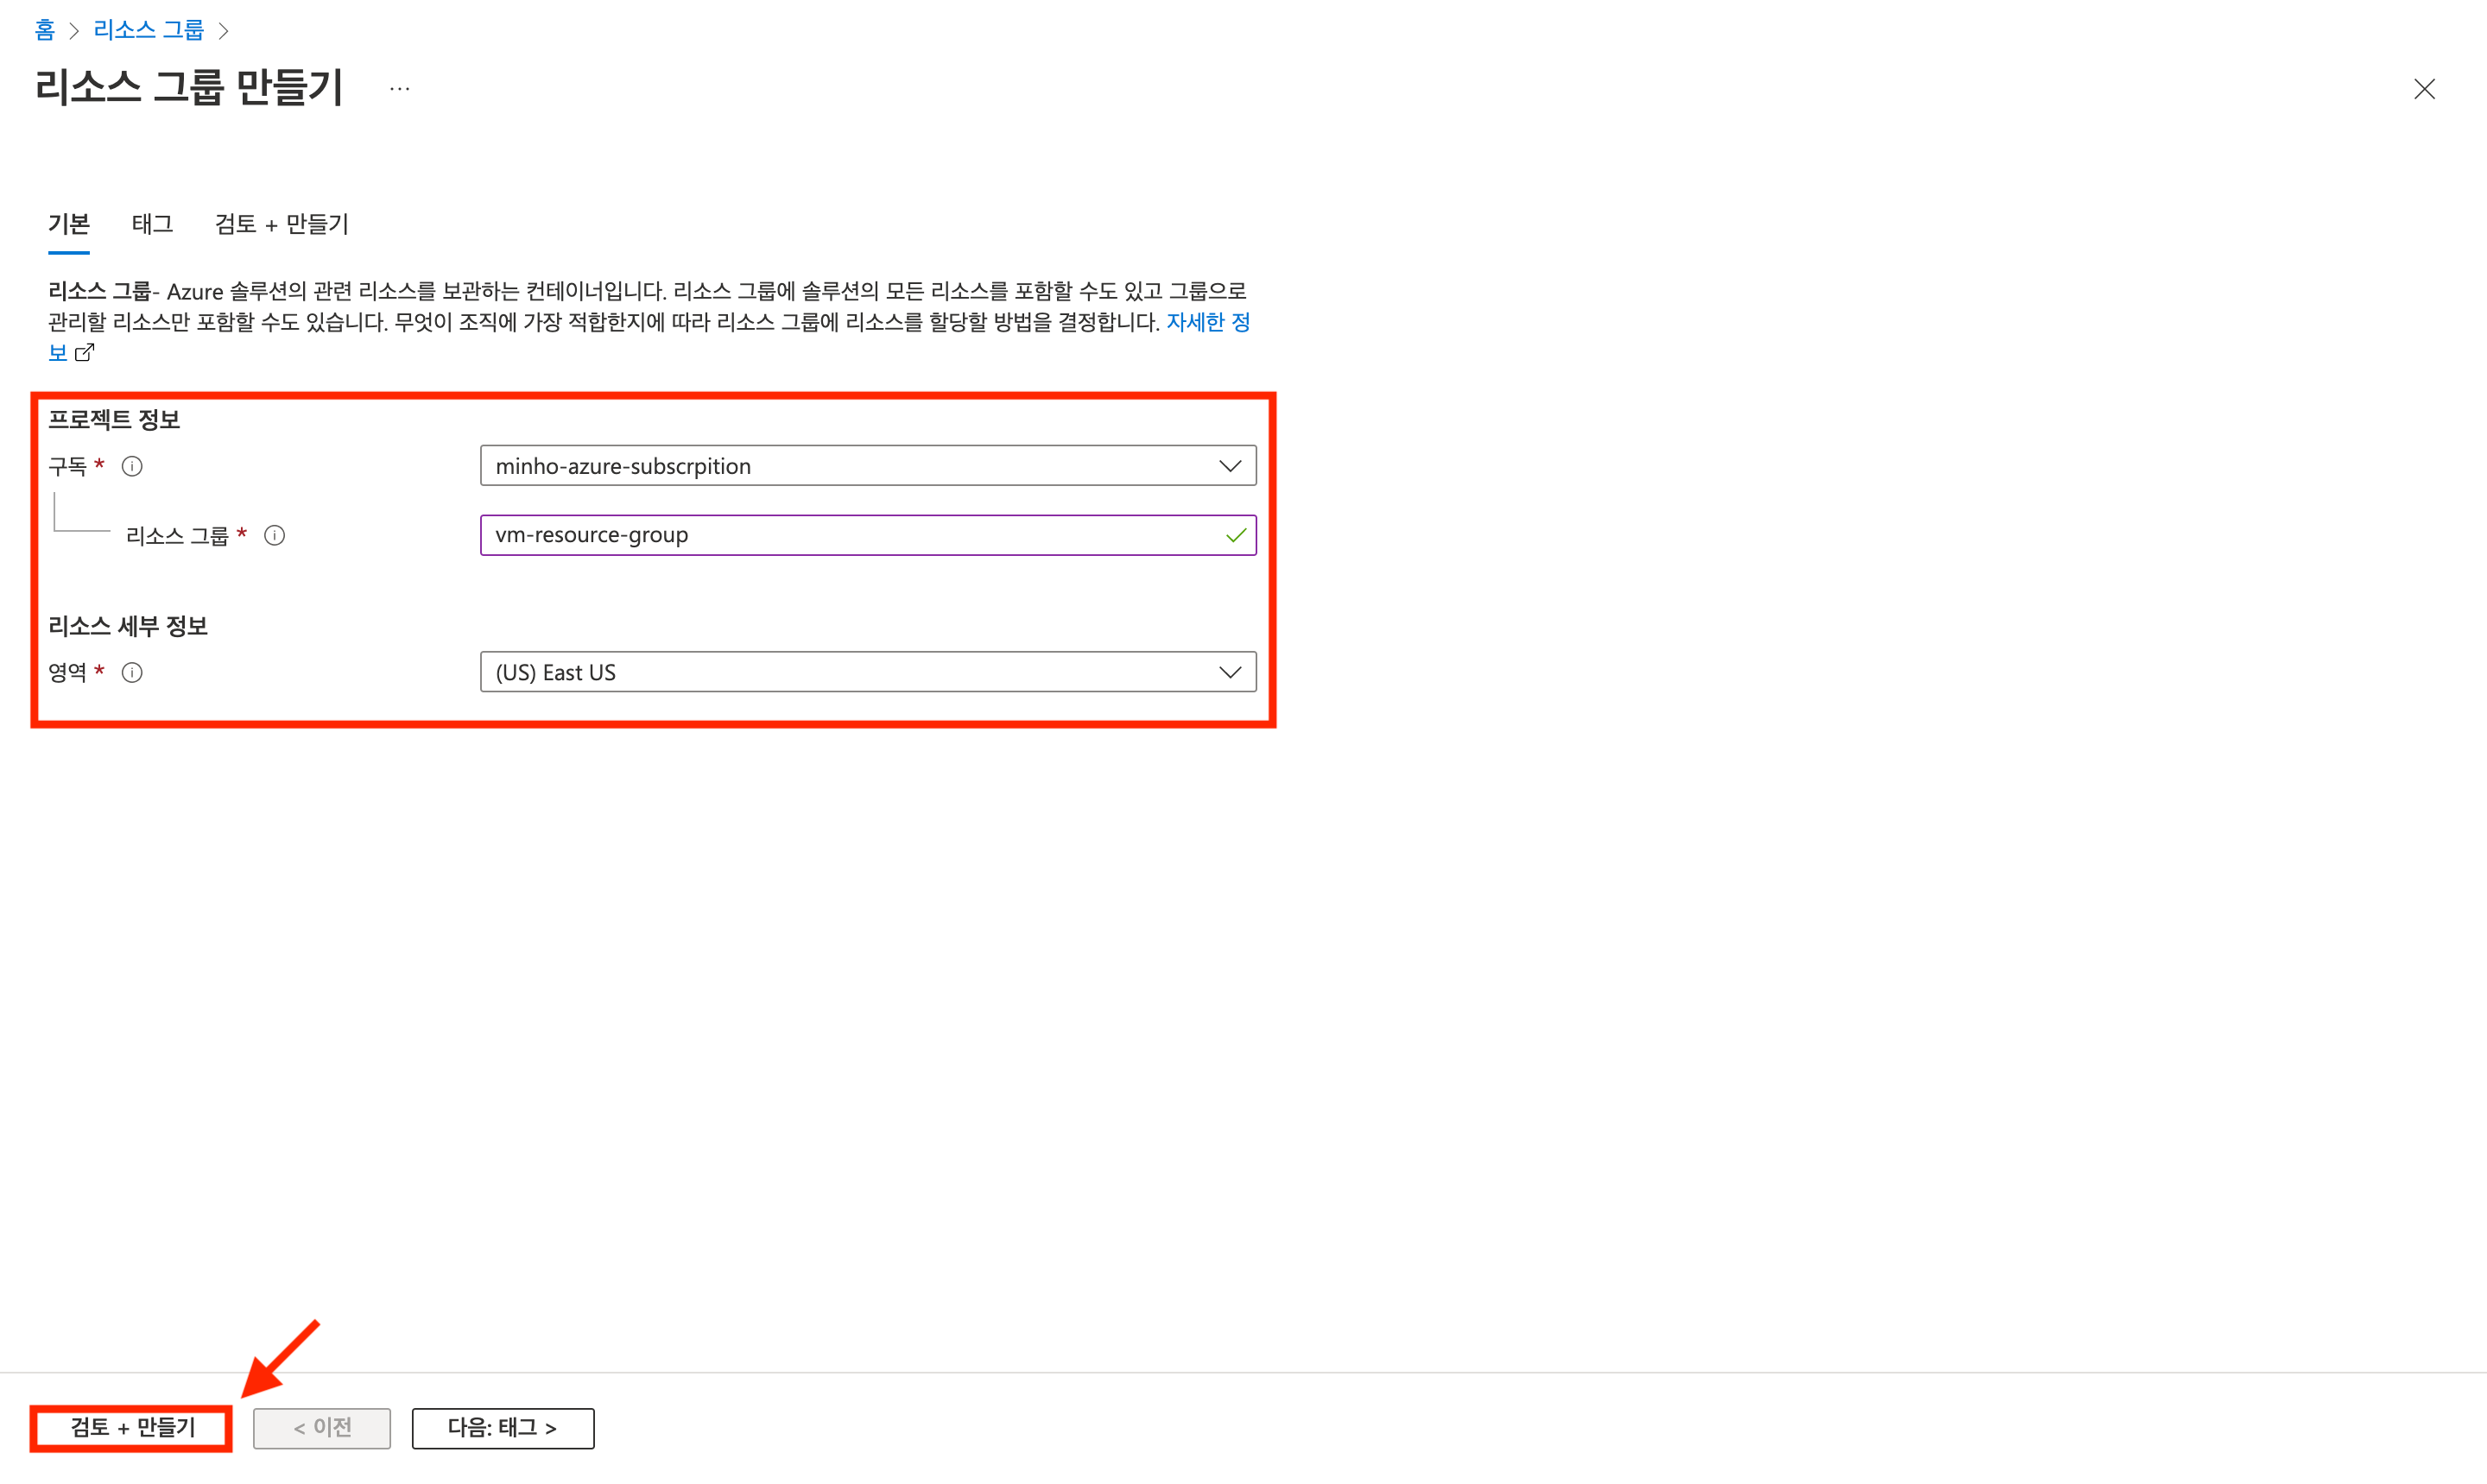
Click [Create] button
Enter project information and click [Review + Create] button
3. Role Assignment
Role
is a collection of access permissions for Azure resources.
Azure plugin needs to collect resource information, so it needs a role with the necessary permissions. You can create a role with the necessary permissions through custom role creation.
Collector plugin does not need any permissions other than read permission. The necessary permission information for each plugin is as follows.
| Plugin | URL |
|---|---|
| Microsoft Azure Cloud Service Collector | https://github.com/cloudforet-io/plugin-azure-inven-collector#authentication-overview |
There are two ways to assign roles.
- Assign role to subscription: If you want to collect all resources in the subscription, assign role to subscription.
- Assign role to resource group: If you want to collect only specific resource group in the subscription, proceed with 2. Resource Group Creation and then assign role to resource group.
3-1. Assign role to subscription
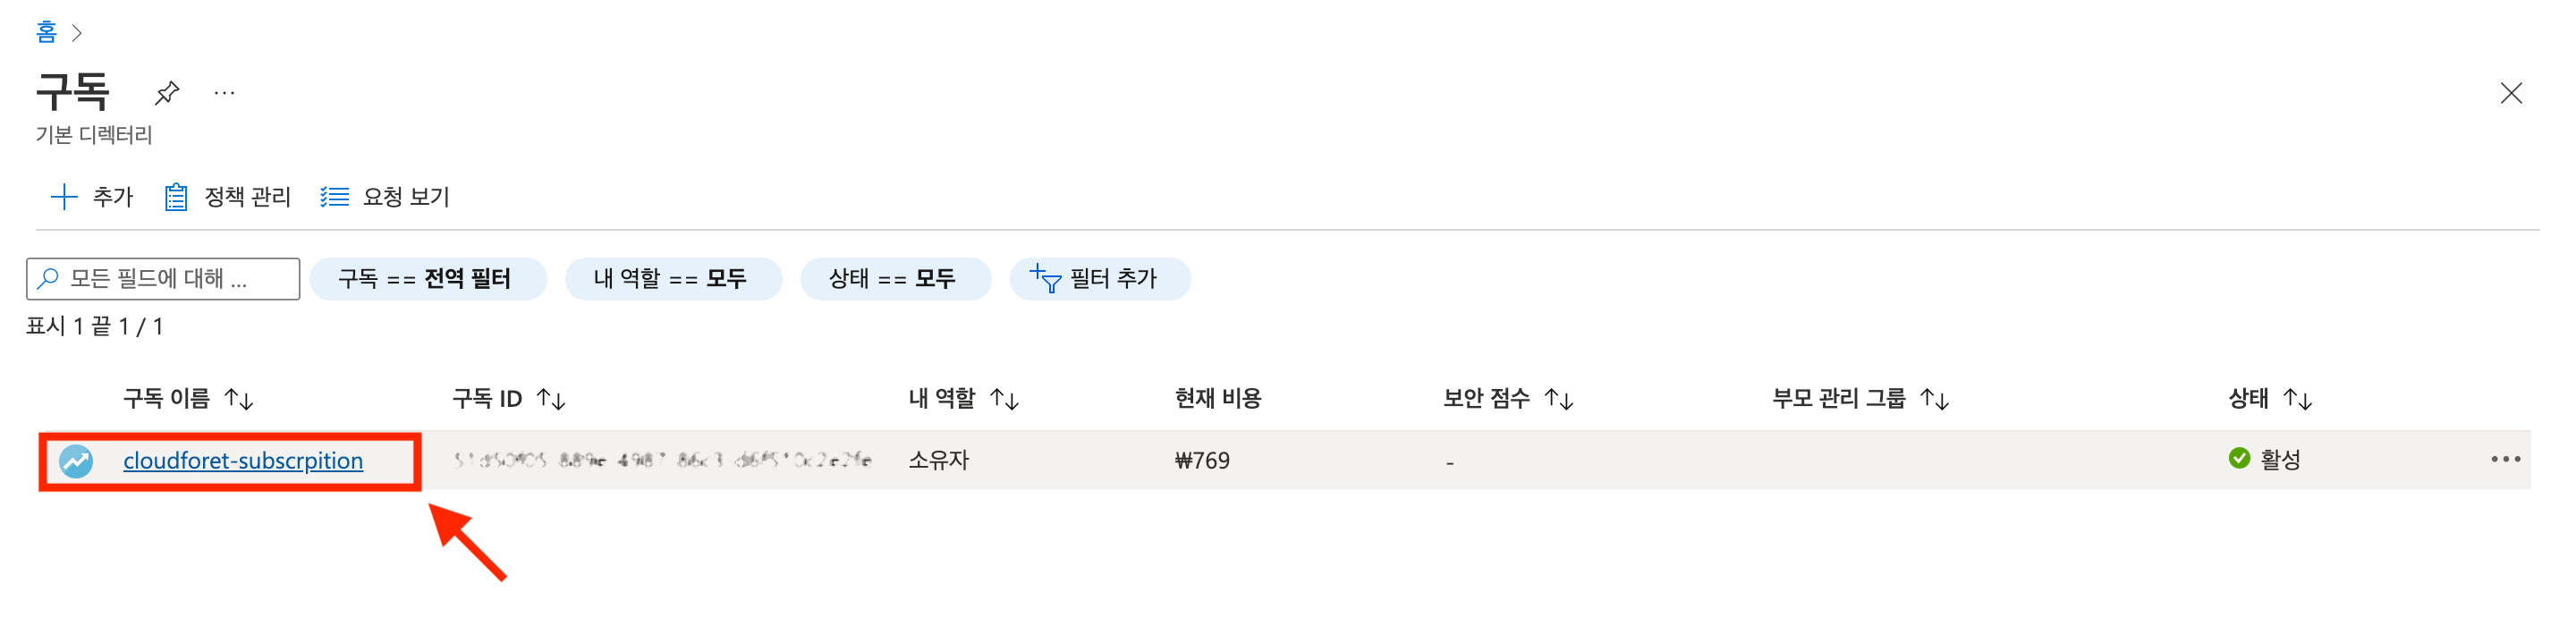
Navigate to [Subscriptions] page in Azure Portal
Enter ‘Subscriptions’ in the search bar and click on the [Subscriptions] in the service list.

Select subscription to assign role
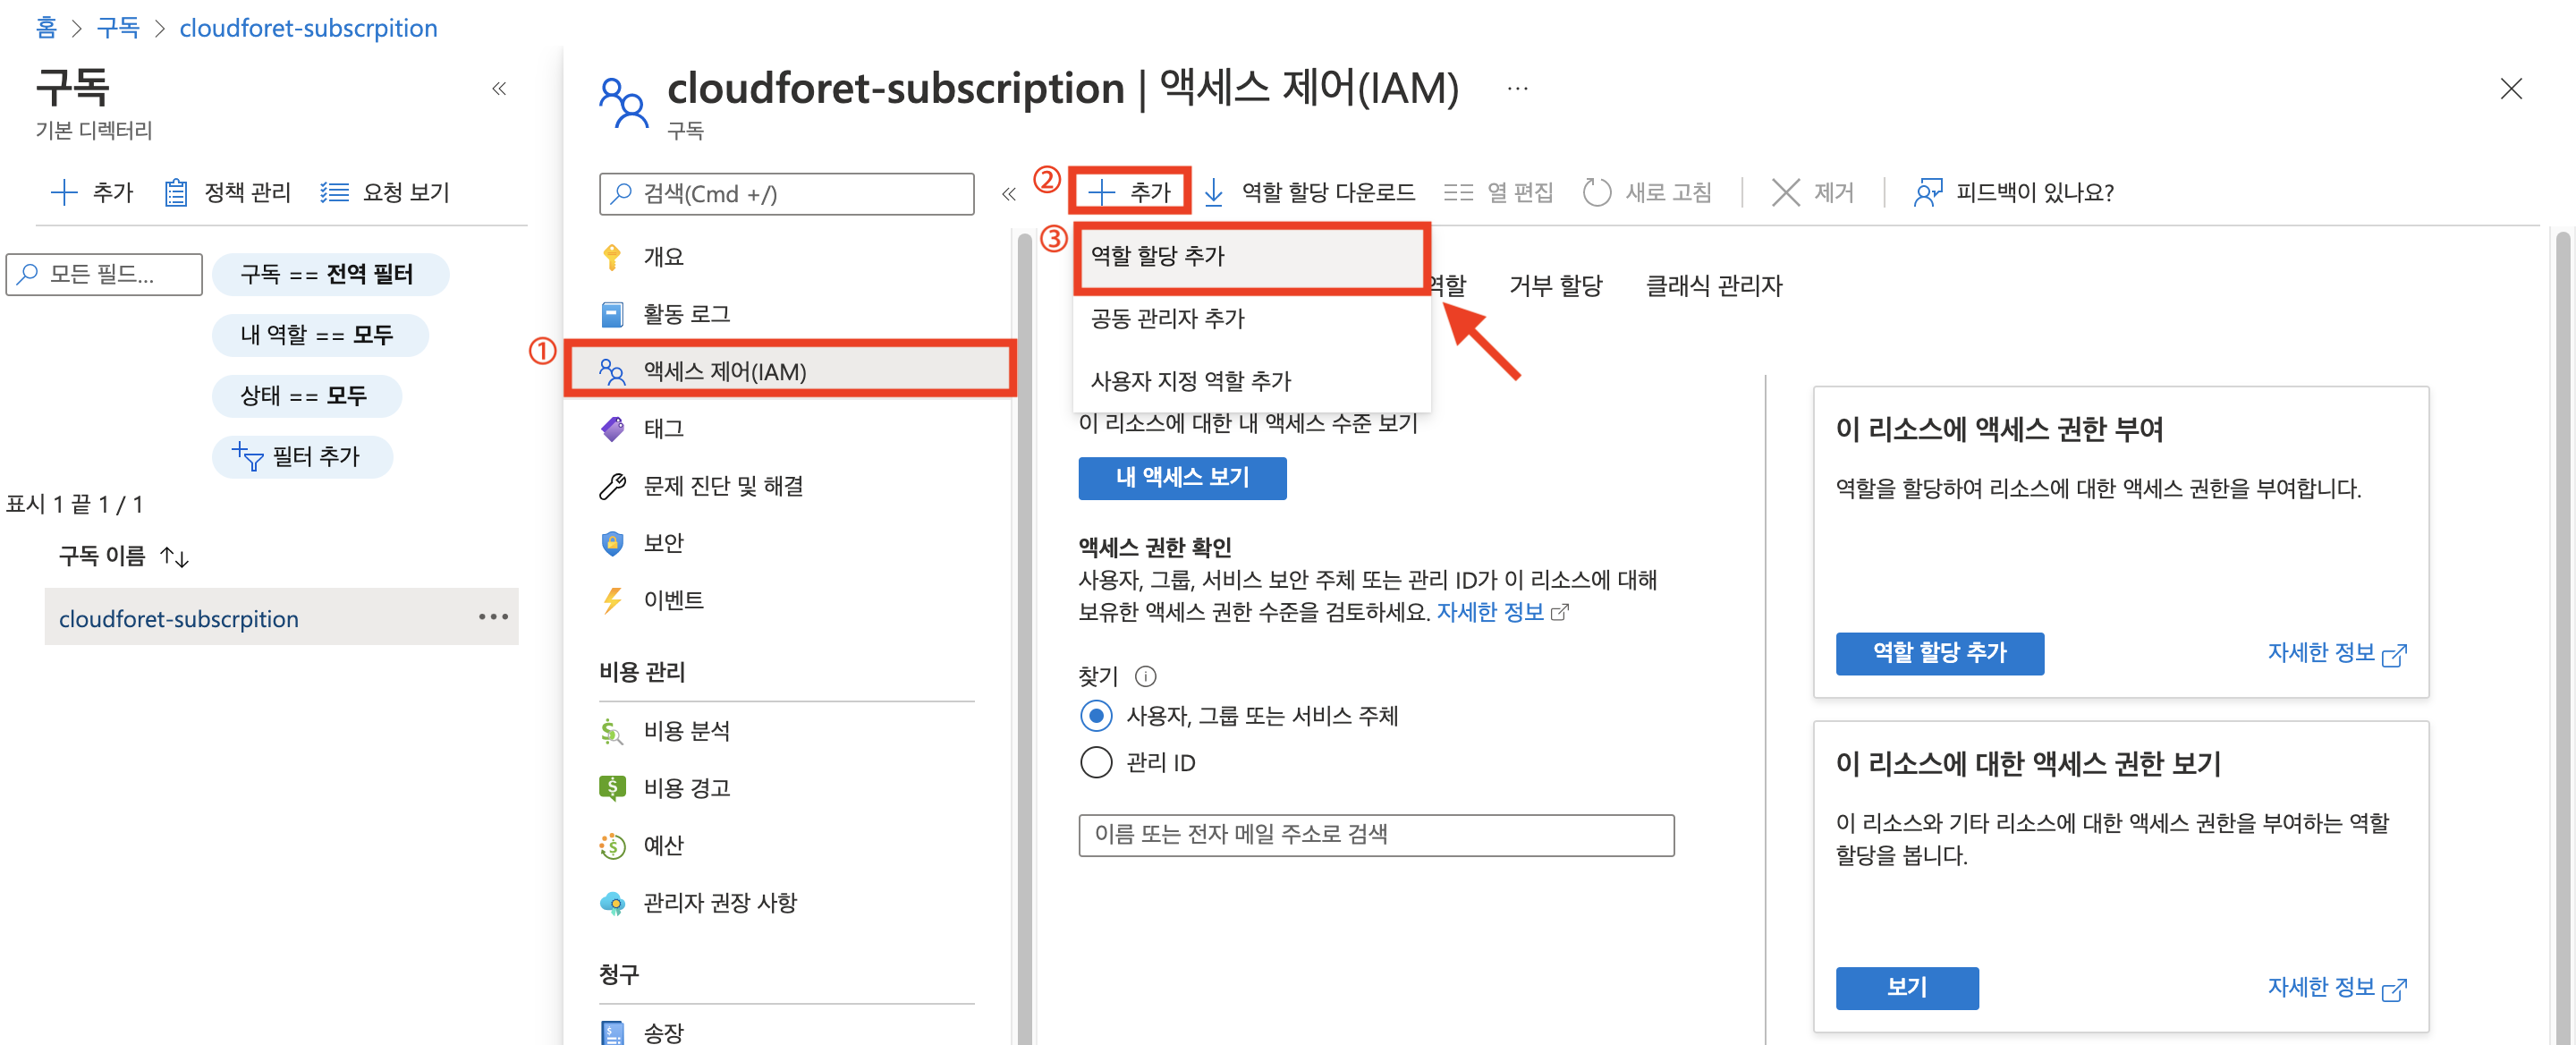
Click [Access Control (IAM) > Add > Role Assignment Add] button
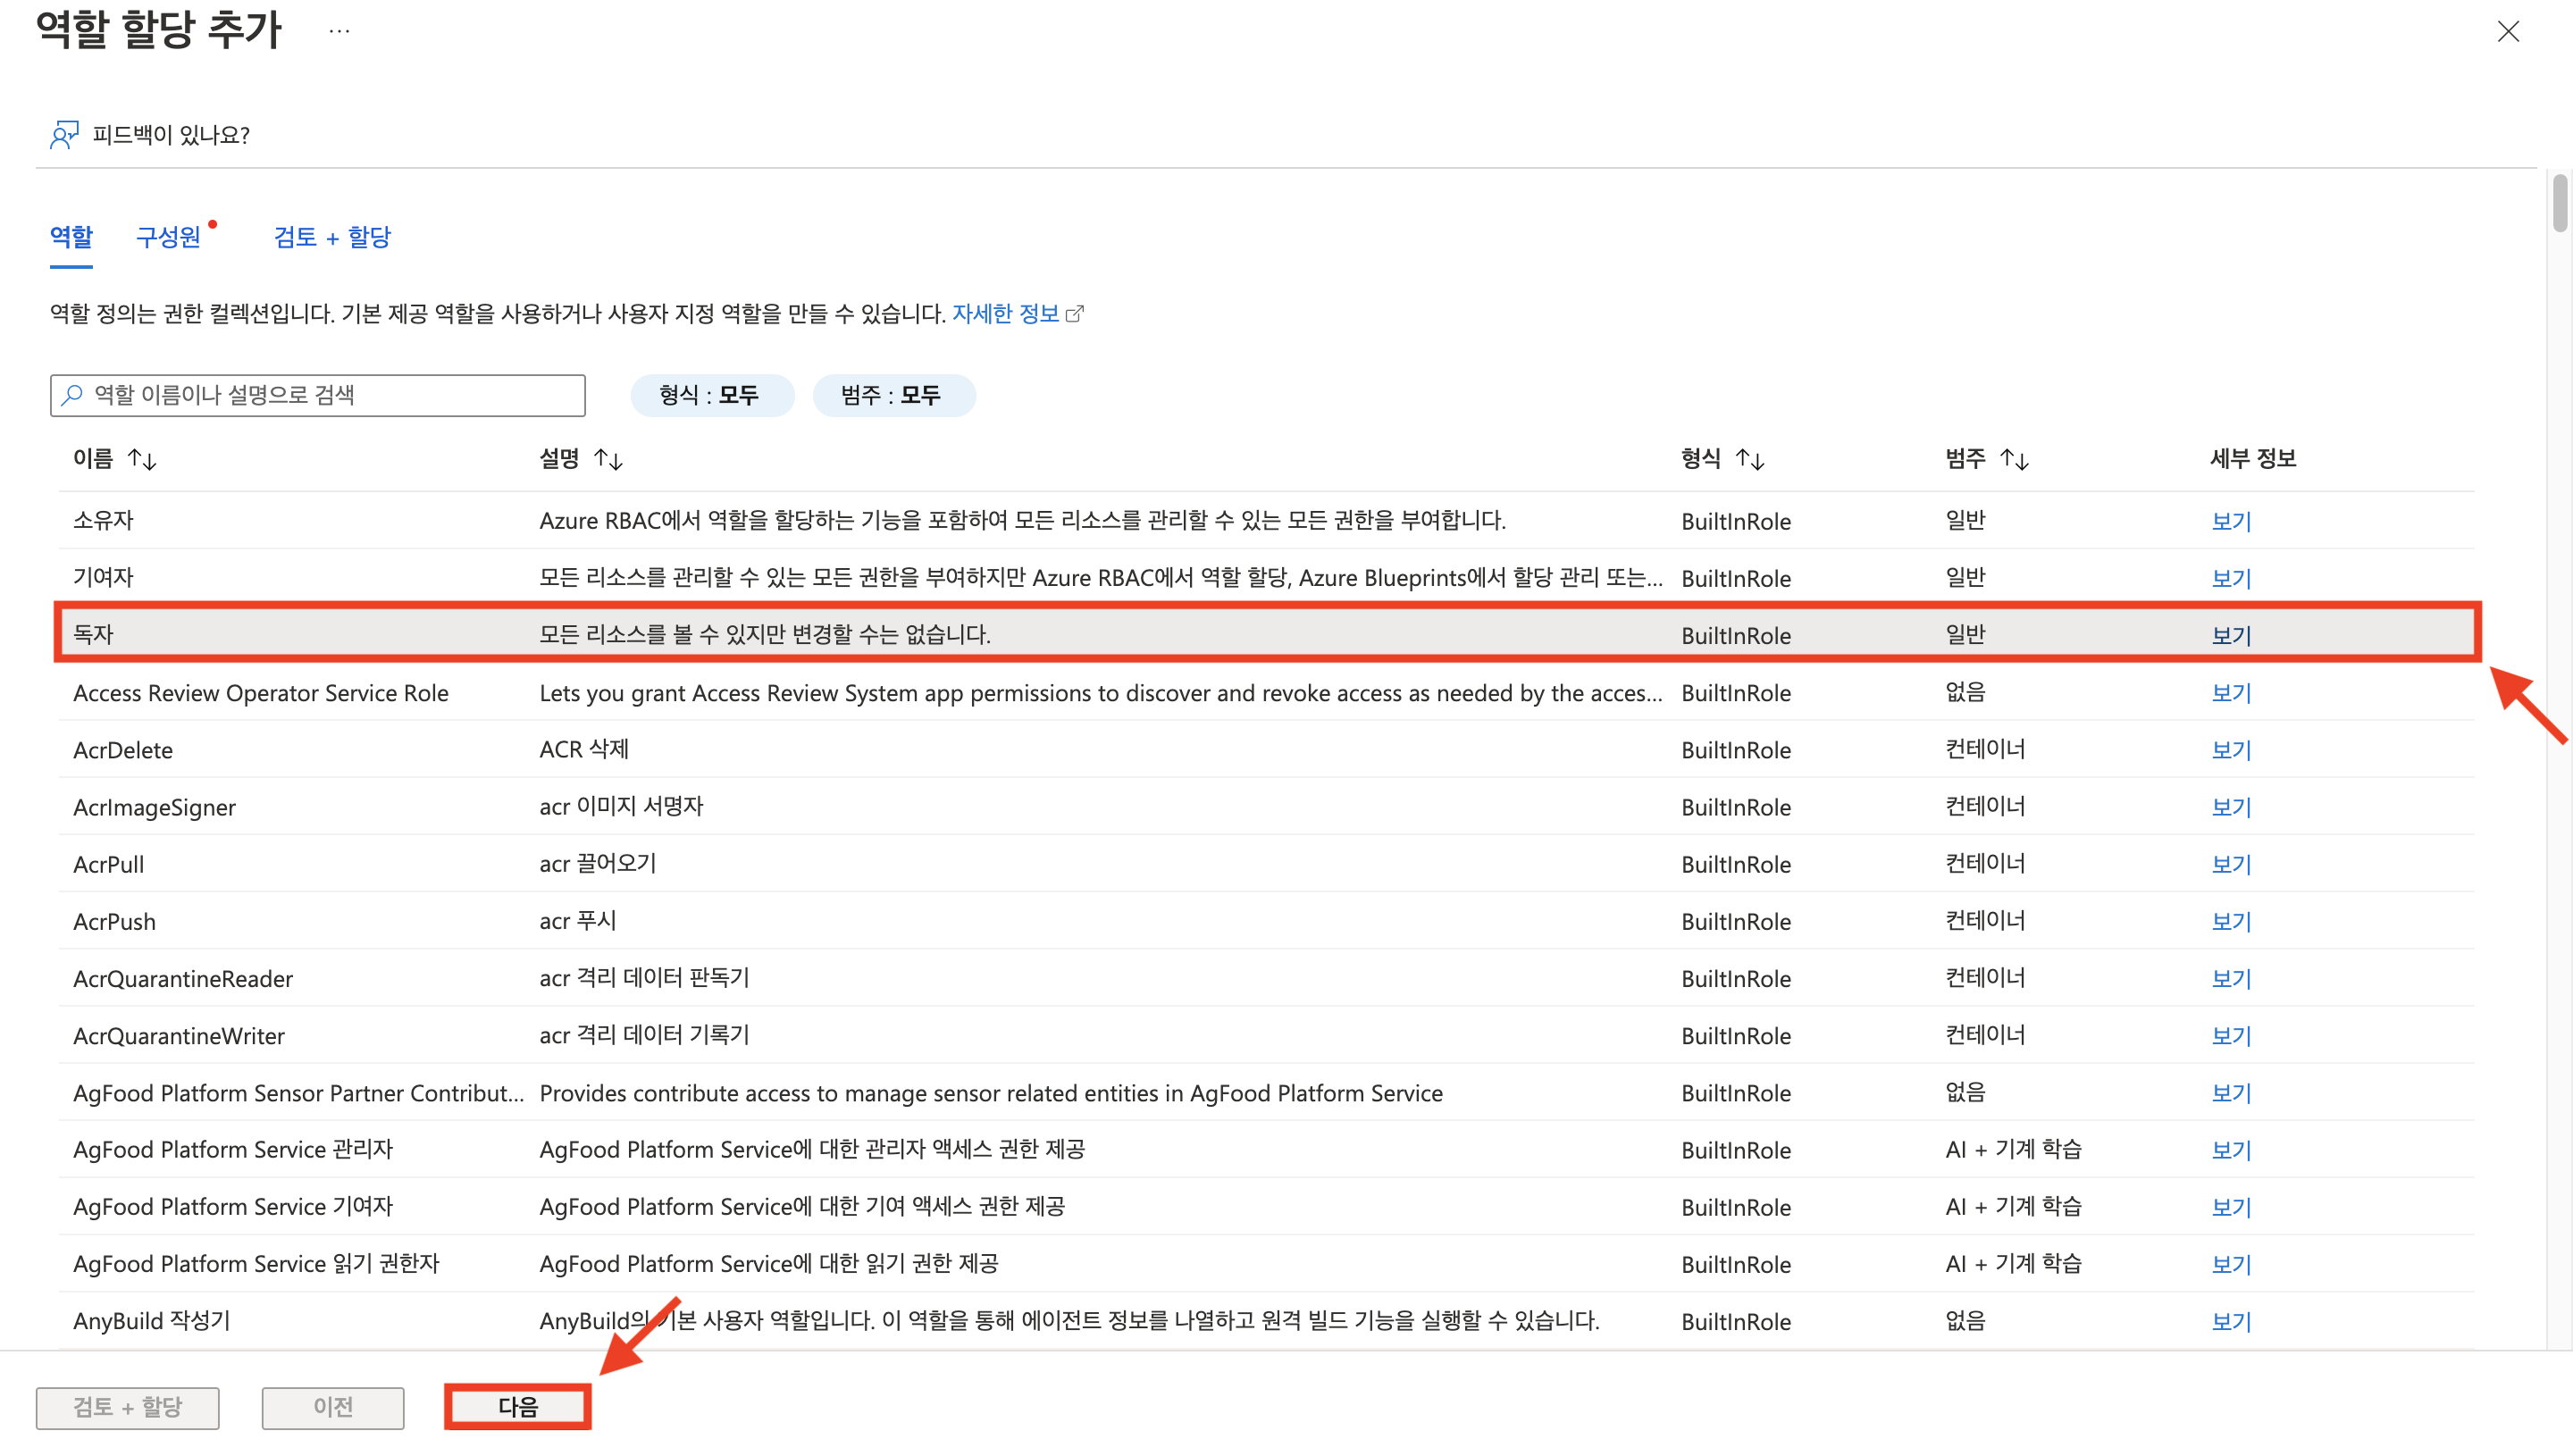
Click [Reader] role and then click [Next] button
Click [Select members] button to select application as member
After adding members, click [Select] button
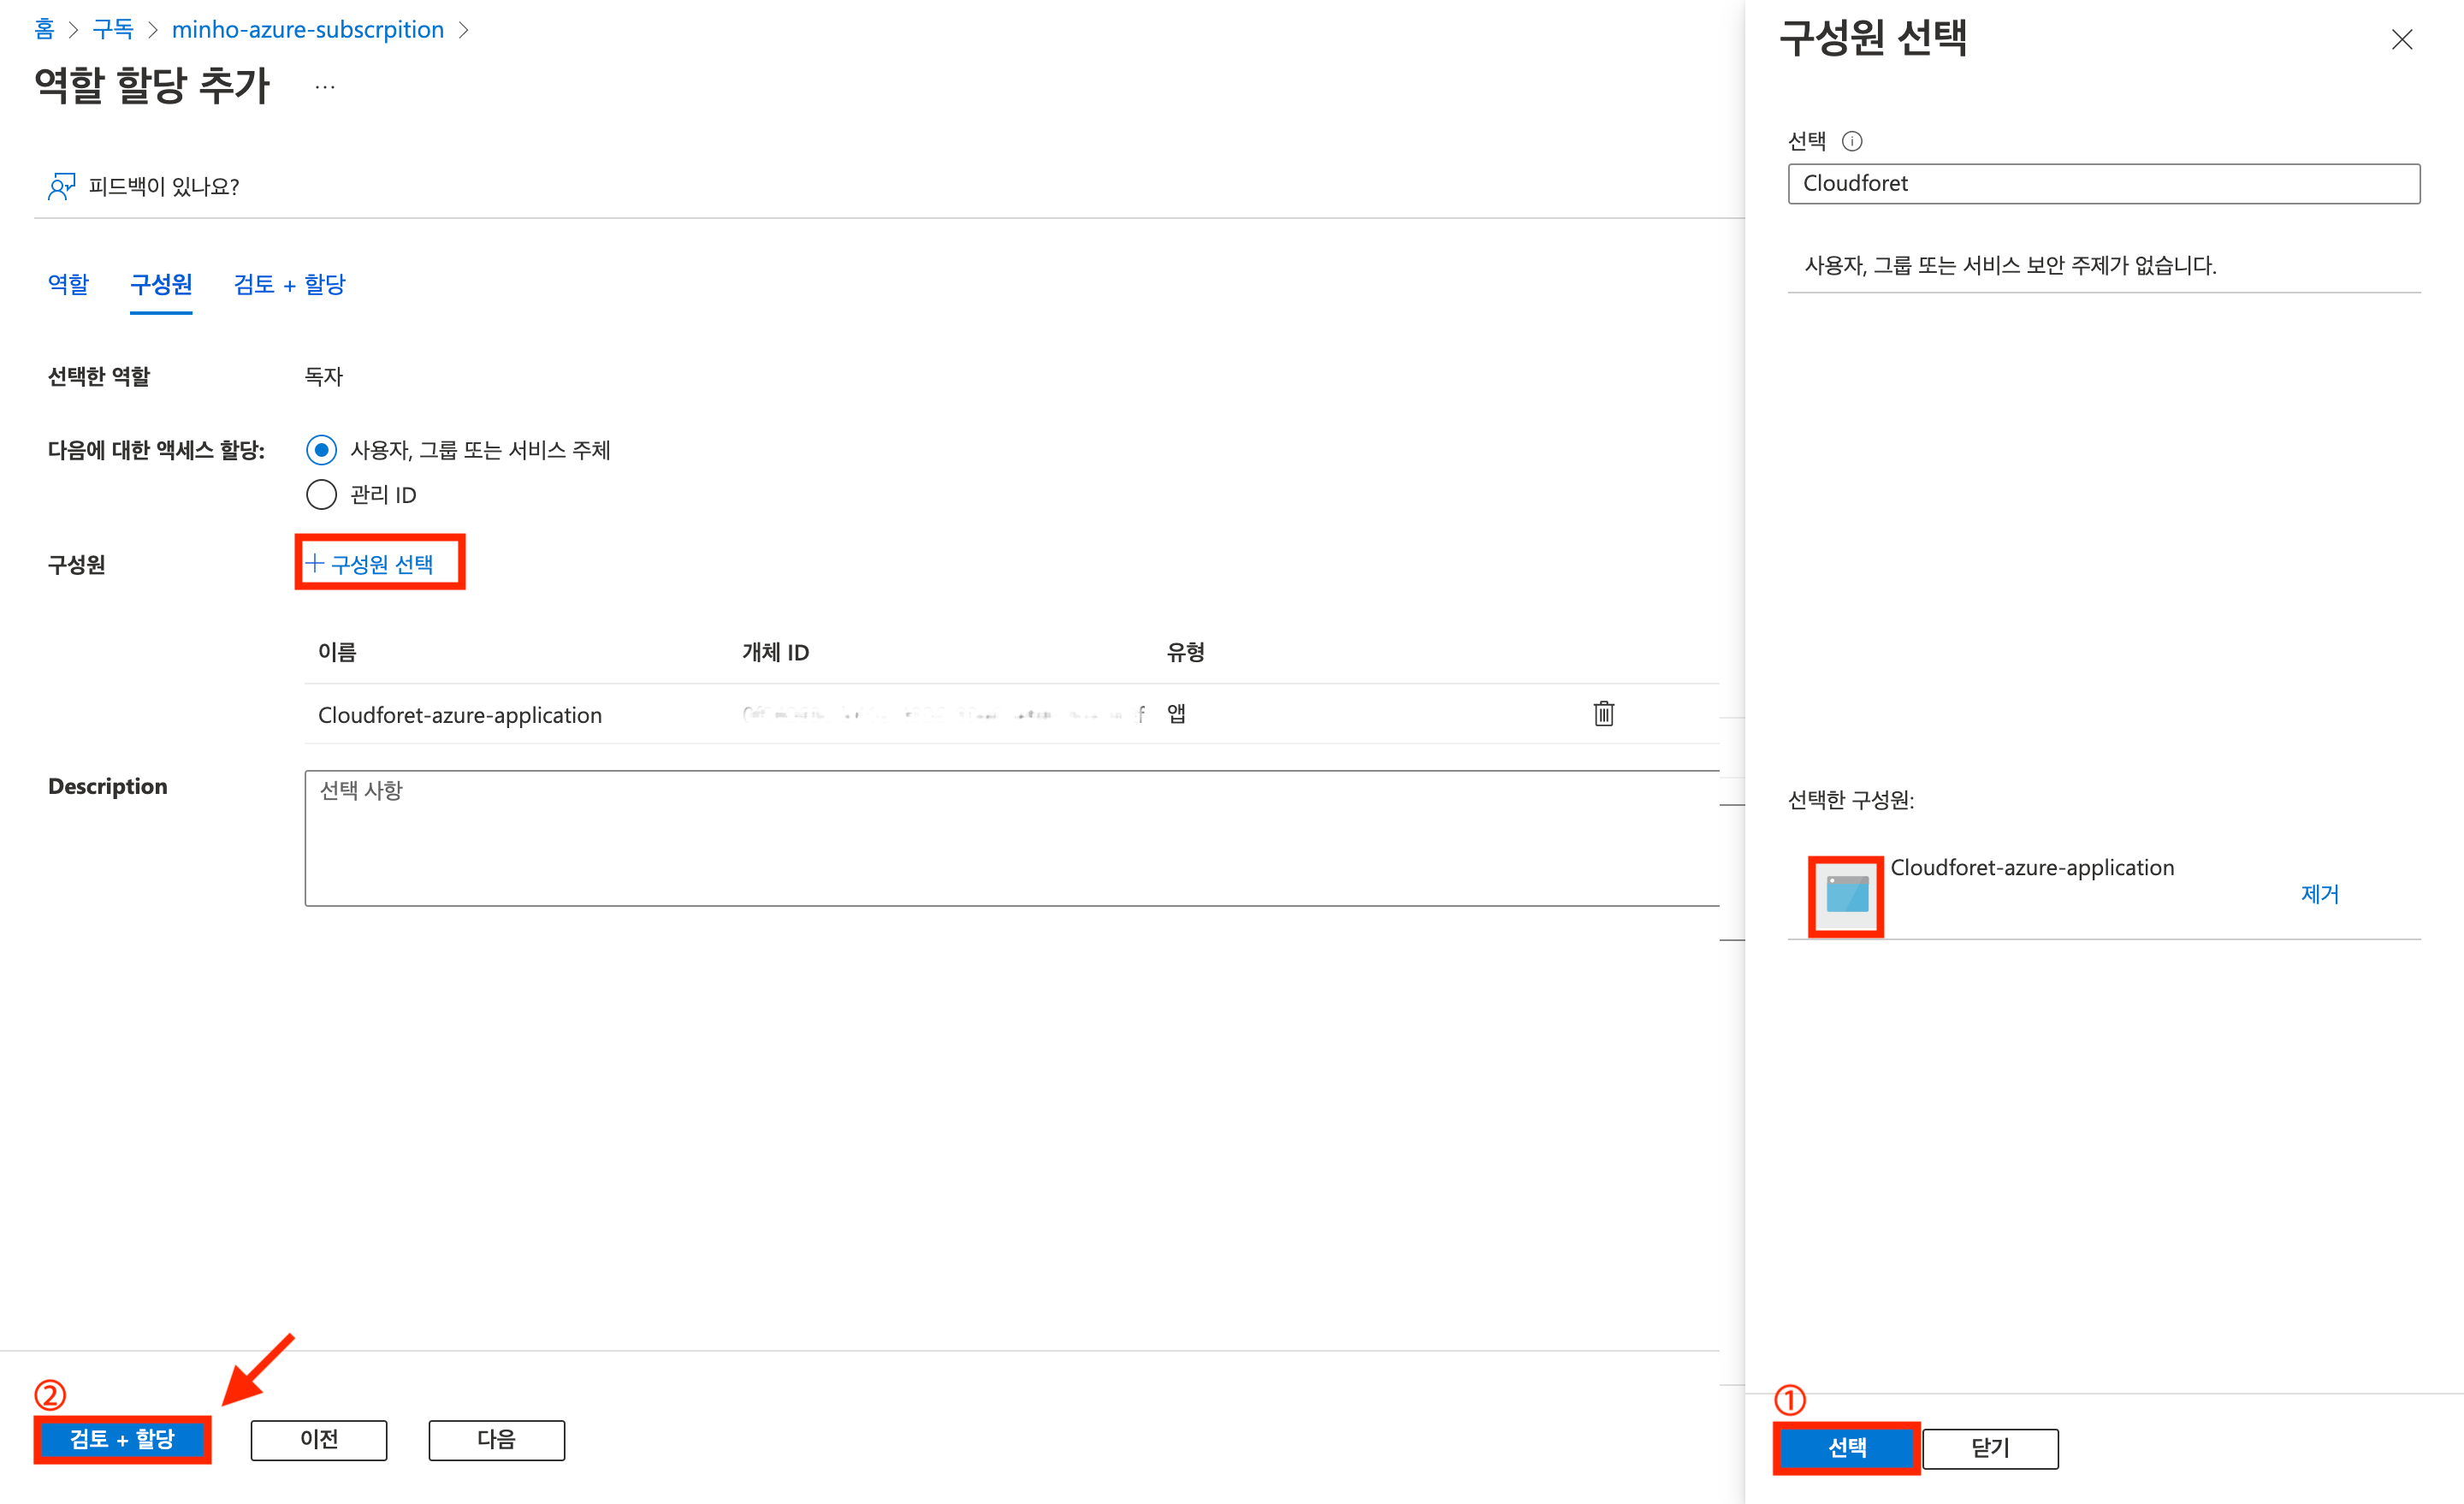
Click [Review + Assign] button when it is activated
3-2. Assign role to resource group
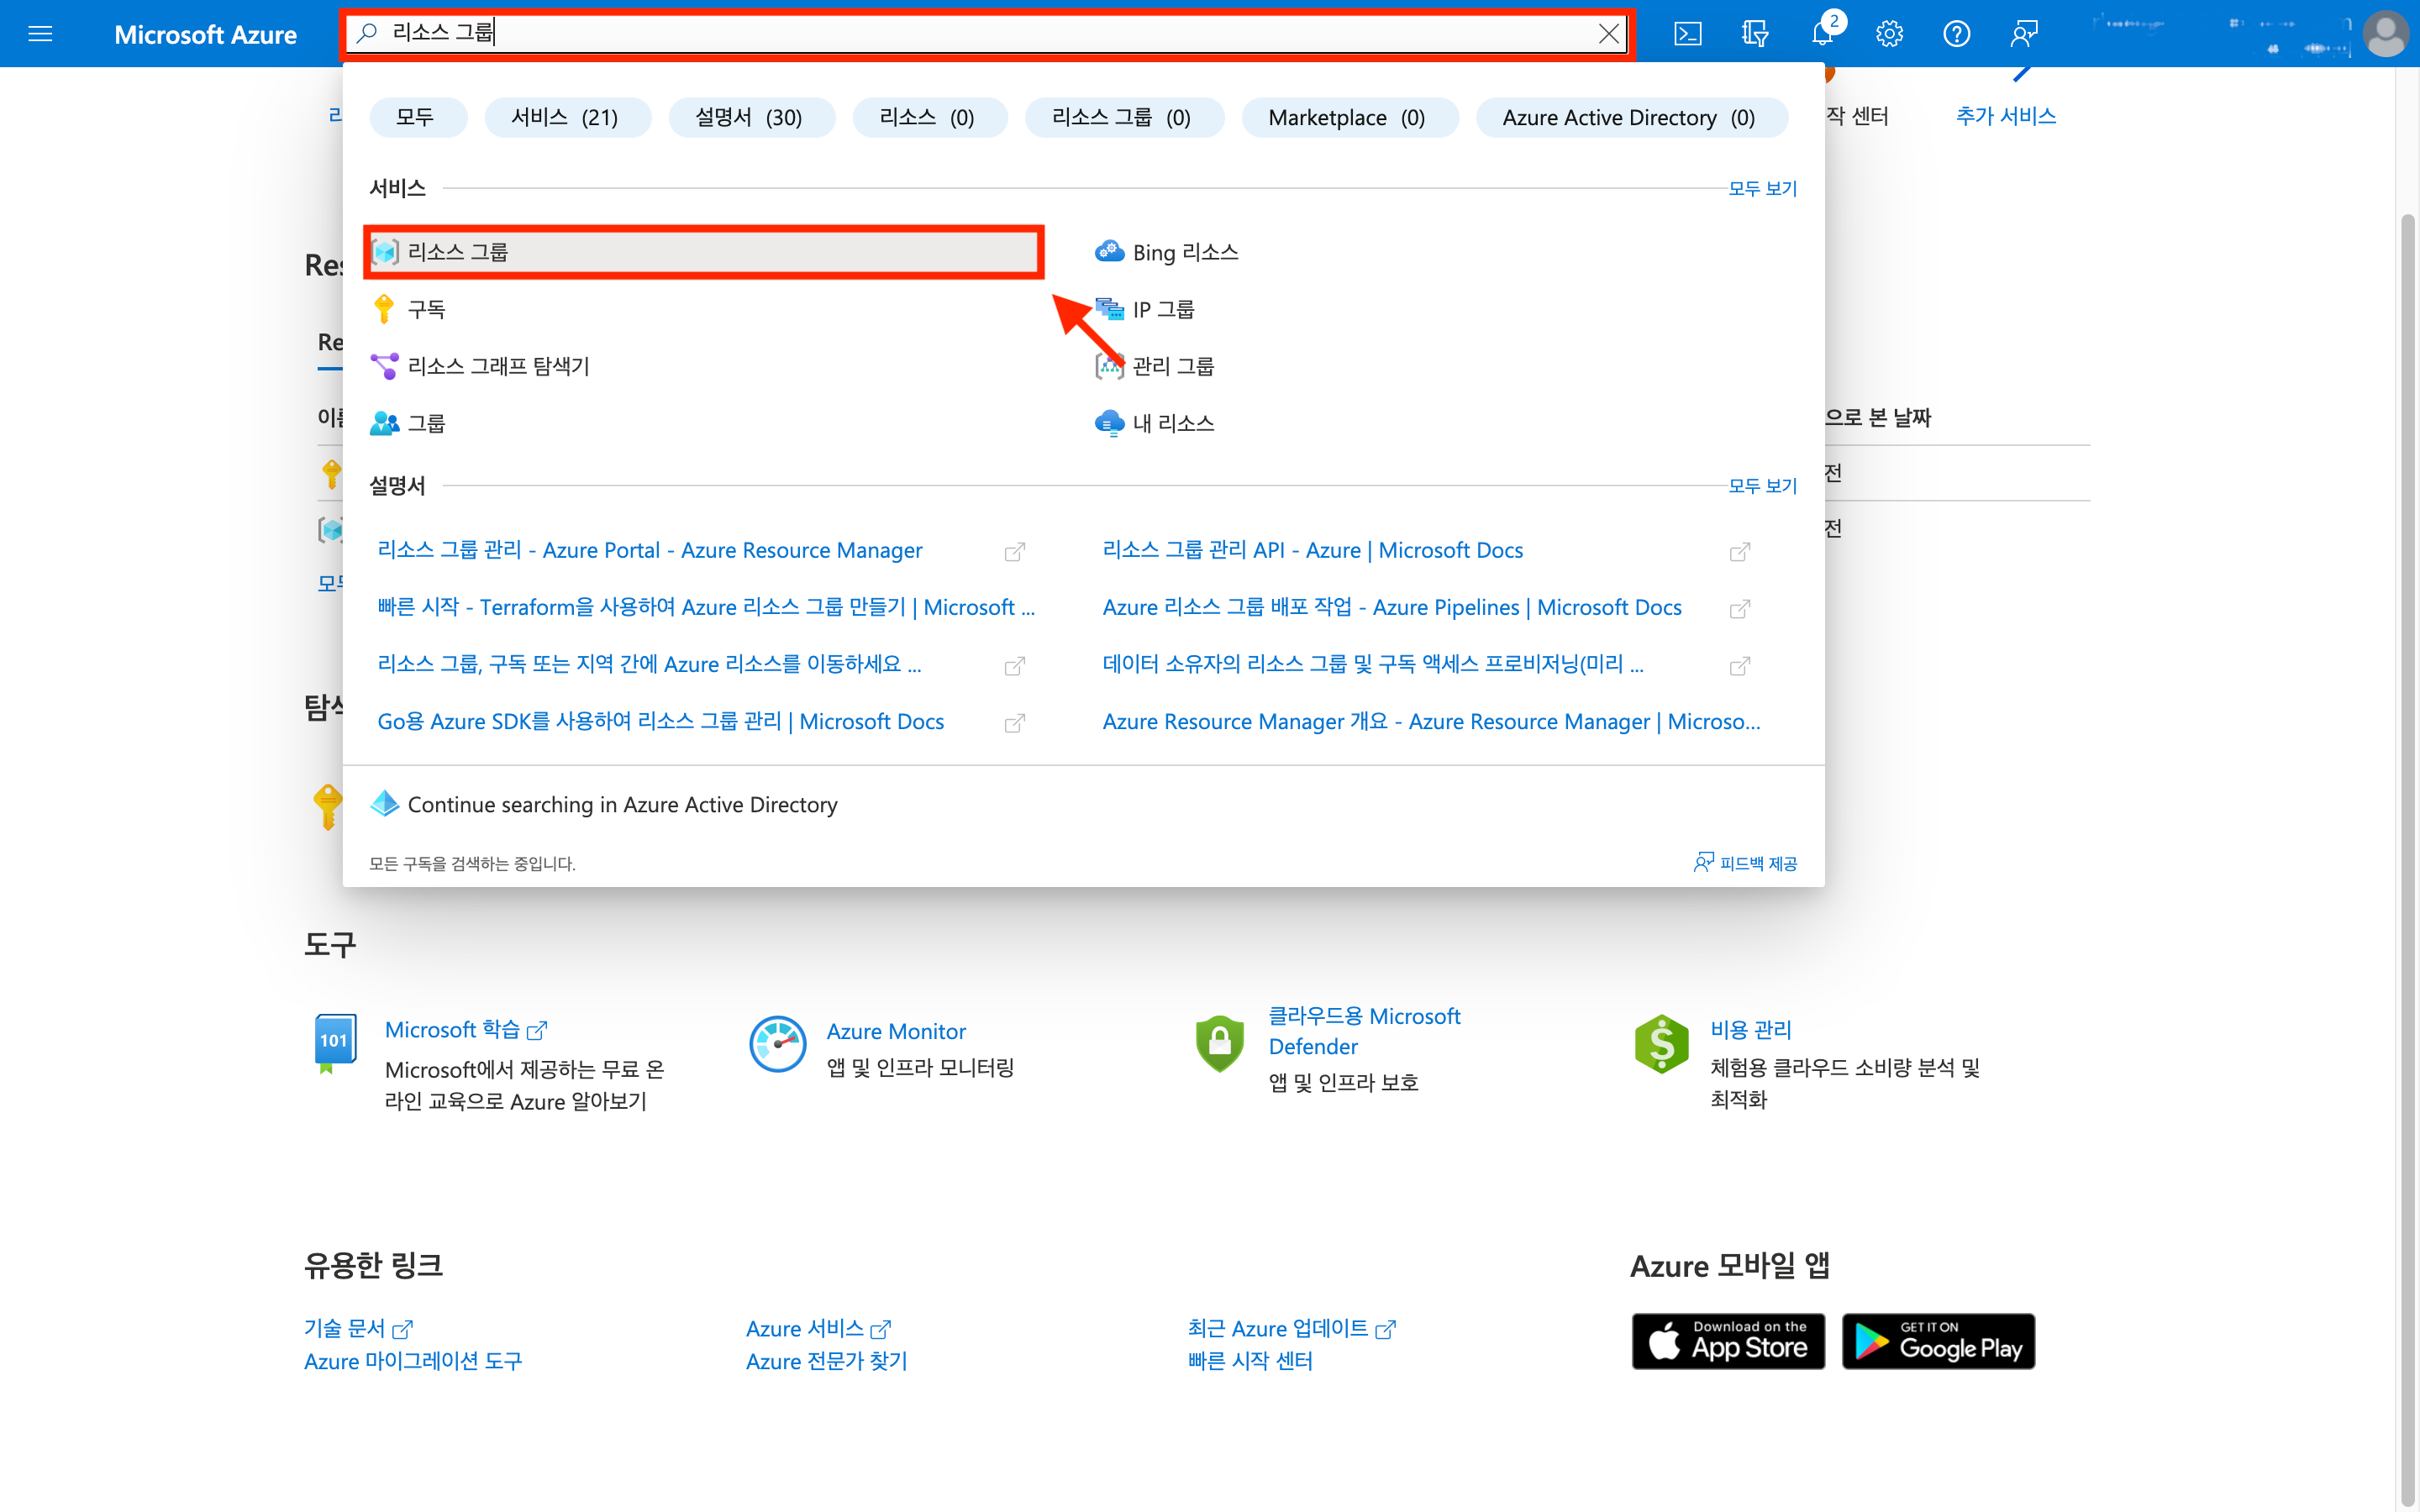
Navigate to [Resource groups] page in Azure Portal
Enter ‘Resource groups’ in the search bar and click on the [Resource groups] in the service list.
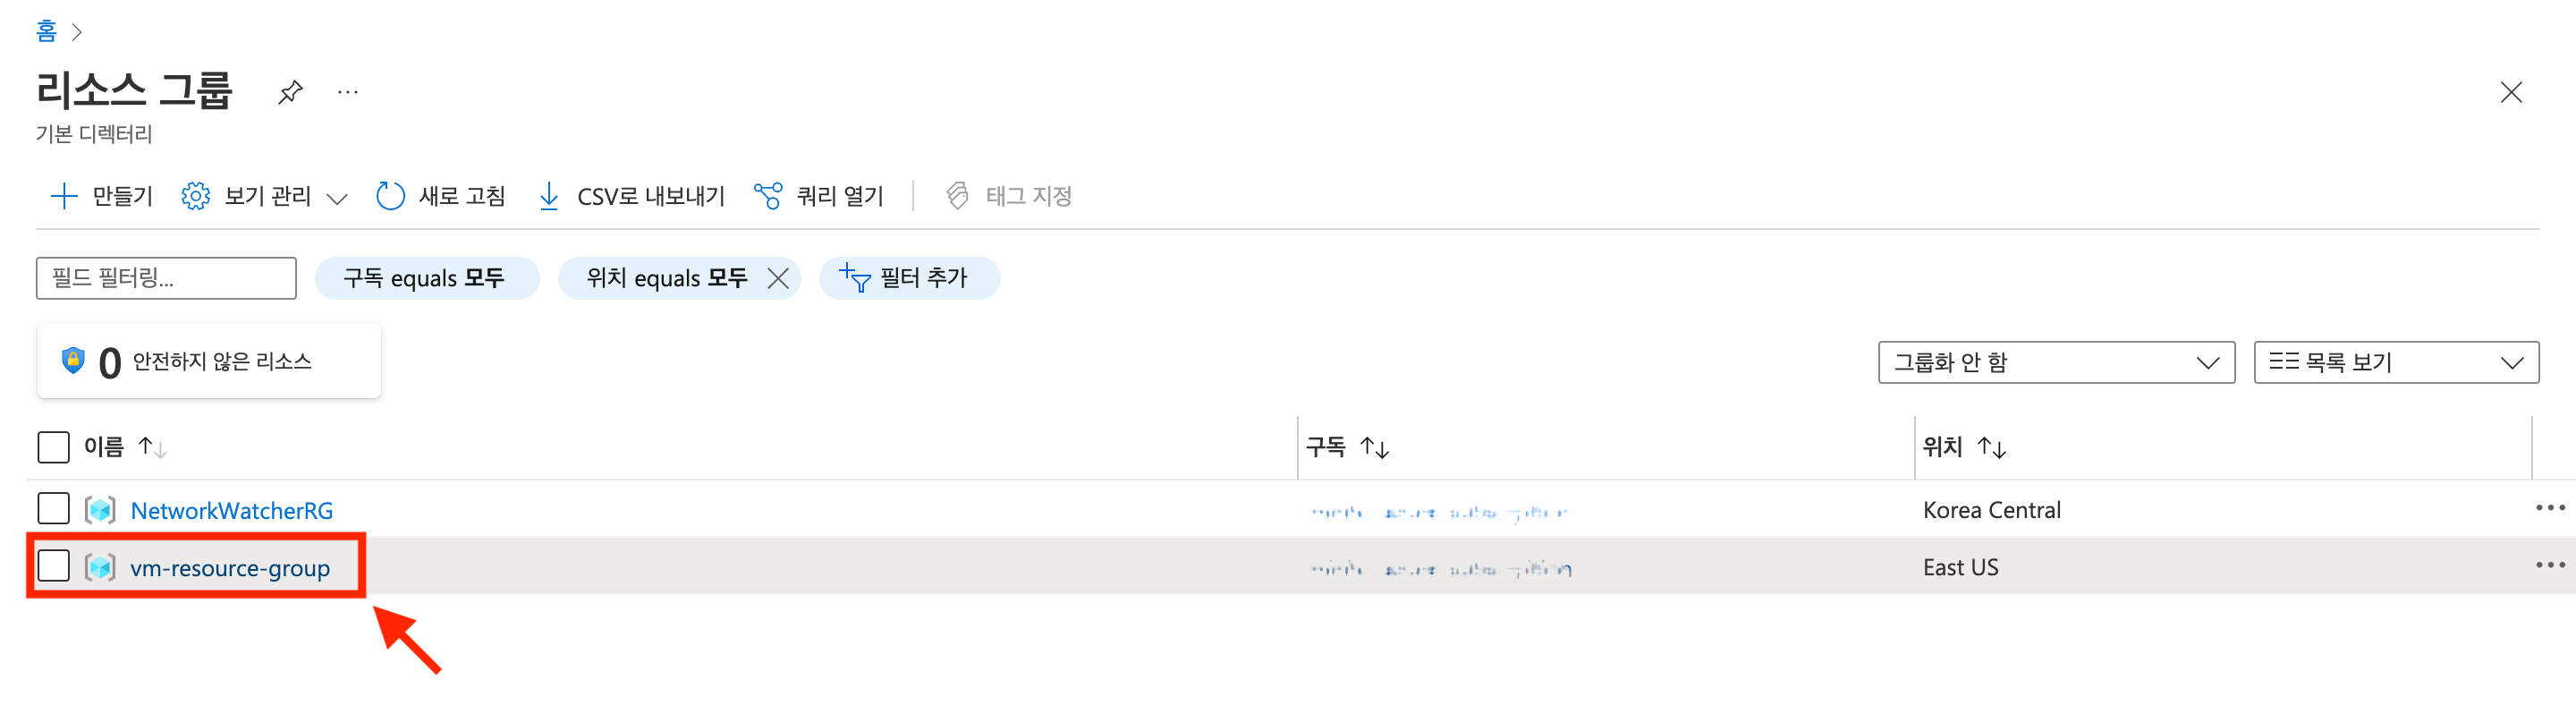
Click resource group to assign permission
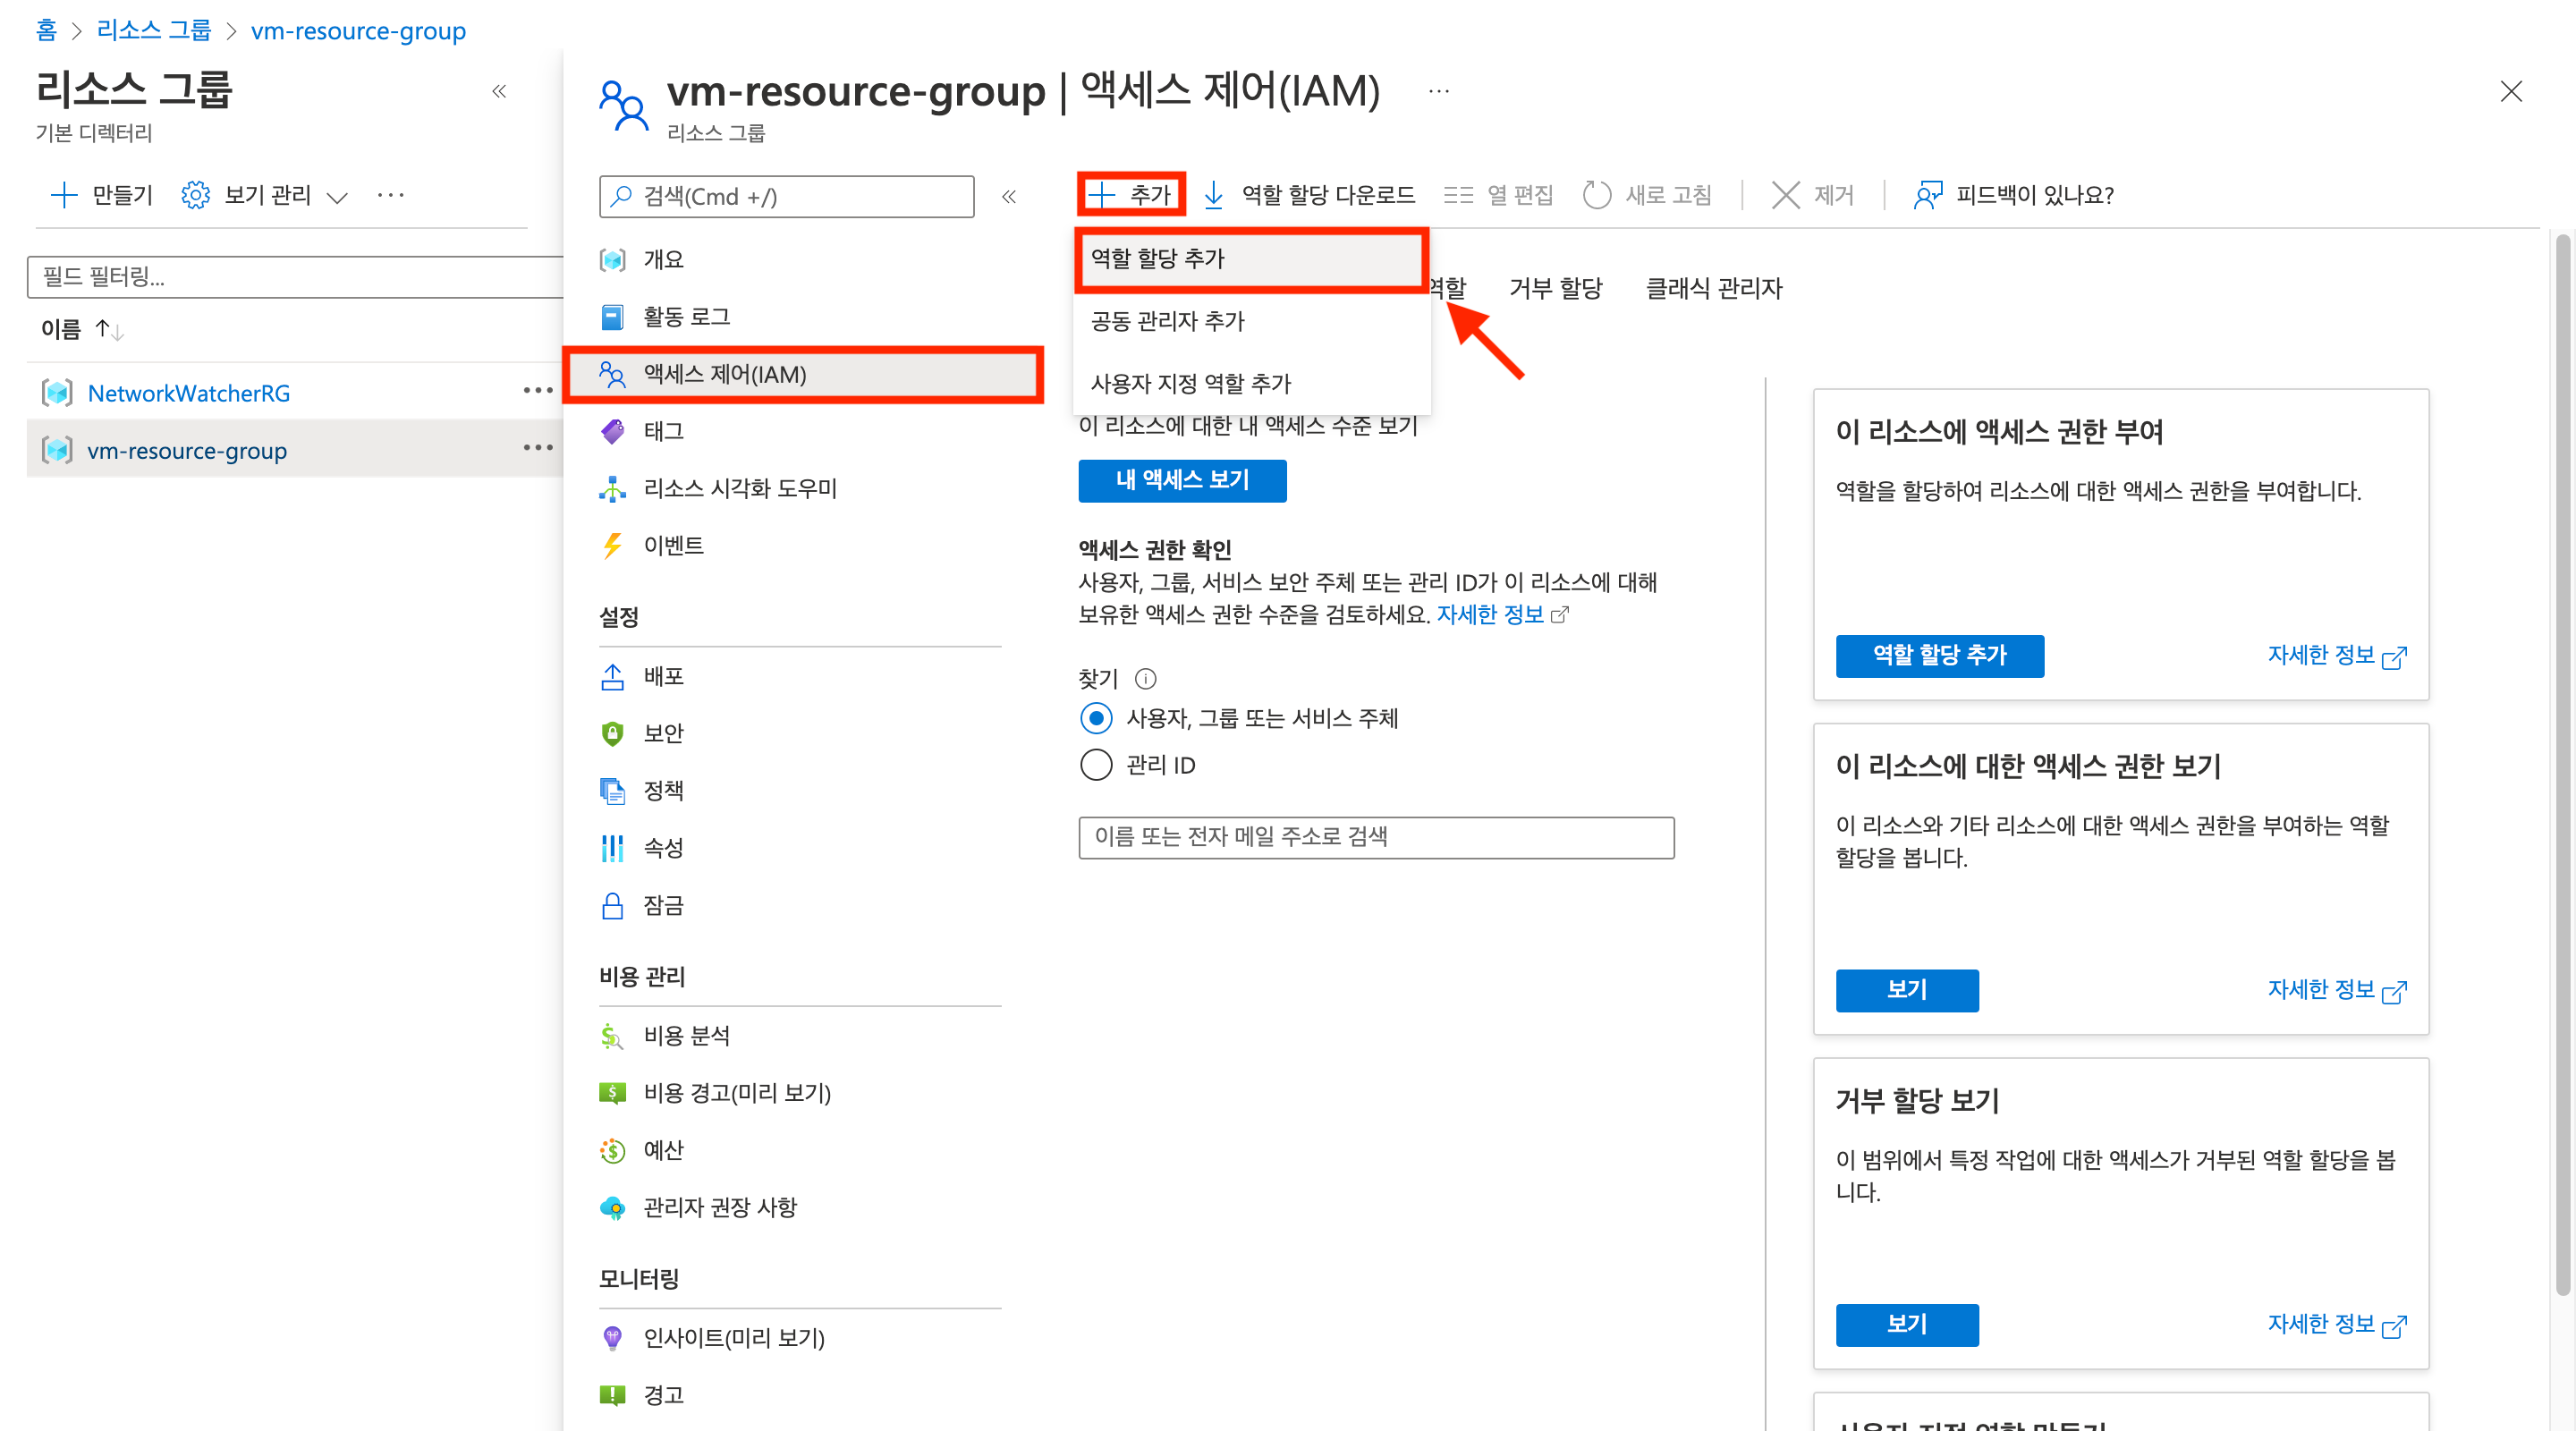
Click [Access Control (IAM) > Add > Role Assignment Add] button
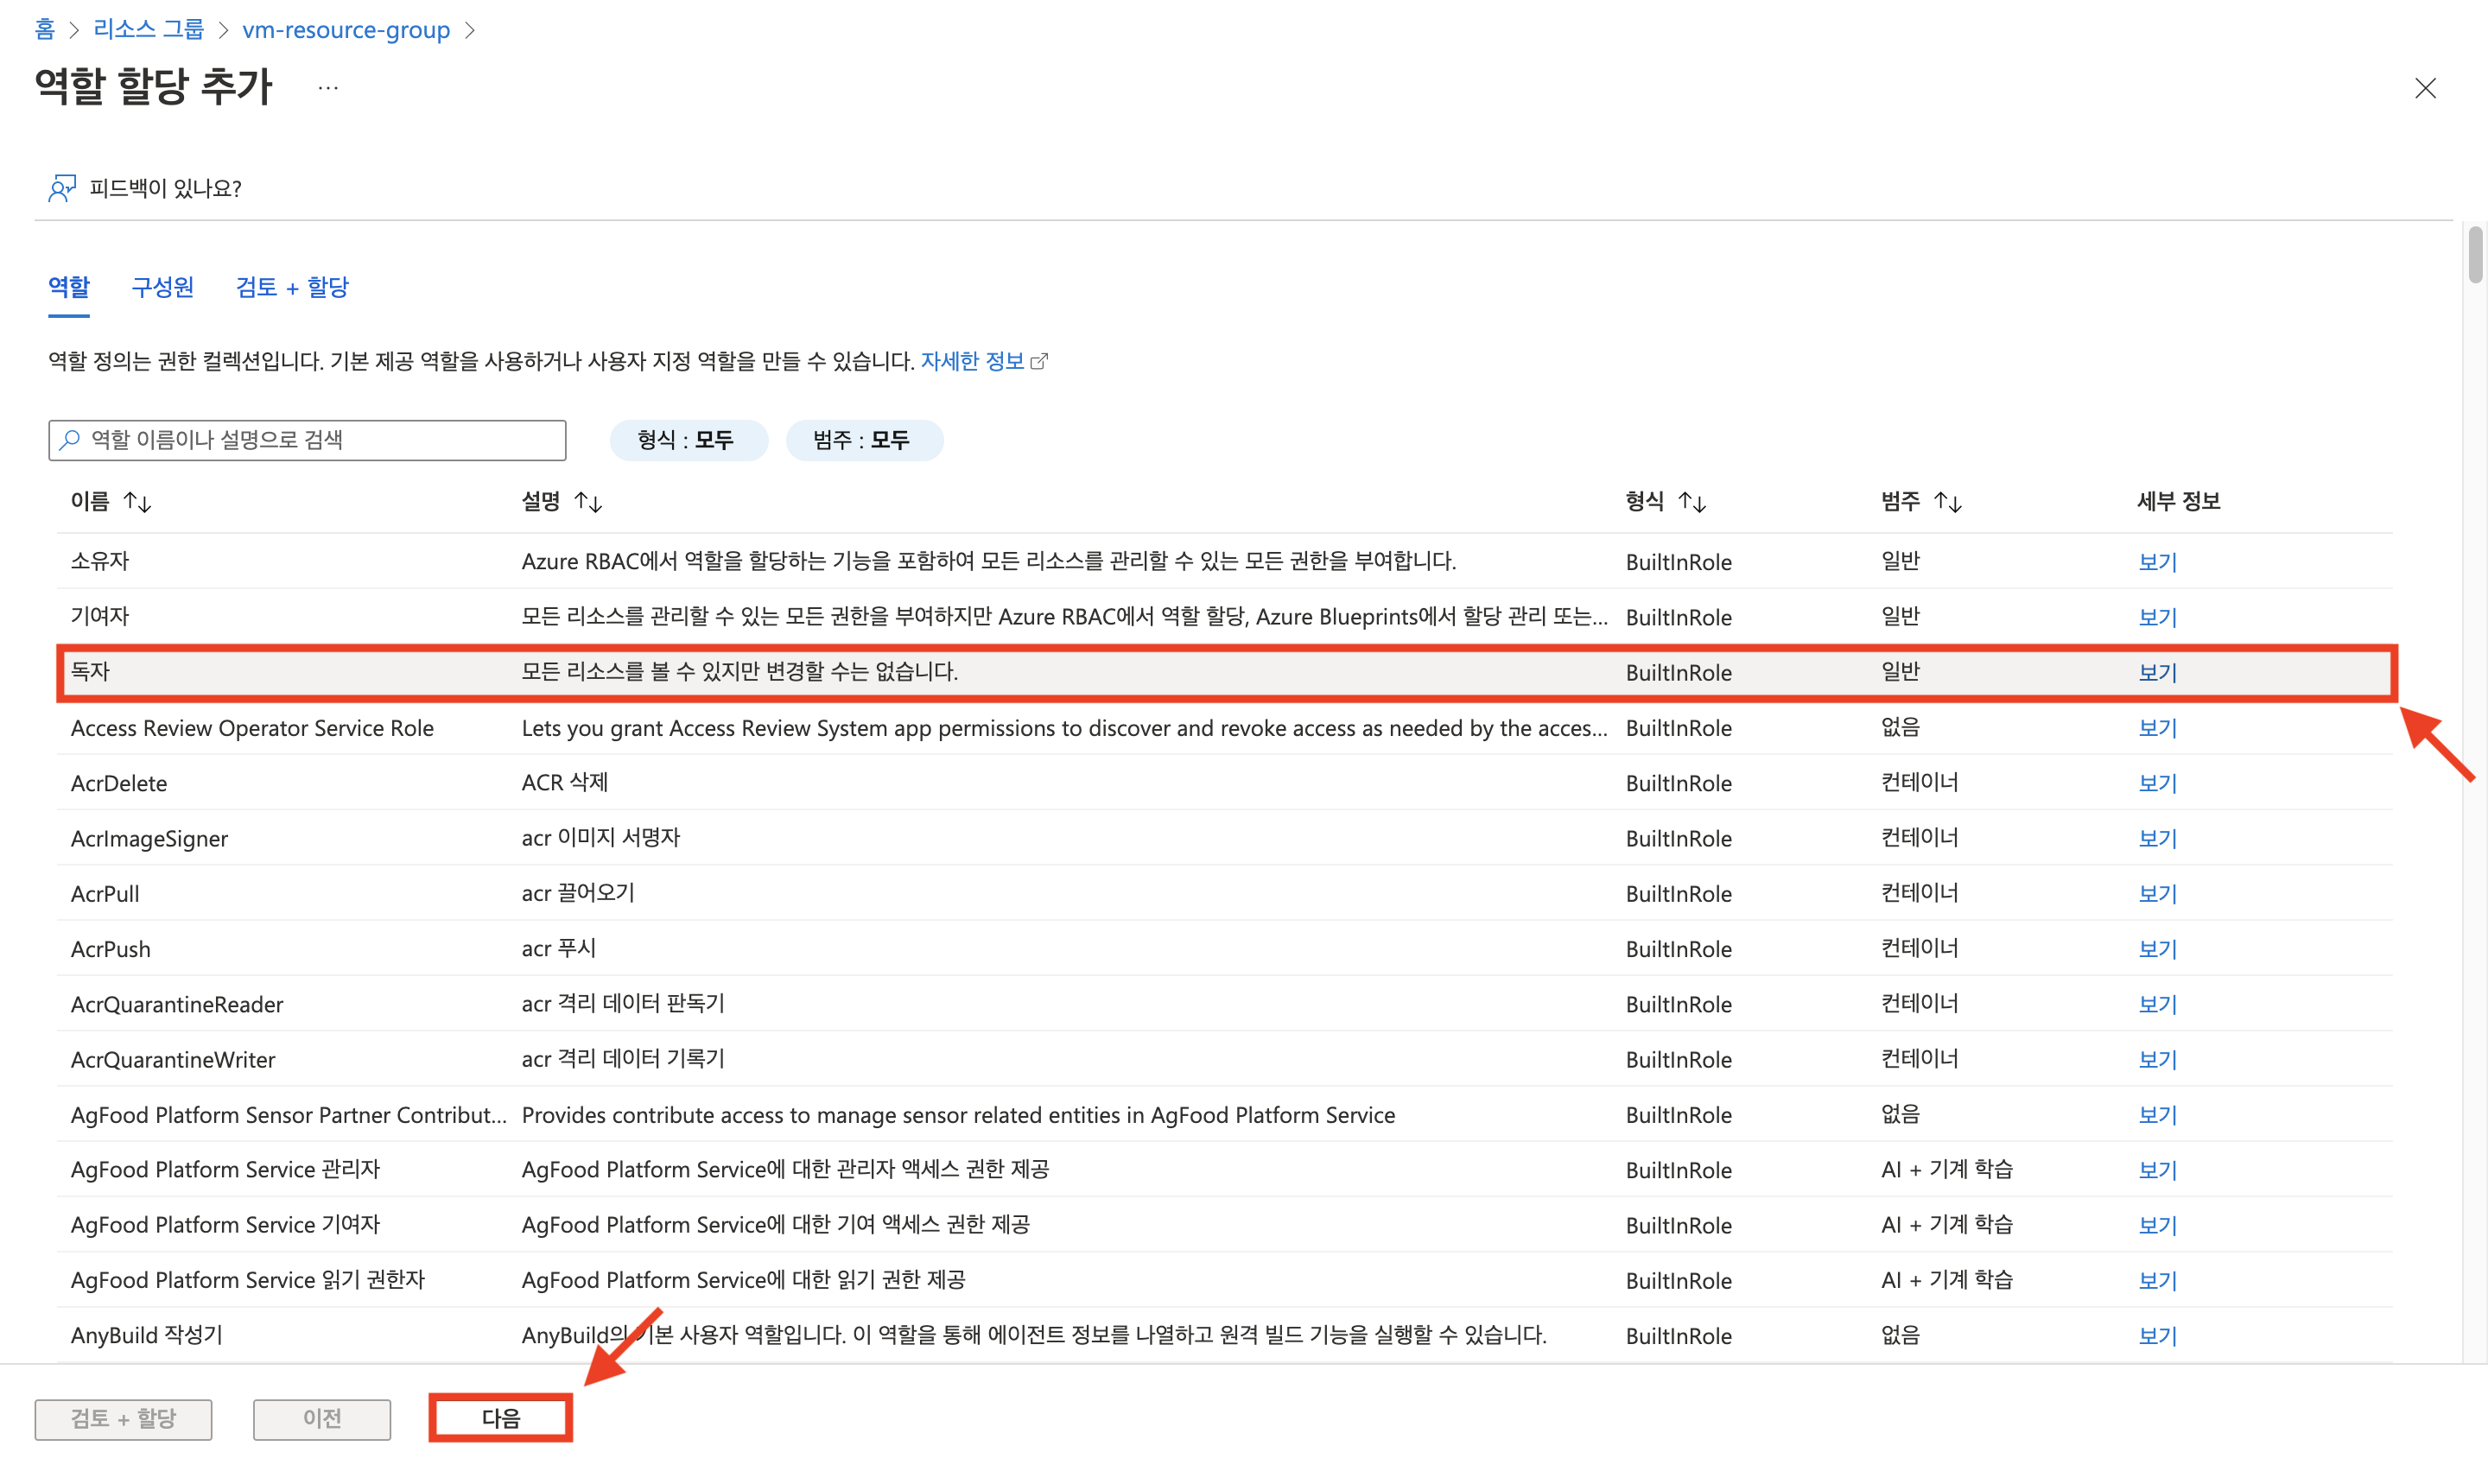
Click [Reader] permission and then click [Next] button
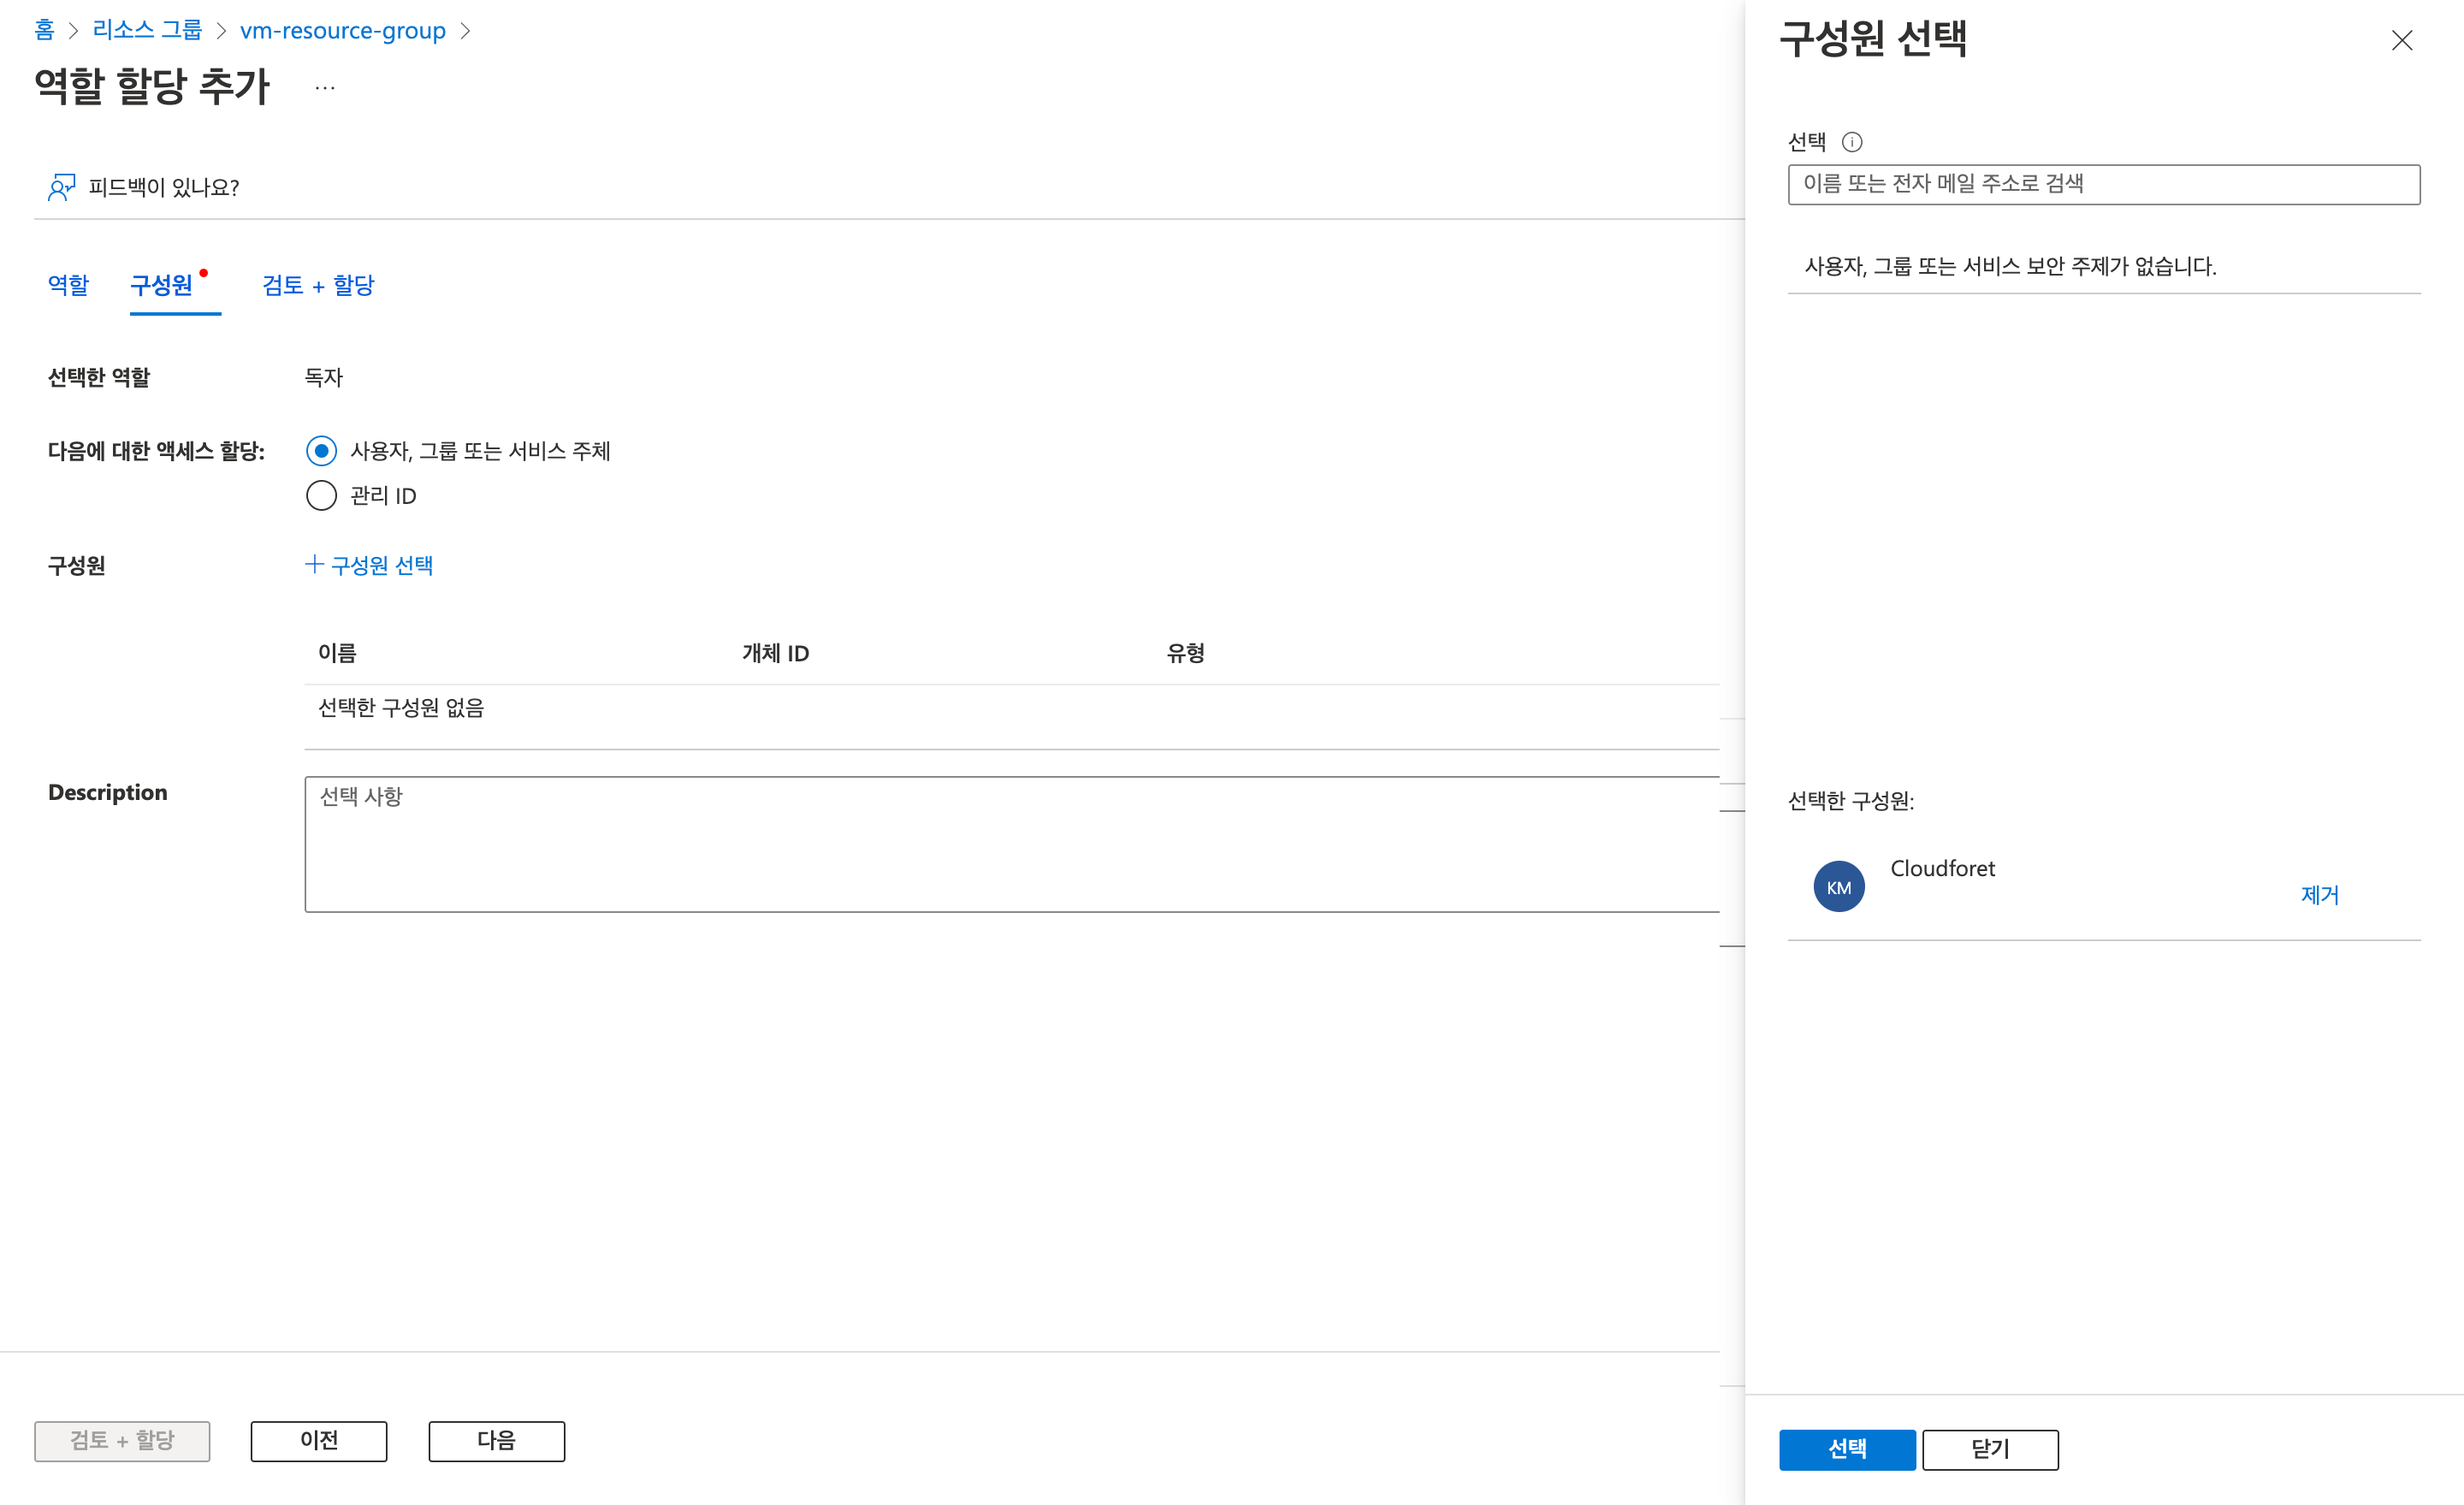
Select [Users, groups, service principals] and click [Select members]
Confirm [Selected members] and click [Select] button
Click [Review + Assign] button when it is activated
4. App Authentication Key Creation
Authentication key contains credential information for accessing Azure resources.
Through authentication key creation, you can obtain Client Secret setup information.
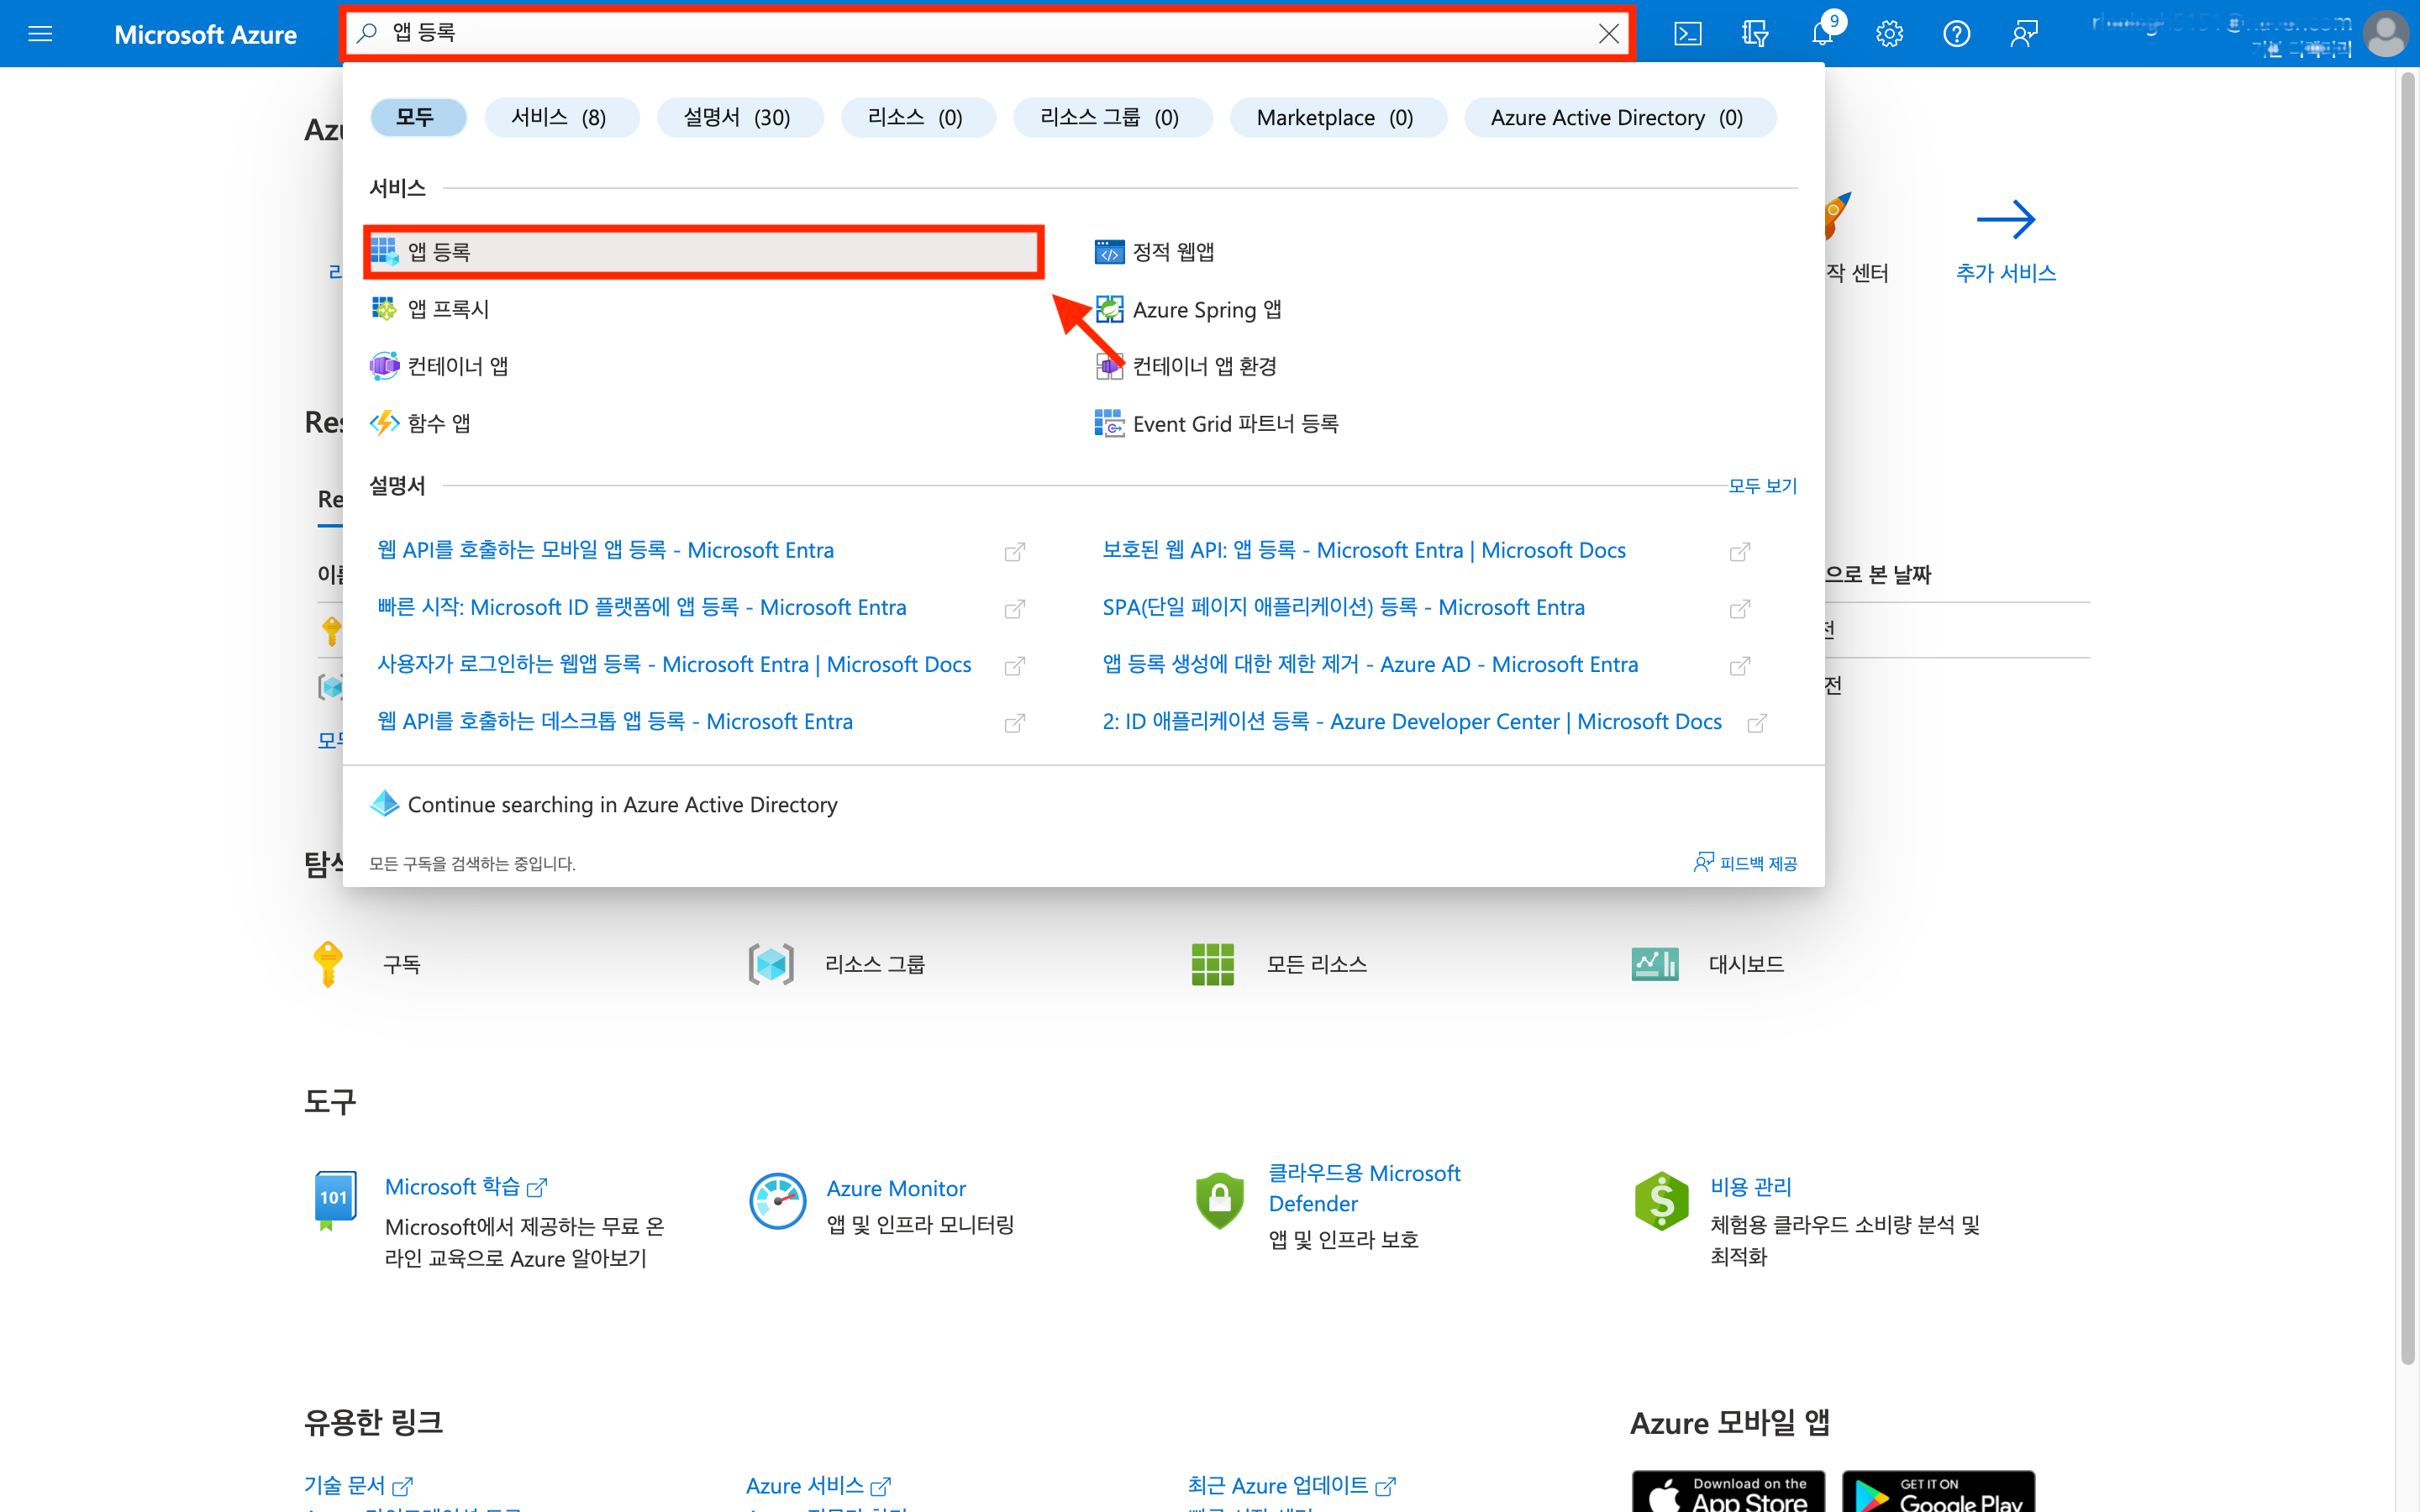
Navigate to [App registrations] page in Azure Portal
Enter ‘App registrations’ in the search bar and click [App registrations].
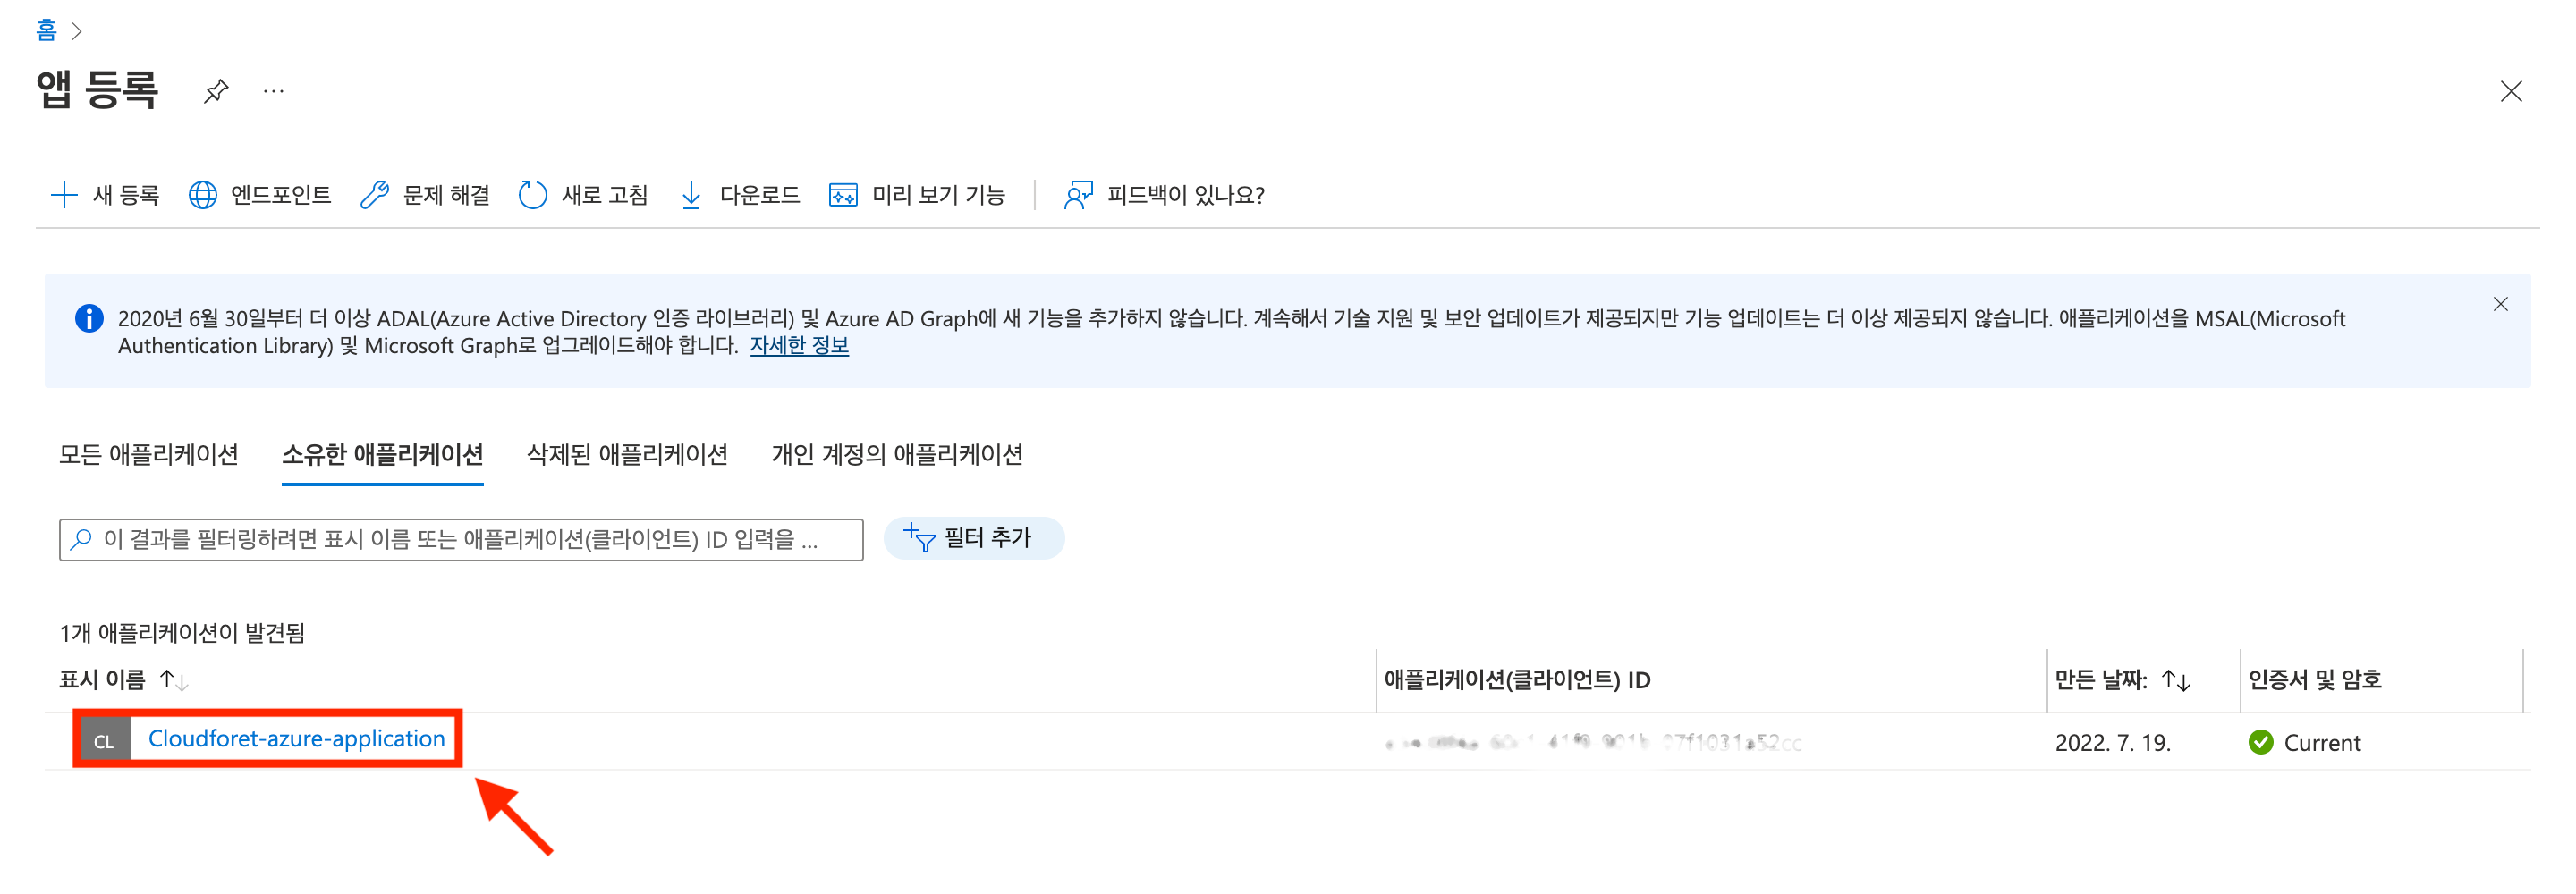
Click application to create authentication key
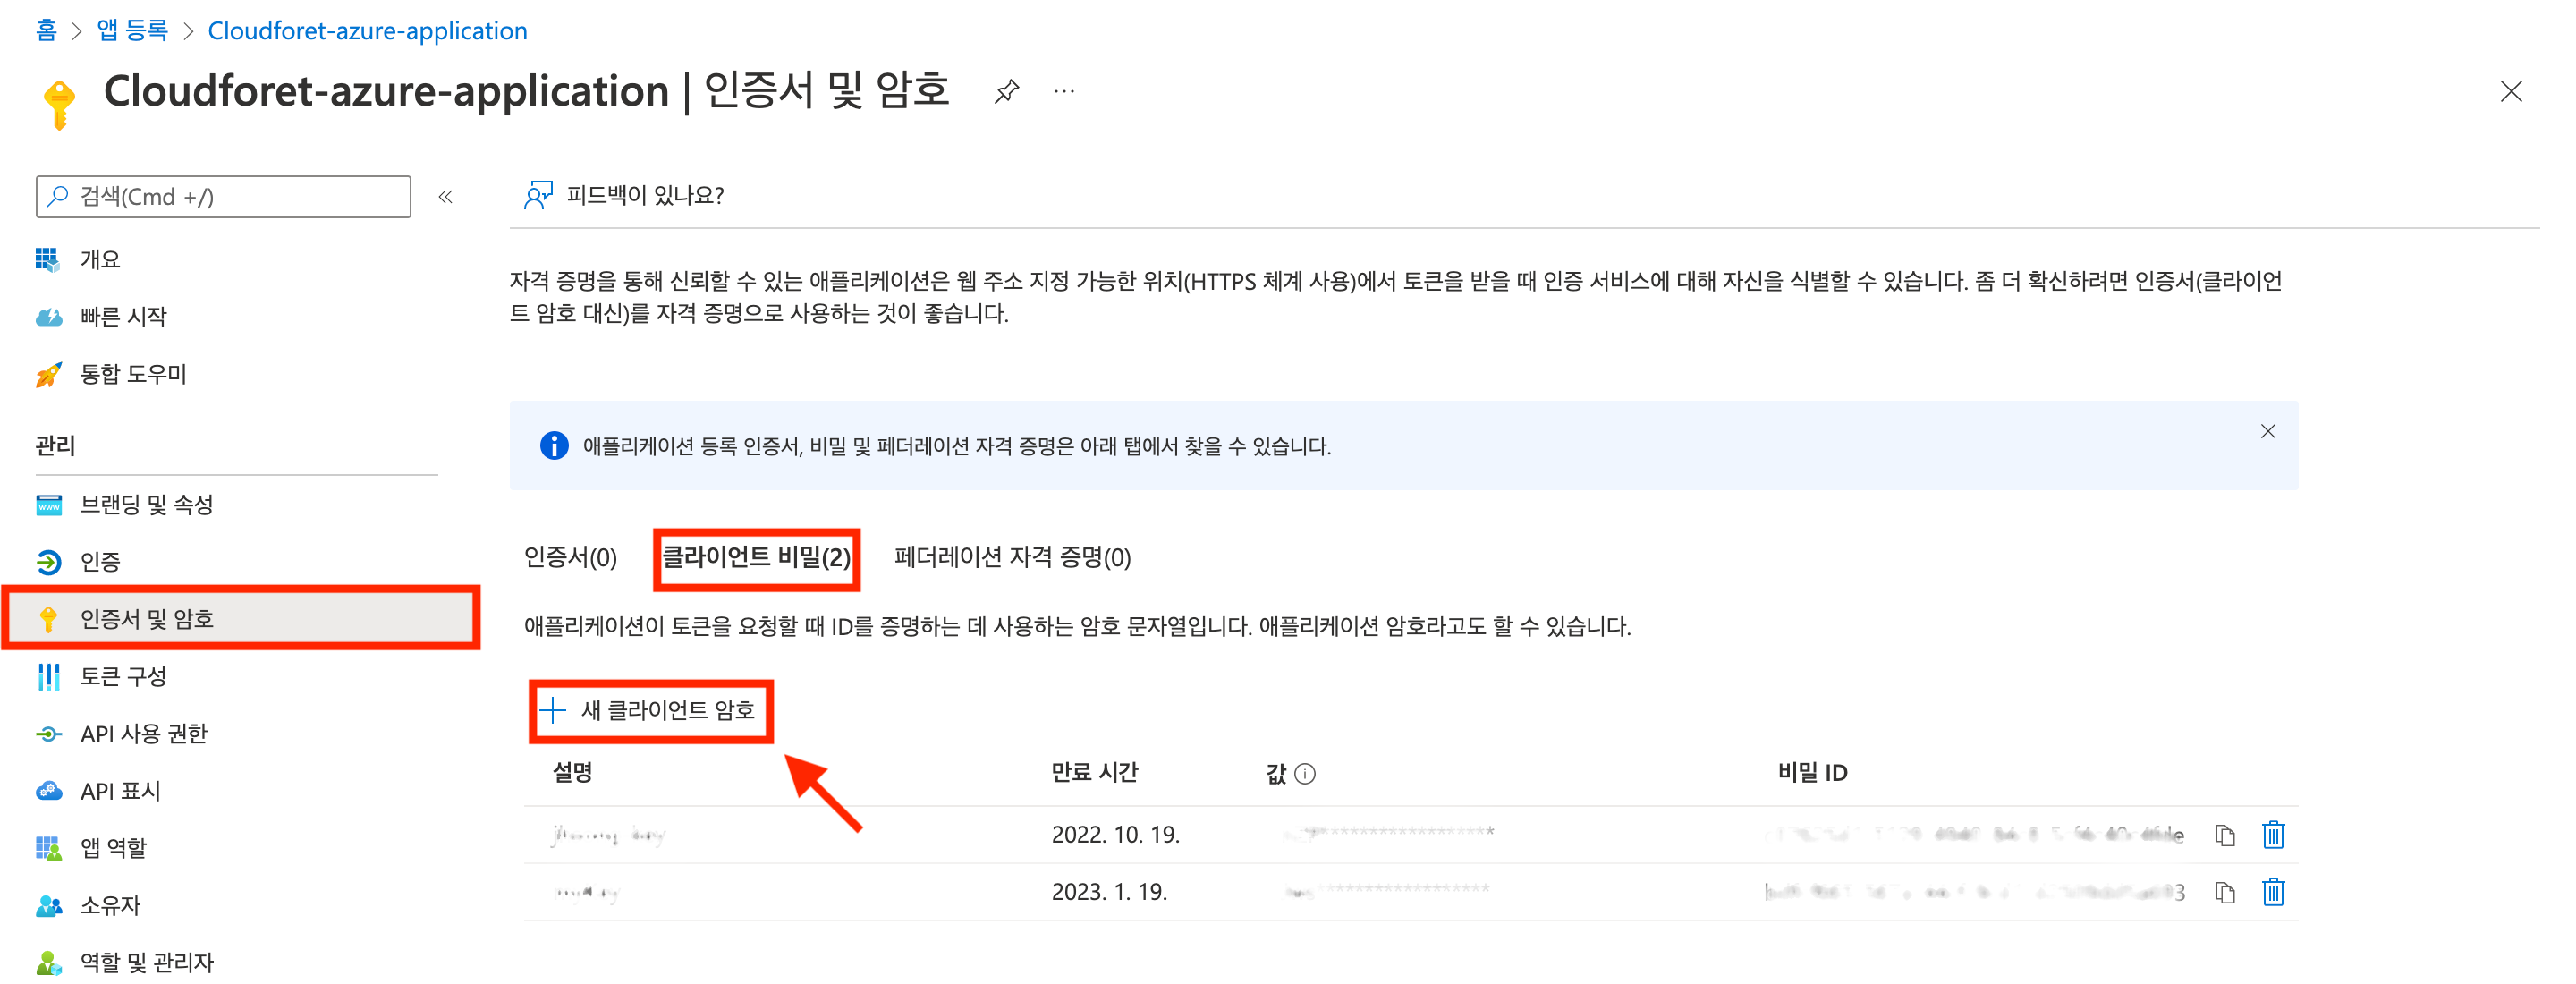
Click [Certificates & secrets > Client secrets] tab and then click [New client secret] button
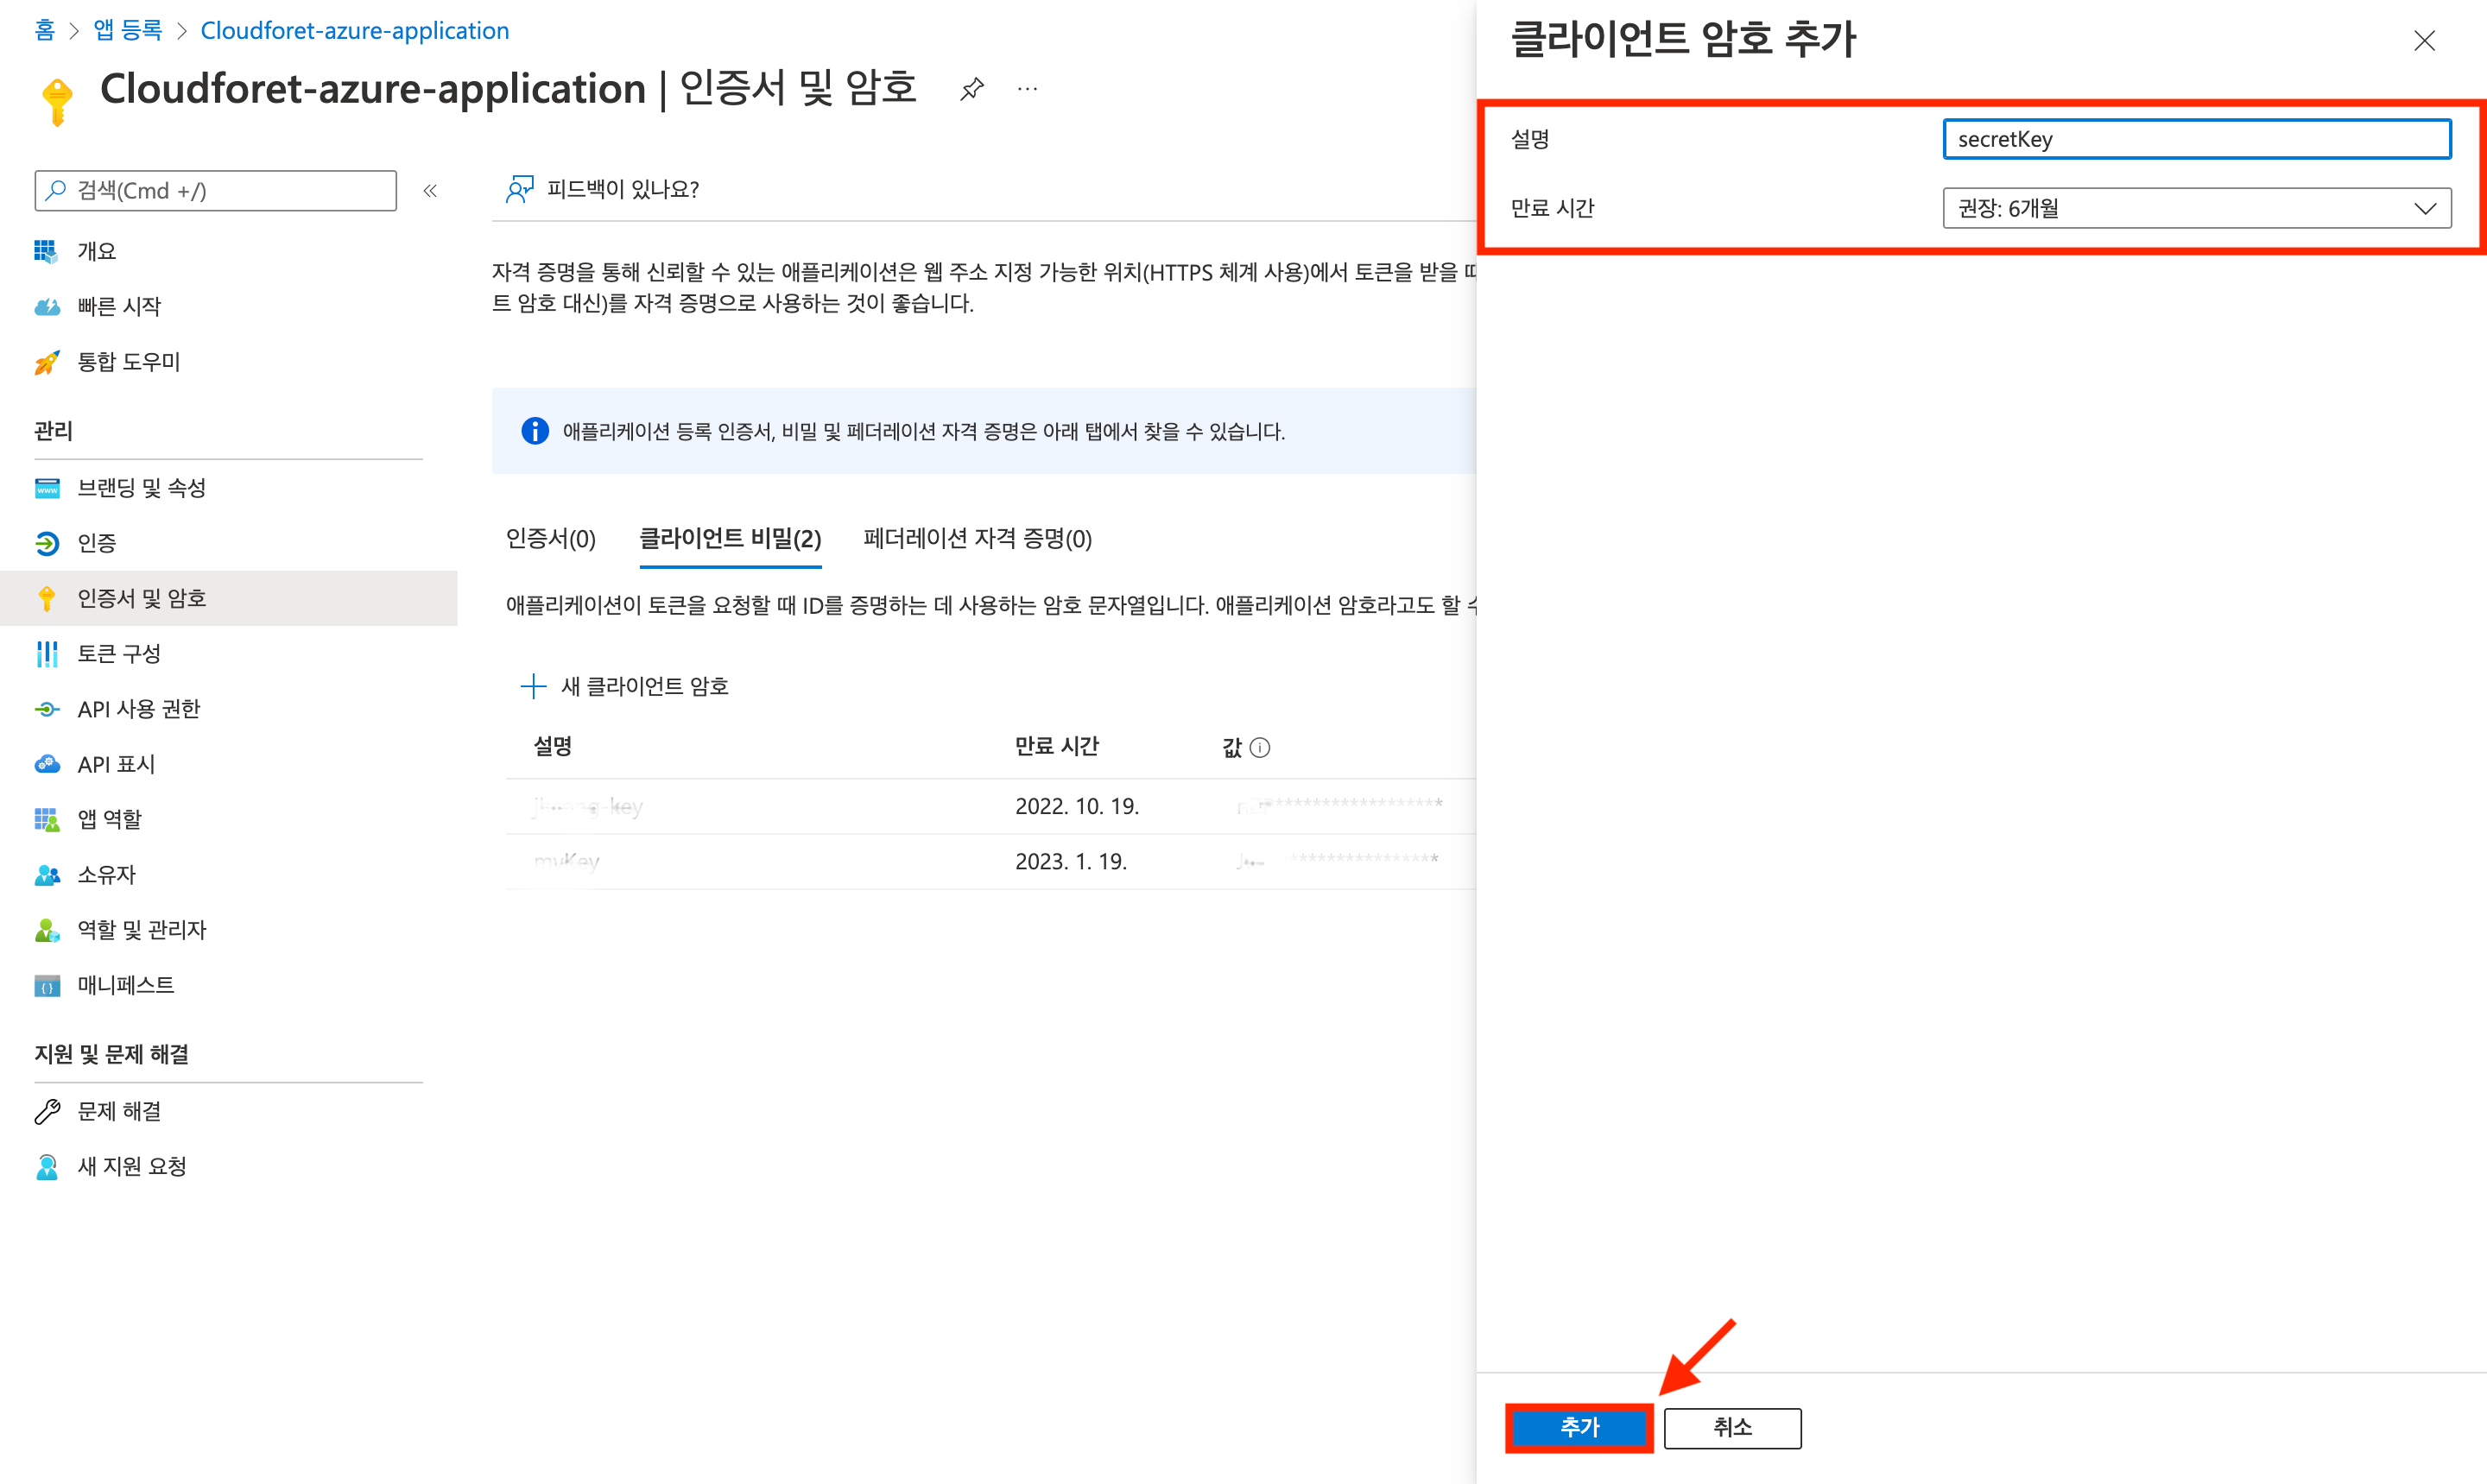
Enter client secret information and click [Add] button
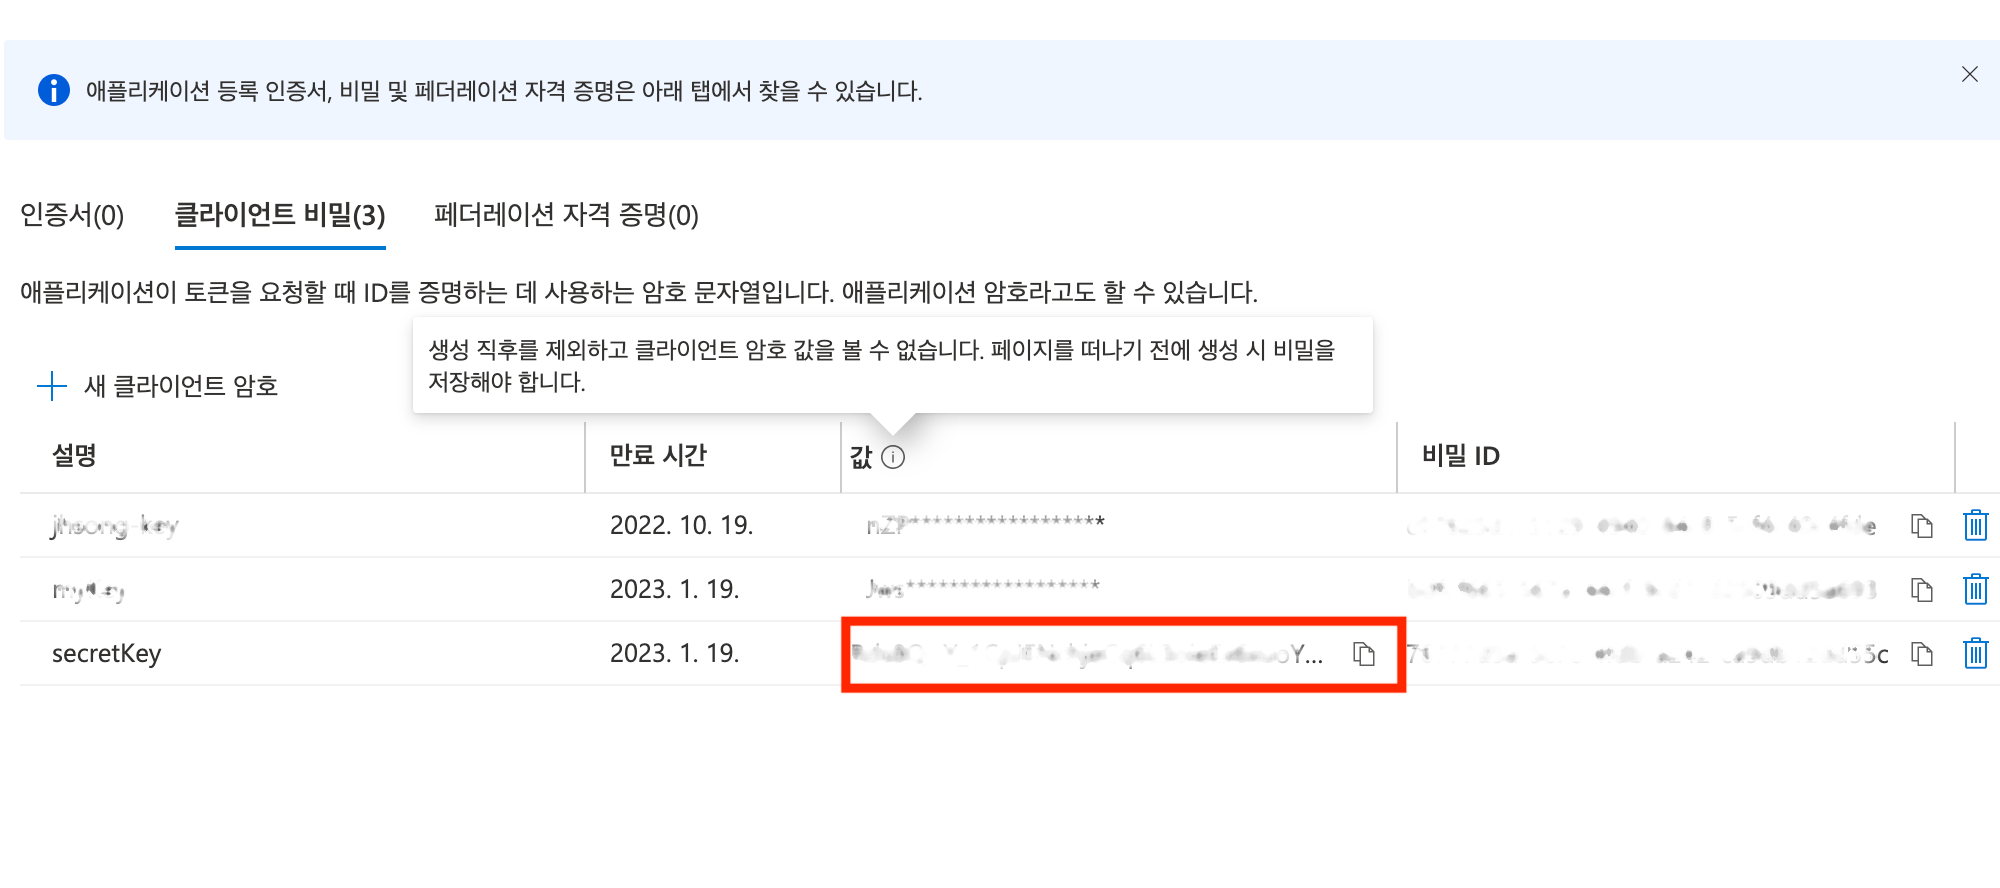
Remember generated authentication key information
Since you cannot view the generated password value again when you leave the page, please remember it. The information in the [Value] column corresponds to Client Secret setup information.
5. Subscription ID(Subscription ID) Confirmation
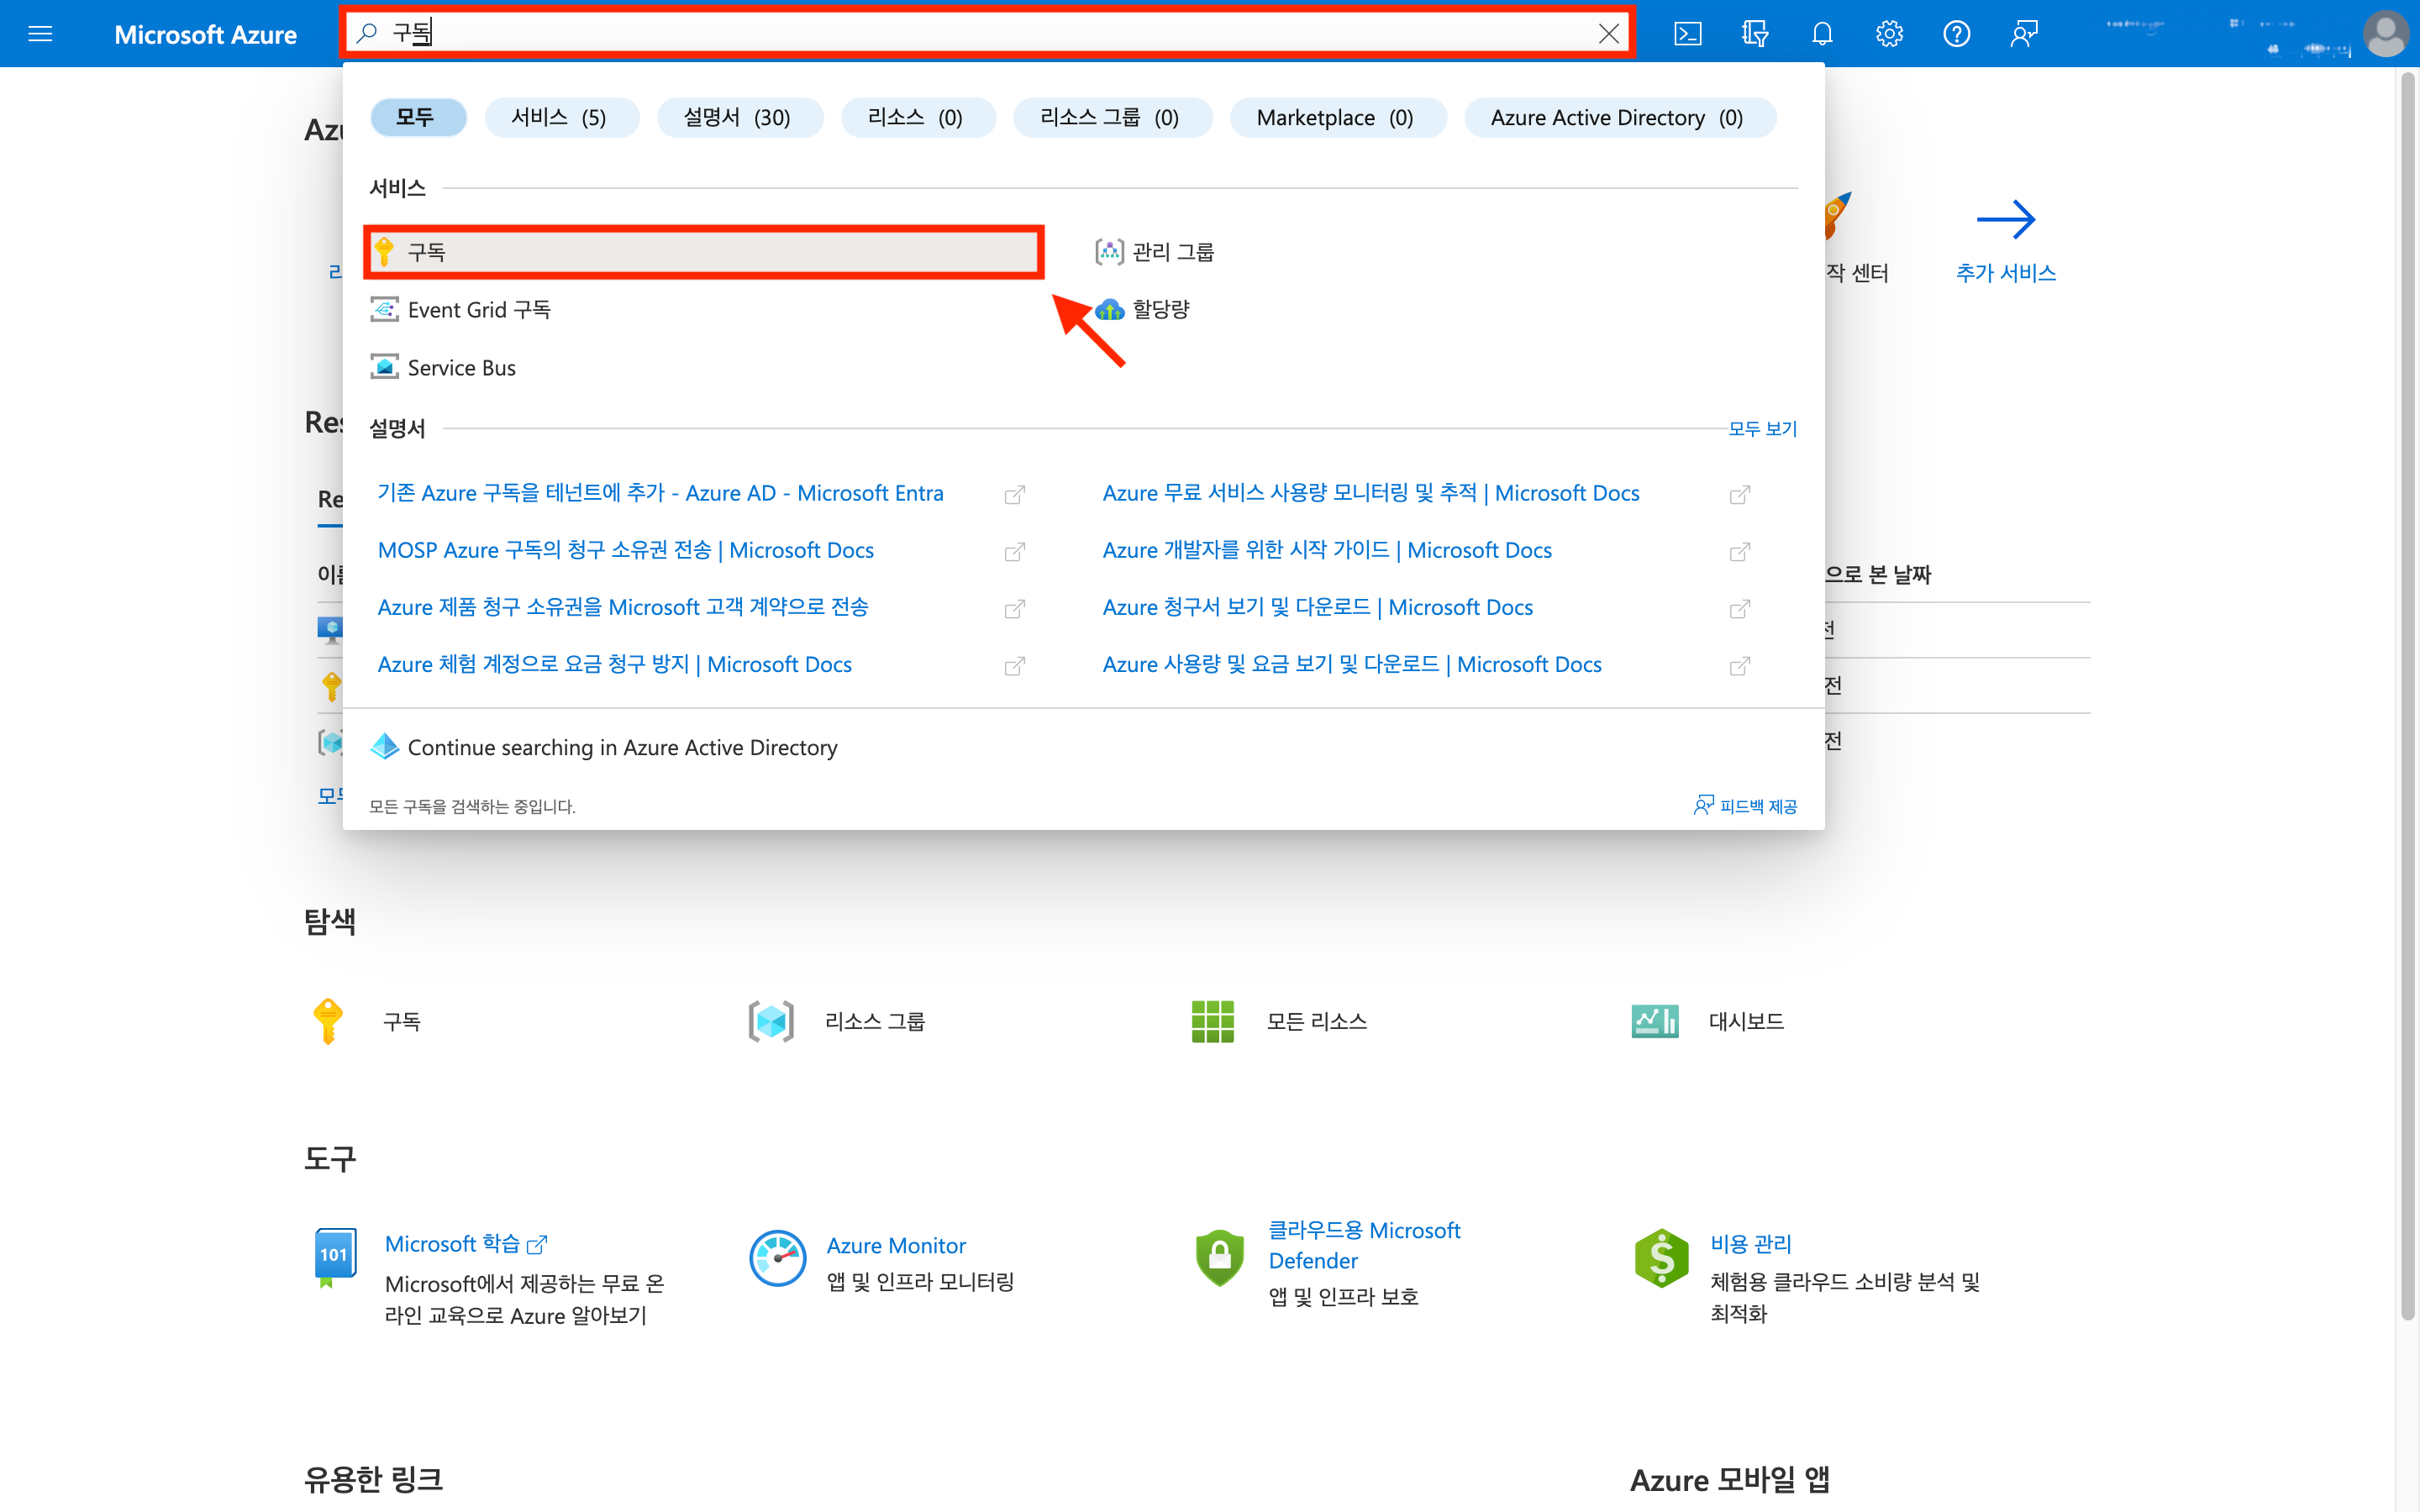
Navigate to [Subscriptions] page in Azure Portal
Enter ‘Subscriptions’ in the search bar and click on the [Subscriptions] in the service list.
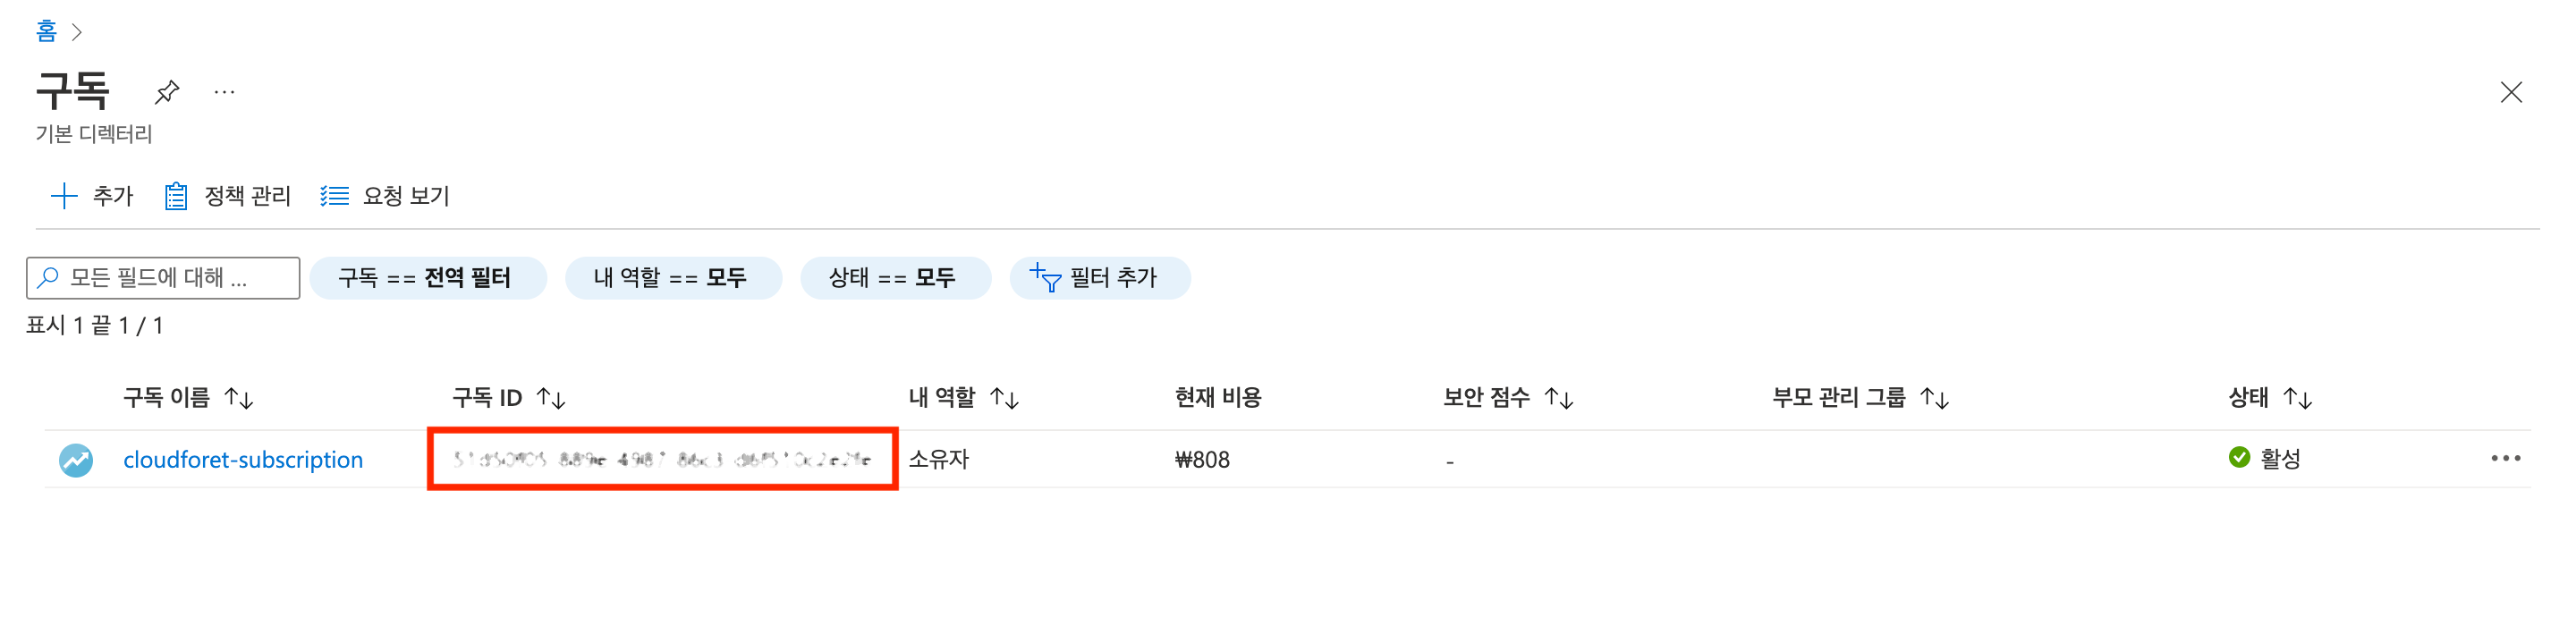
Confirm subscription information
Please confirm the subscription ID information corresponding to Subscription ID.
6. Service Account Registration in SpaceONE
Enter the information obtained from [1~5] steps in SpaceONE domain.
Please refer to Service Account Registration for details on service account registration.
7. Custom Role Addition (Optional)
Navigate to [Subscriptions] service and select [Access Control (IAM)] menu
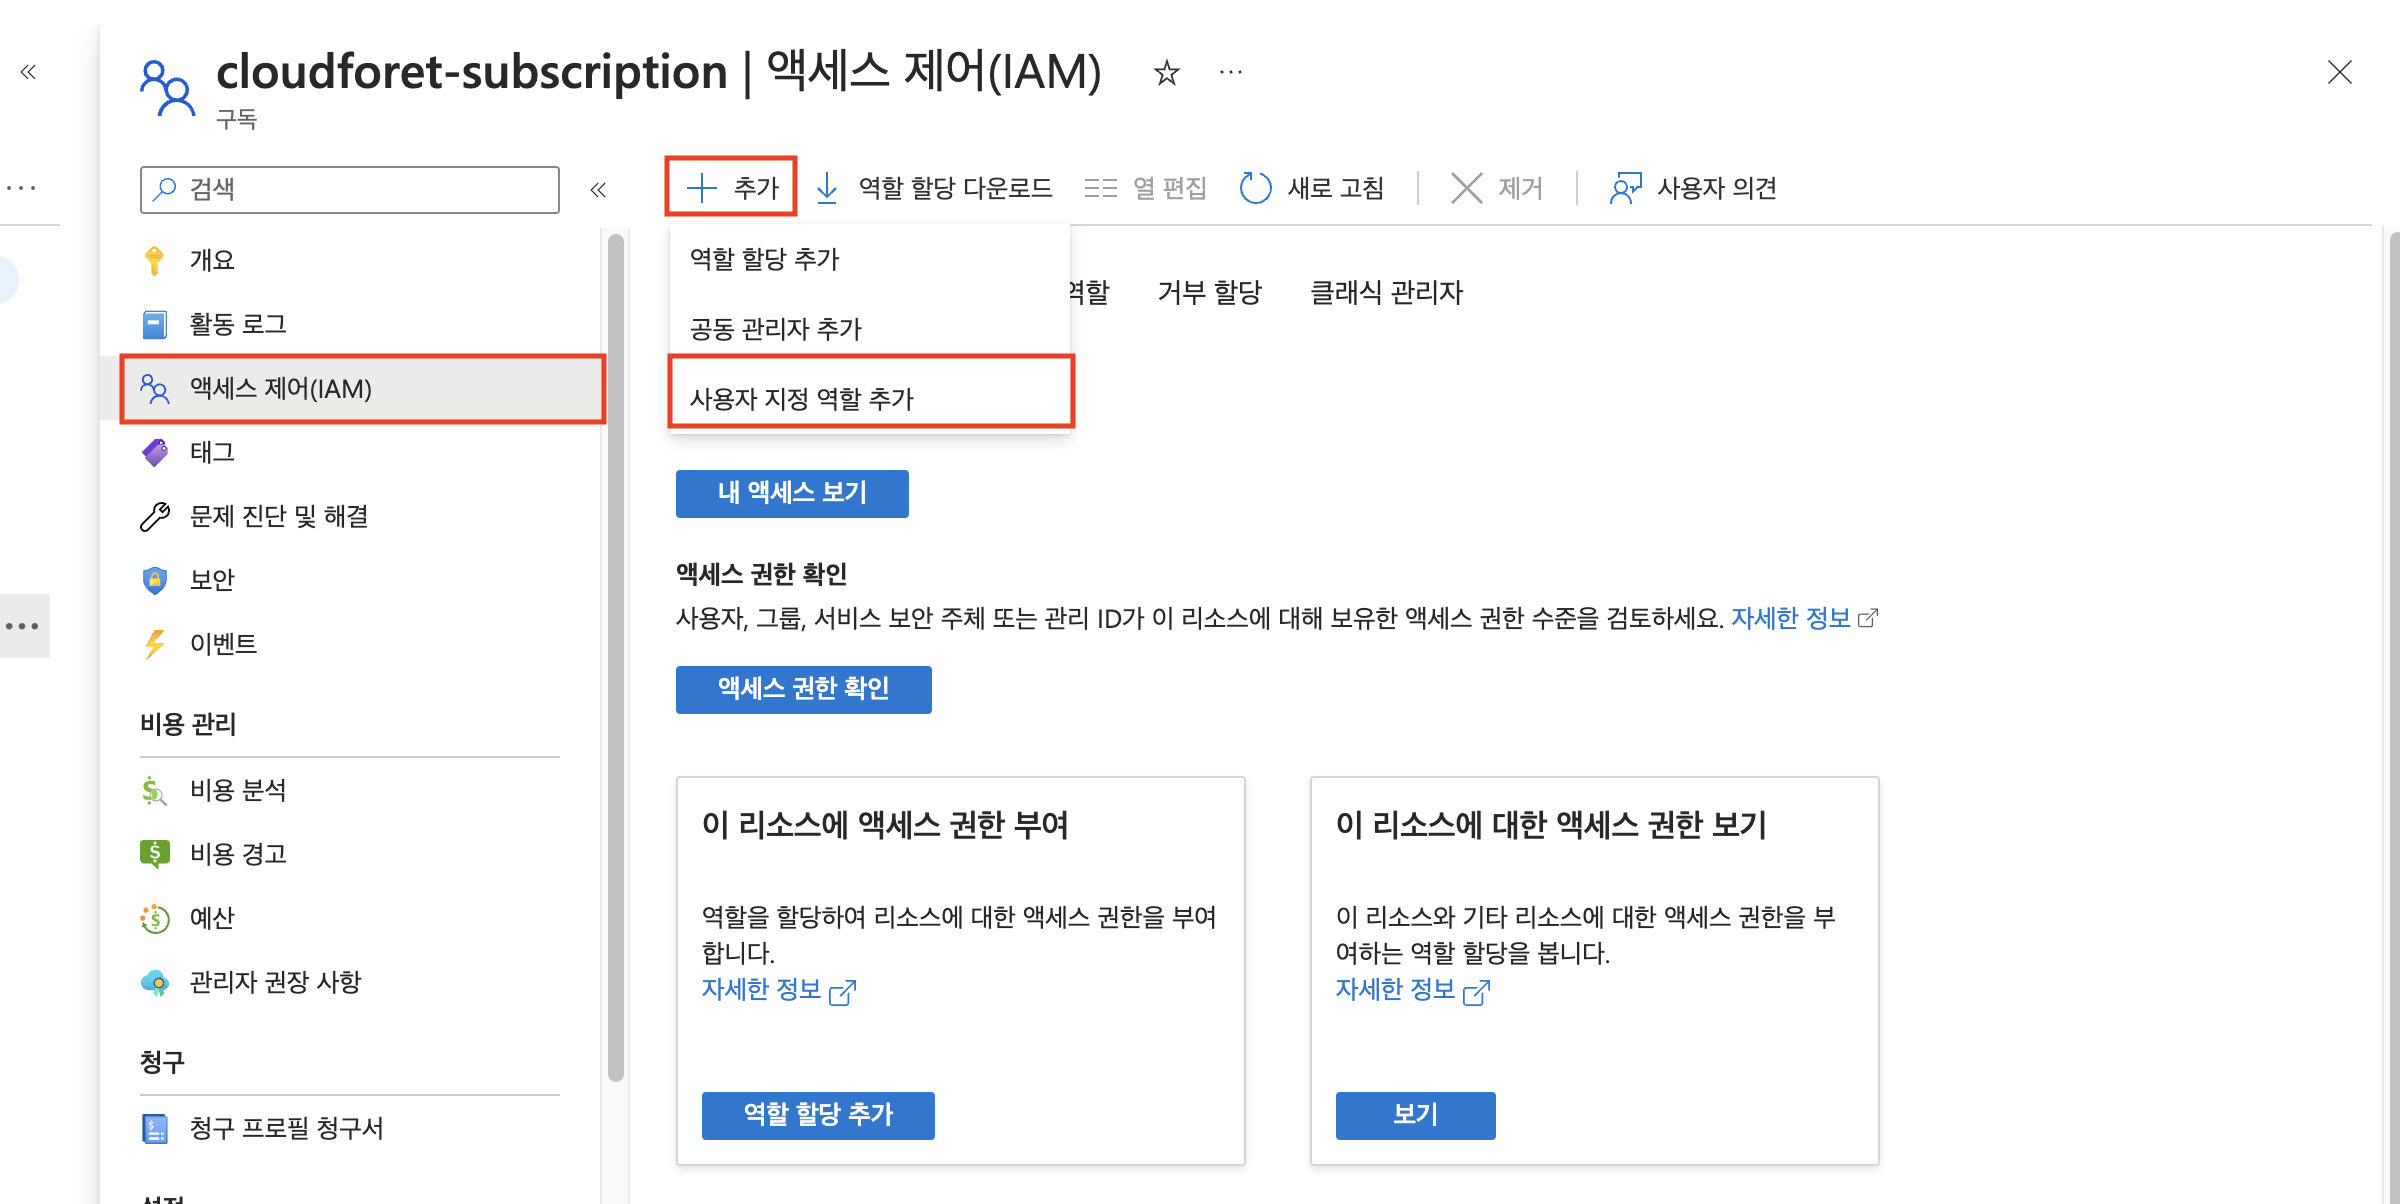
(1) Select [Access Control (IAM)] menu.
(2) Click [Add] button.
(3) Click [Custom Role Addition].
Enter basic information
Enter spaceone_custom_role in custom role name.

(1) Click [Start from scratch] in standard permission.
(2) Click [Next] button in the lower left corner.
Permission Addition
Click [Edit] button and then add permissions in the code block as mentioned in the document.

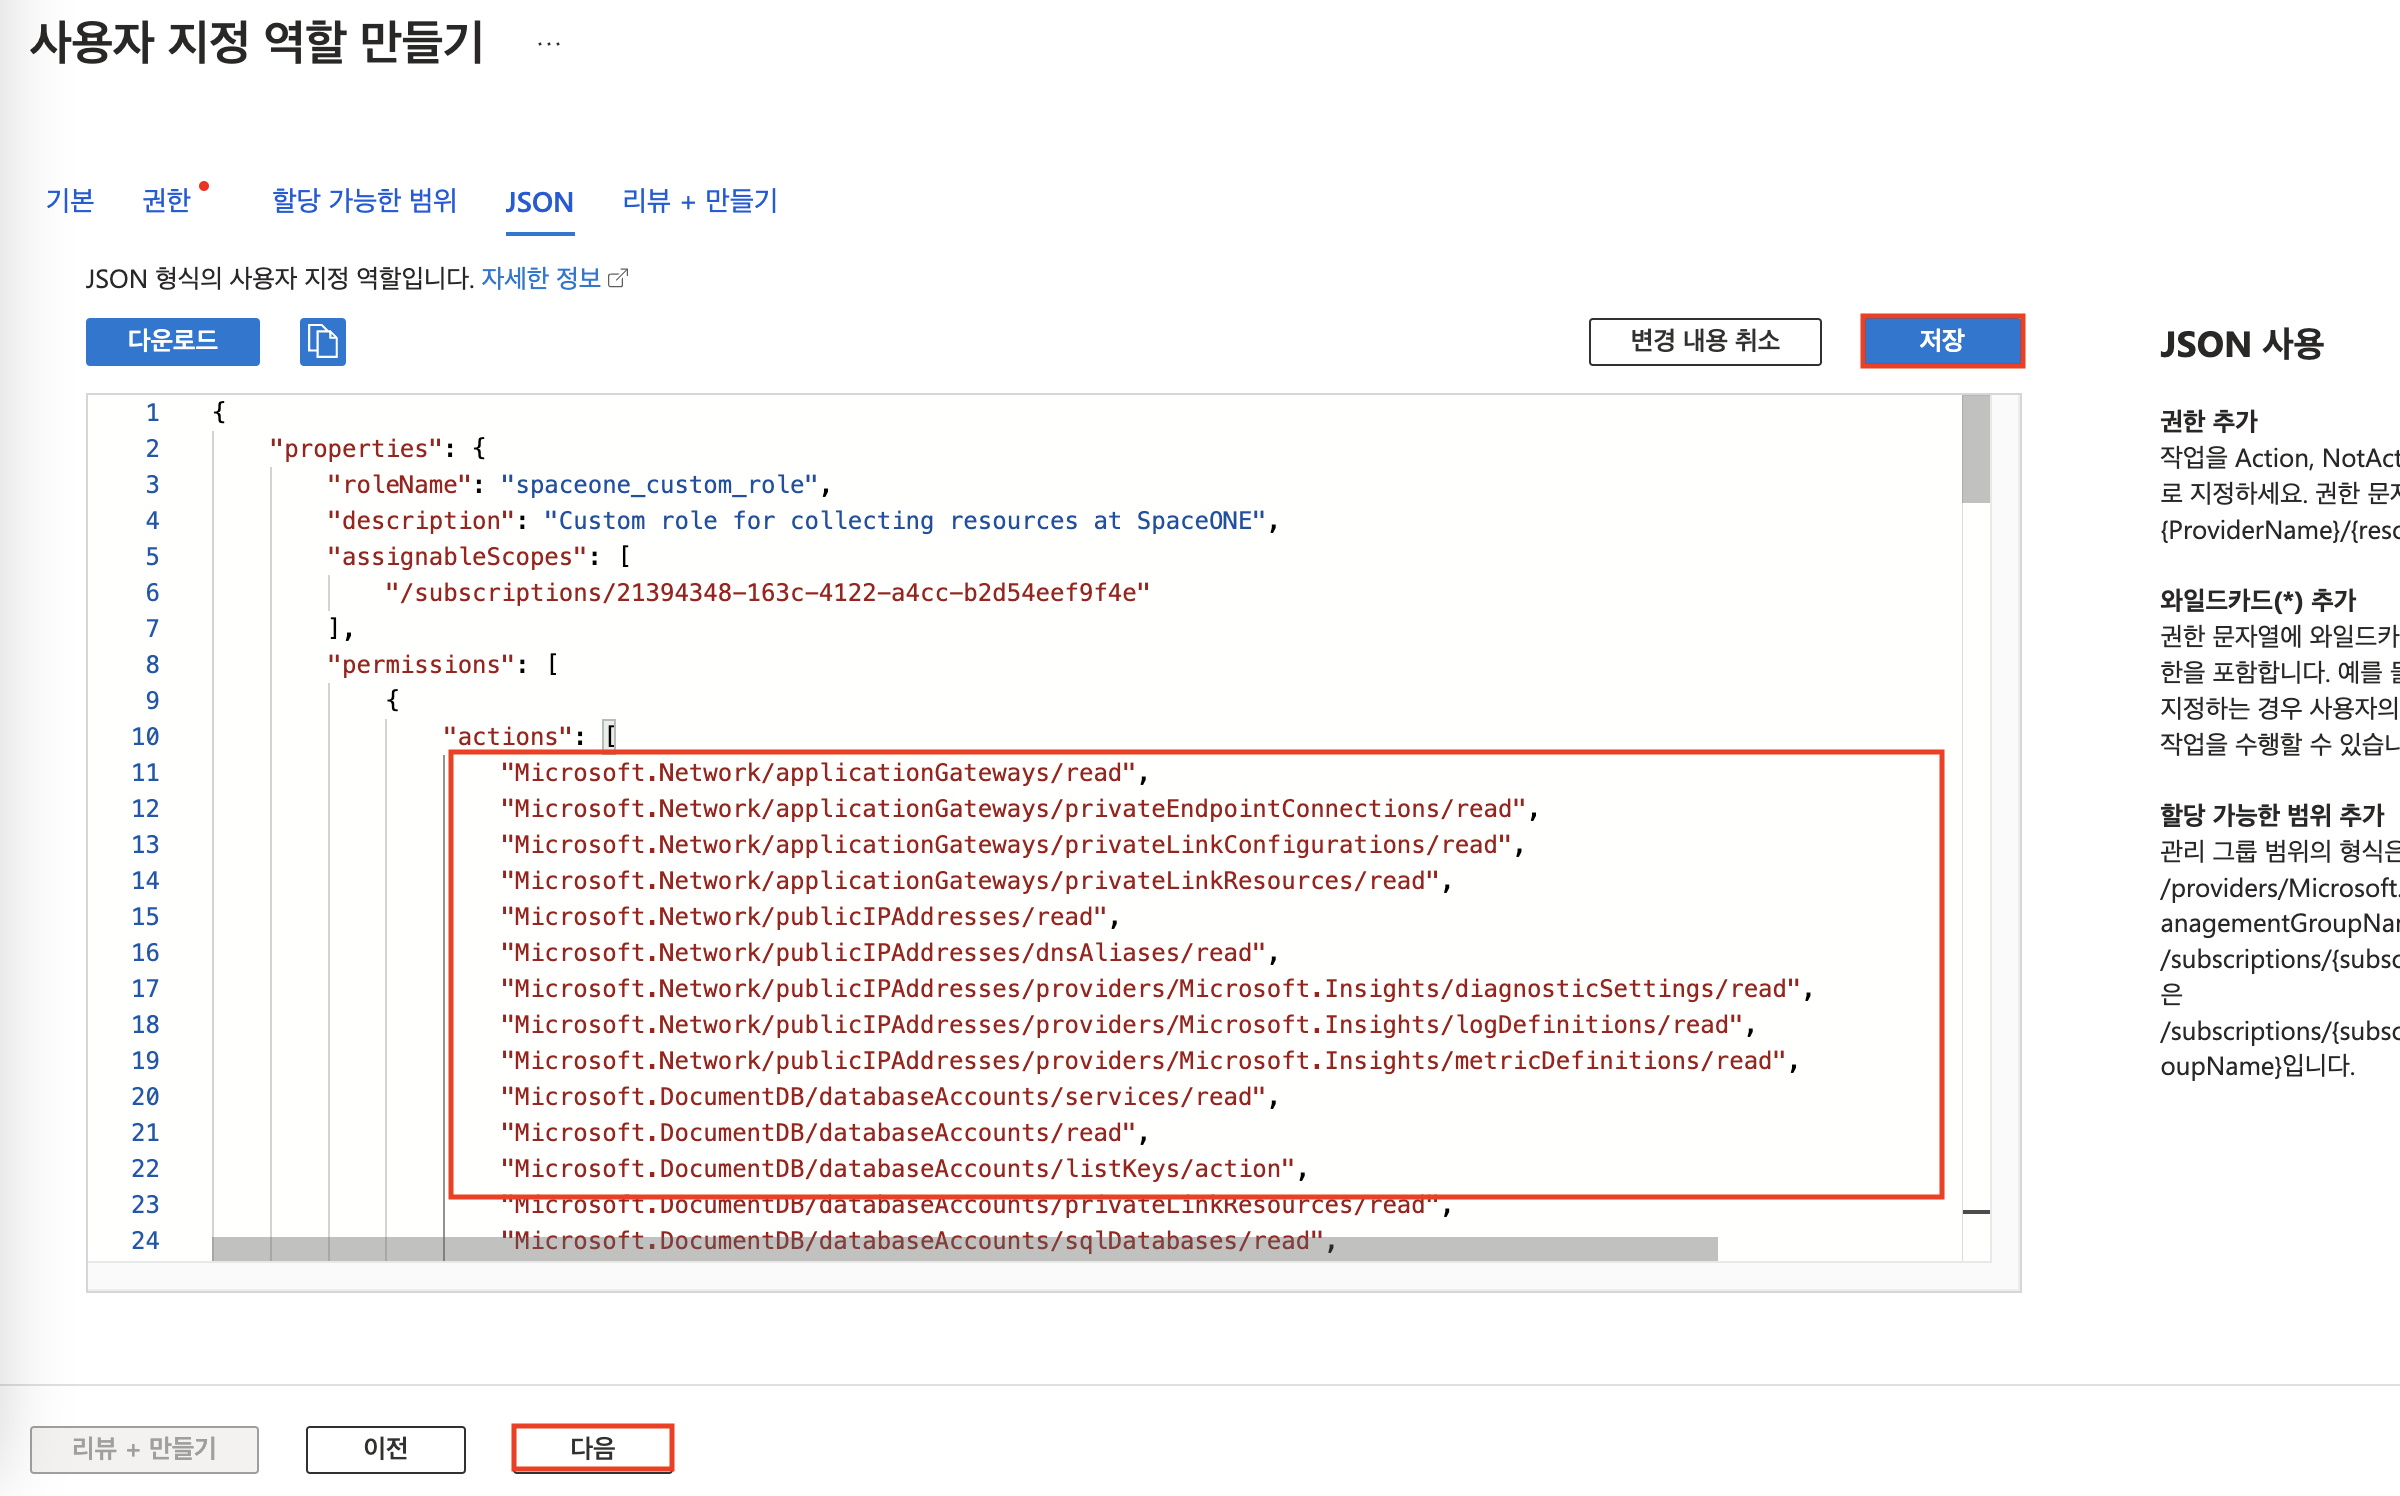
Review and Save
Click [Save] button and then click [Next] button.
Role Assignment
After creating custom role, assign role through 3. Role Assignment process.