Assume Role Method
Overview
A role is an IAM identity with specific permissions, and Assume Role is used to grant cloud resource access permissions to your own account or other accounts.
Example of Using Assume Role
Assume there are IAM users [A], [B], [C] in each AWS account and an IAM user [D] who will be delegated the role.
For each IAM user [A], [B], [C], create a role with permissions for cloud resource collection and delegate it to account [D]. This will create a total of 3 [Role ARNs].
Finally, you can collect cloud resources in use through the [AWS Access Key ID], [AWS Secret Key] of IAM user [D] who received the delegated policy, and the [Role ARN] of IAM users [A], [B], [C].
The Assume Role method requires the following configuration information:
Account ID
A unique 12-digit identifier that is automatically generated when creating an AWS account. For more details about Account ID, refer to AWS Documentation .
Role ARN
A unique identifier for AWS roles. It is used to grant cloud resource access permissions to your own account or other accounts. For more details about Role ARN, refer to AWS Documentation .
External ID
AWS External ID is an identifier used to grant access permissions from outside AWS accounts. It is assigned to IAM users or roles and is used to grant access to resources requested by other AWS accounts or services.
There are two ways to create an Assume Role:
- Manual creation through AWS Console
- Automatic creation through CloudFormation
You can proceed with either method. If you want to understand AWS’s detailed settings, manual creation is recommended; if you want quick setup, creation through CloudFormation is recommended.
1. Create Assume Role
Access AWS Console
Access the AWS Console .
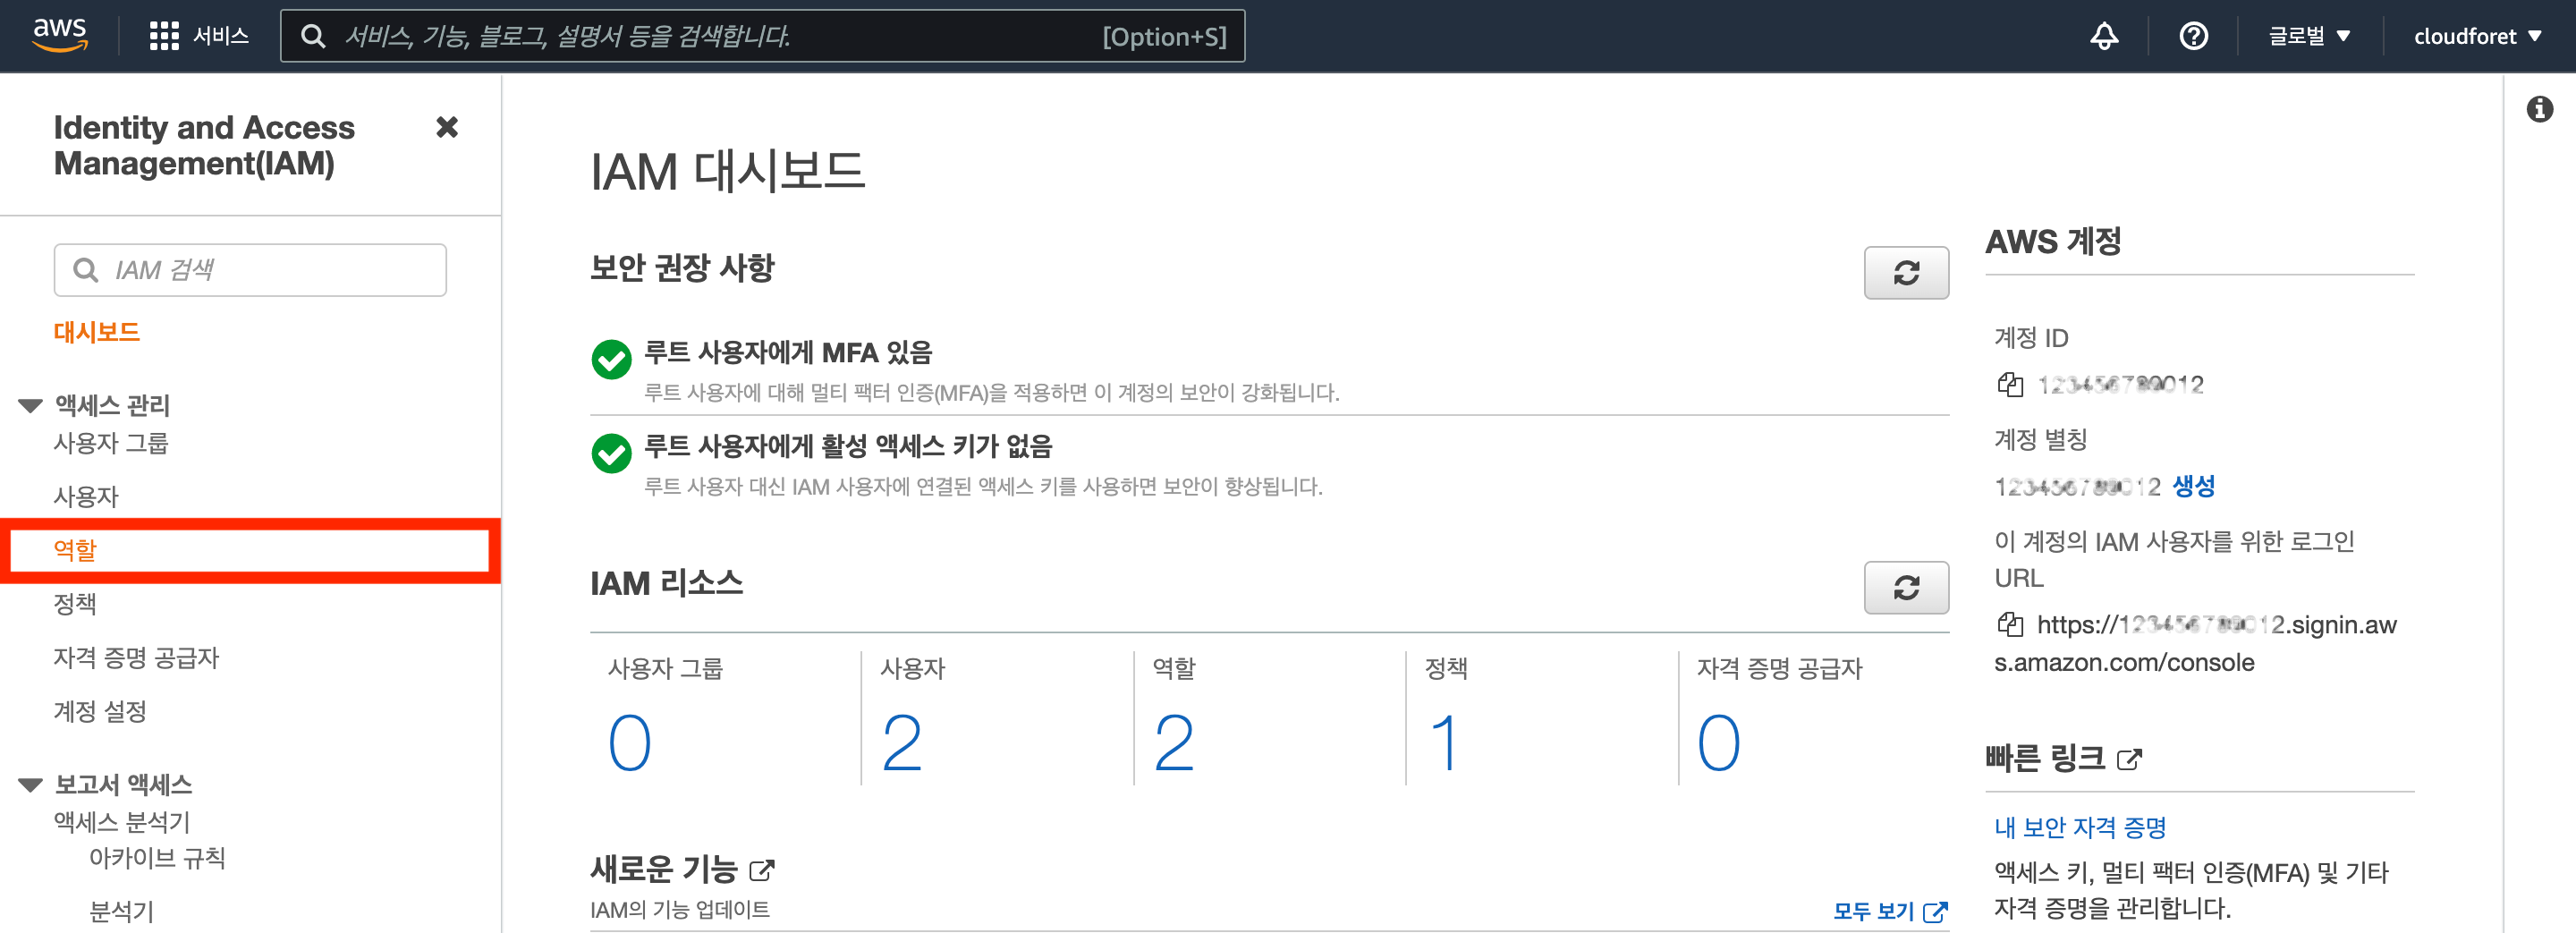
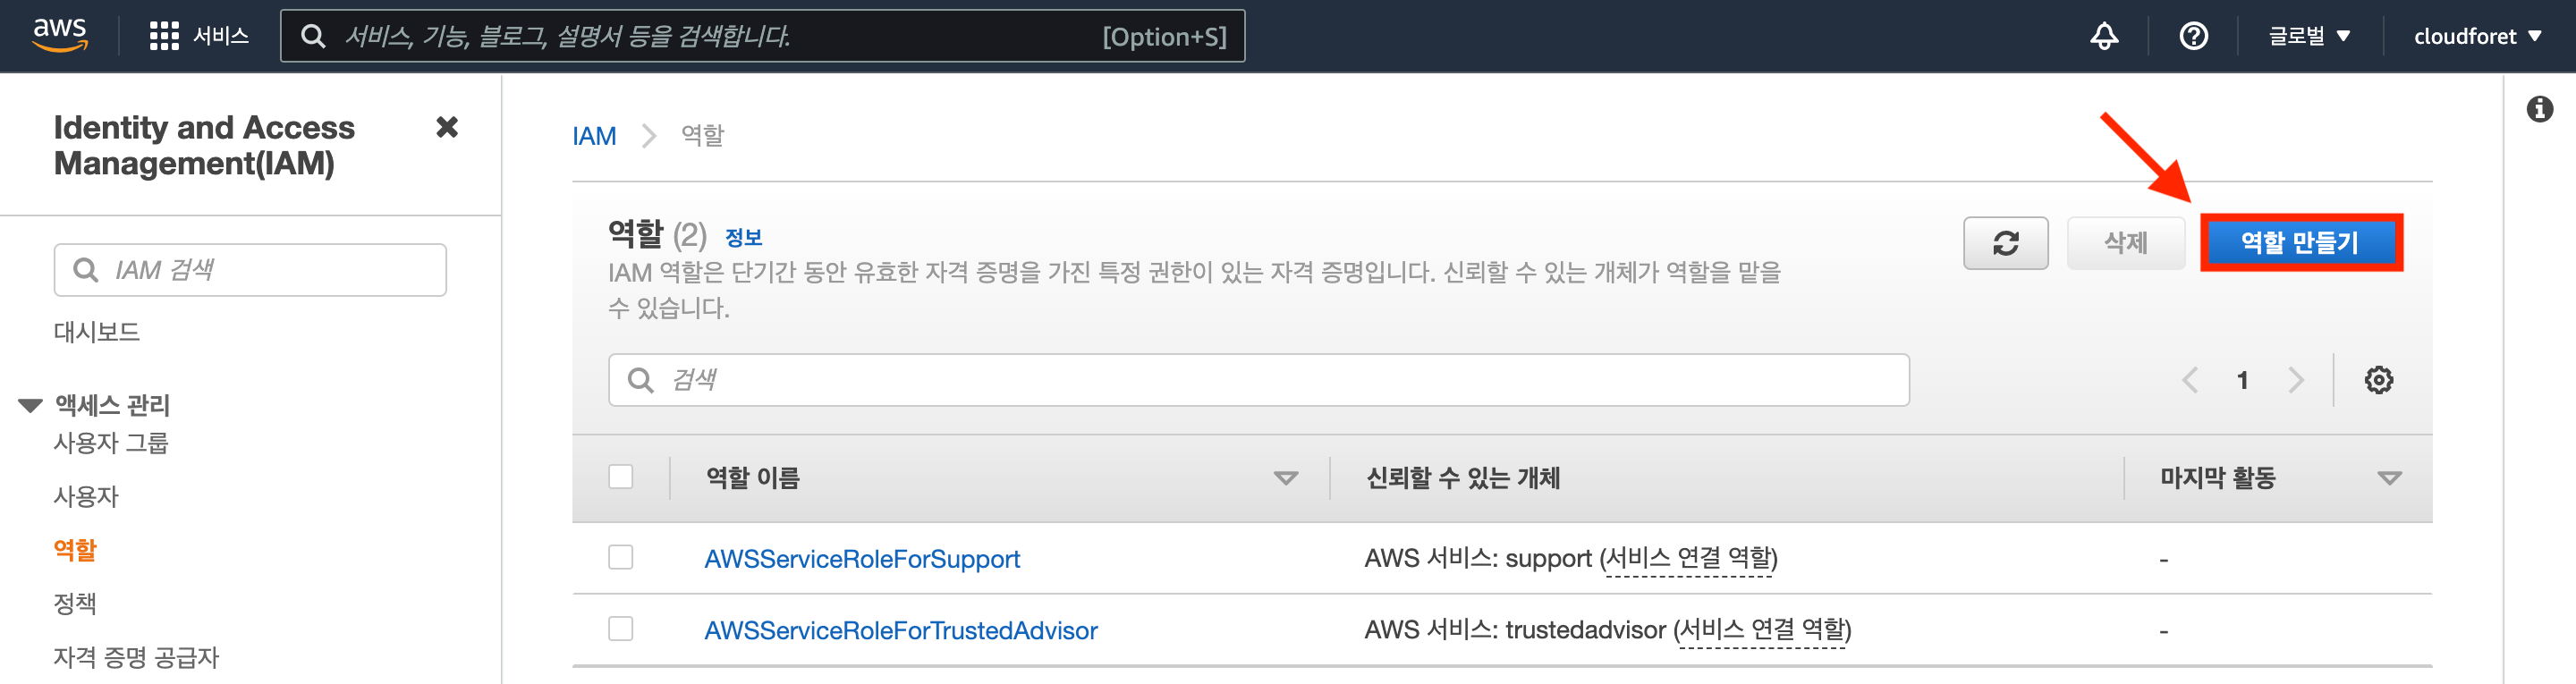
Access IAM Role Menu
Navigate to [Access Management > Roles] menu in the dashboard.
Create and Configure Role
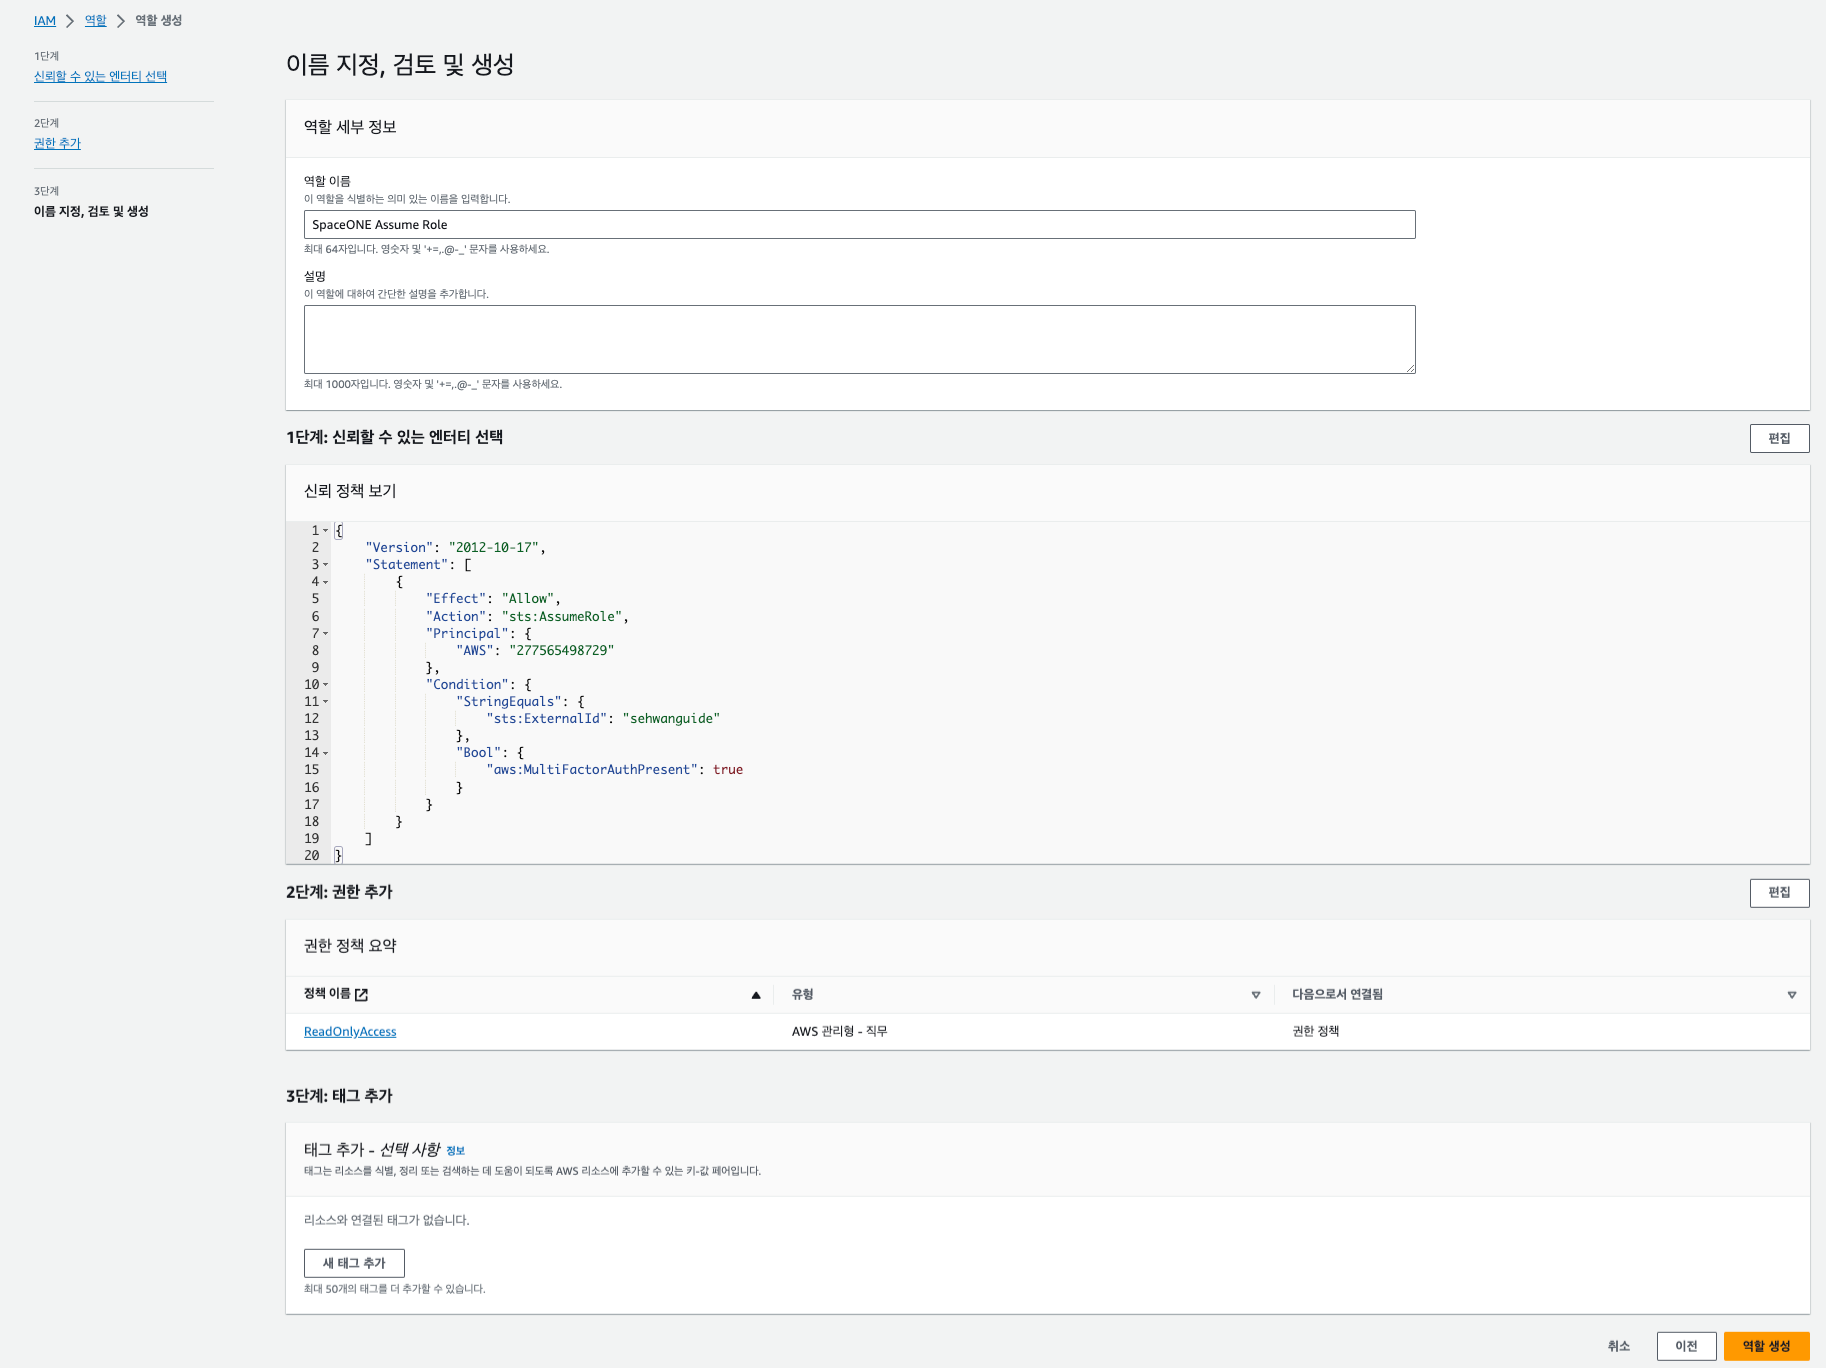
Click the [Create Role] button to move to the role creation page.
(1) Select [AWS Account] as the trusted entity type.
(2) Select the AWS account to grant the role:
- [This Account]: Grant permissions for cloud resources used by your own account
- [Another AWS Account]: The account granted the role receives permissions for your cloud resources
(3) Enter the Trusted AWS Account ID in [AWS Account > Select Another AWS Account].
(4) Enter an arbitrary ID (4 or more characters) in [Options > External ID].
- You can enter the External ID that can be found in the SpaceONE console, or set it arbitrarily on this page and enter it in the SpaceONE console.
Set Permissions
Add the necessary permissions from the four IAM Policies created earlier.
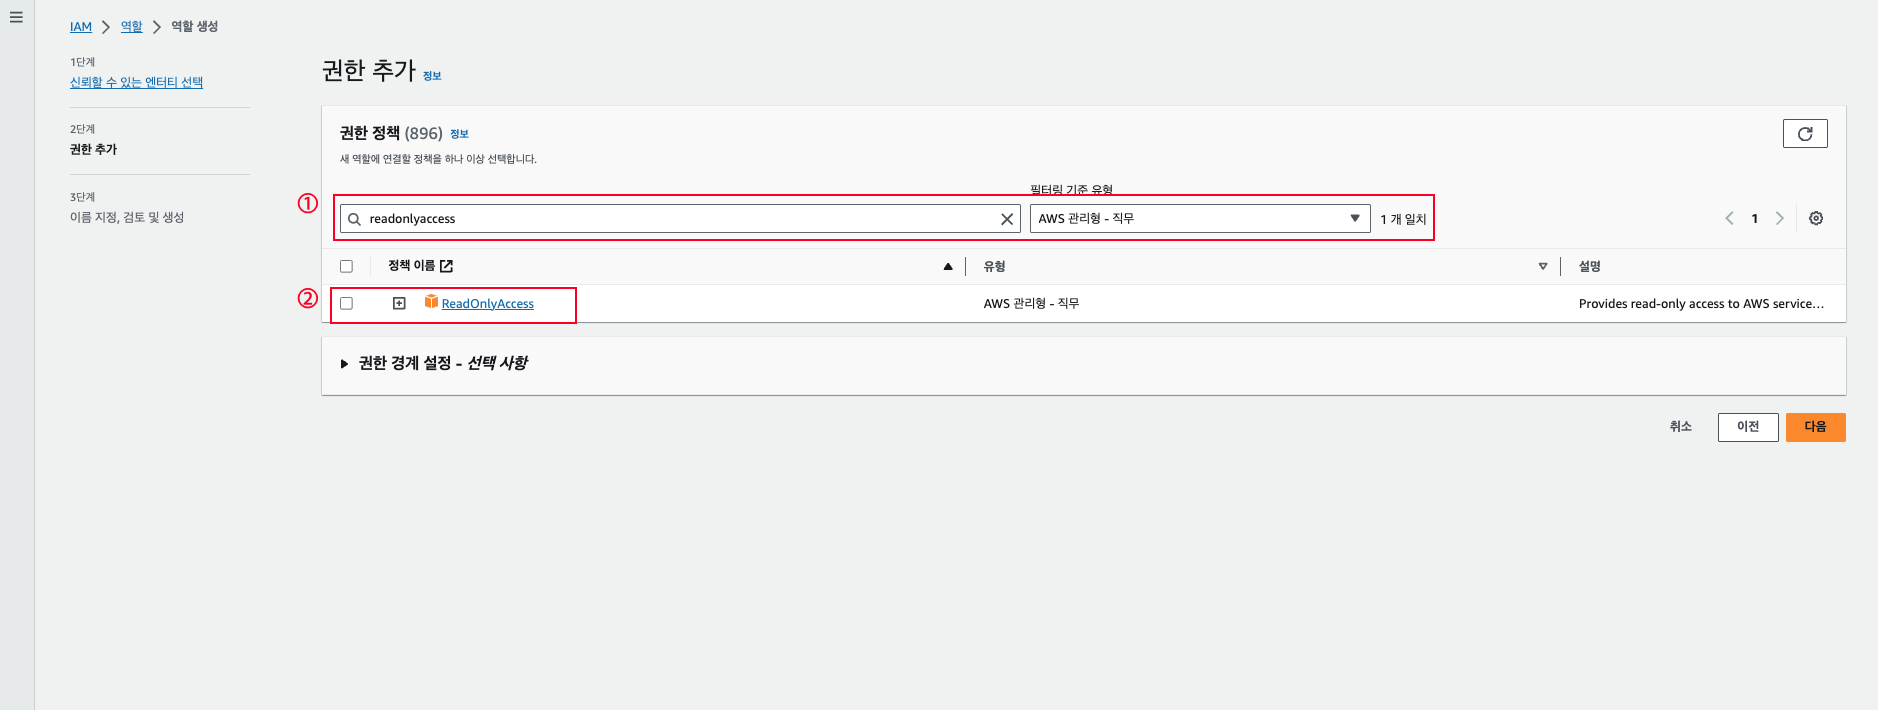
- You can replace ‘AWS Cloud Services collector’ and ‘AWS EC2 Compute collector’ permissions with
ReadOnlyAccess(filter Type: AWS managed job function).
Complete Role Creation
Enter the role name and click [Create Role].
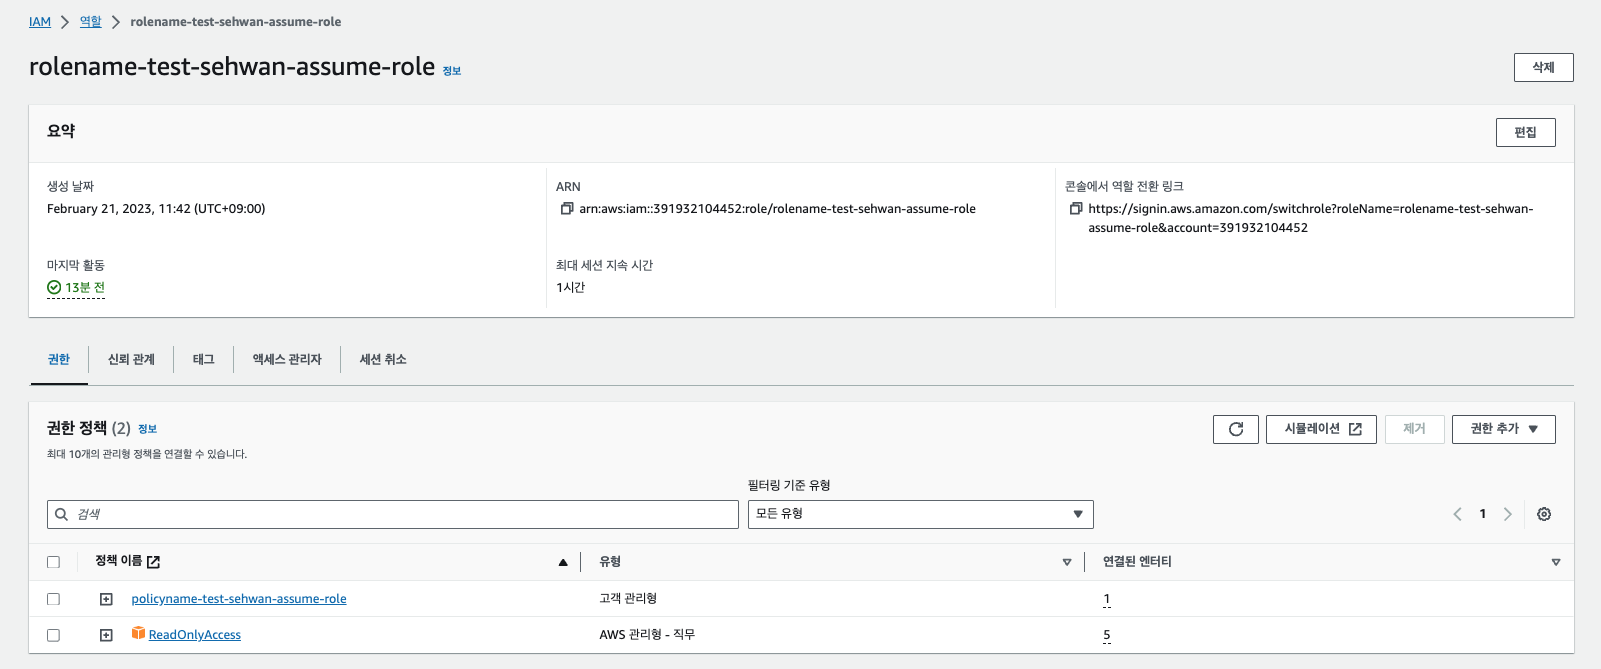
Verify Role ARN
Check the Role ARN information in the created role’s details.
2. Create Assume Role through CloudFormation
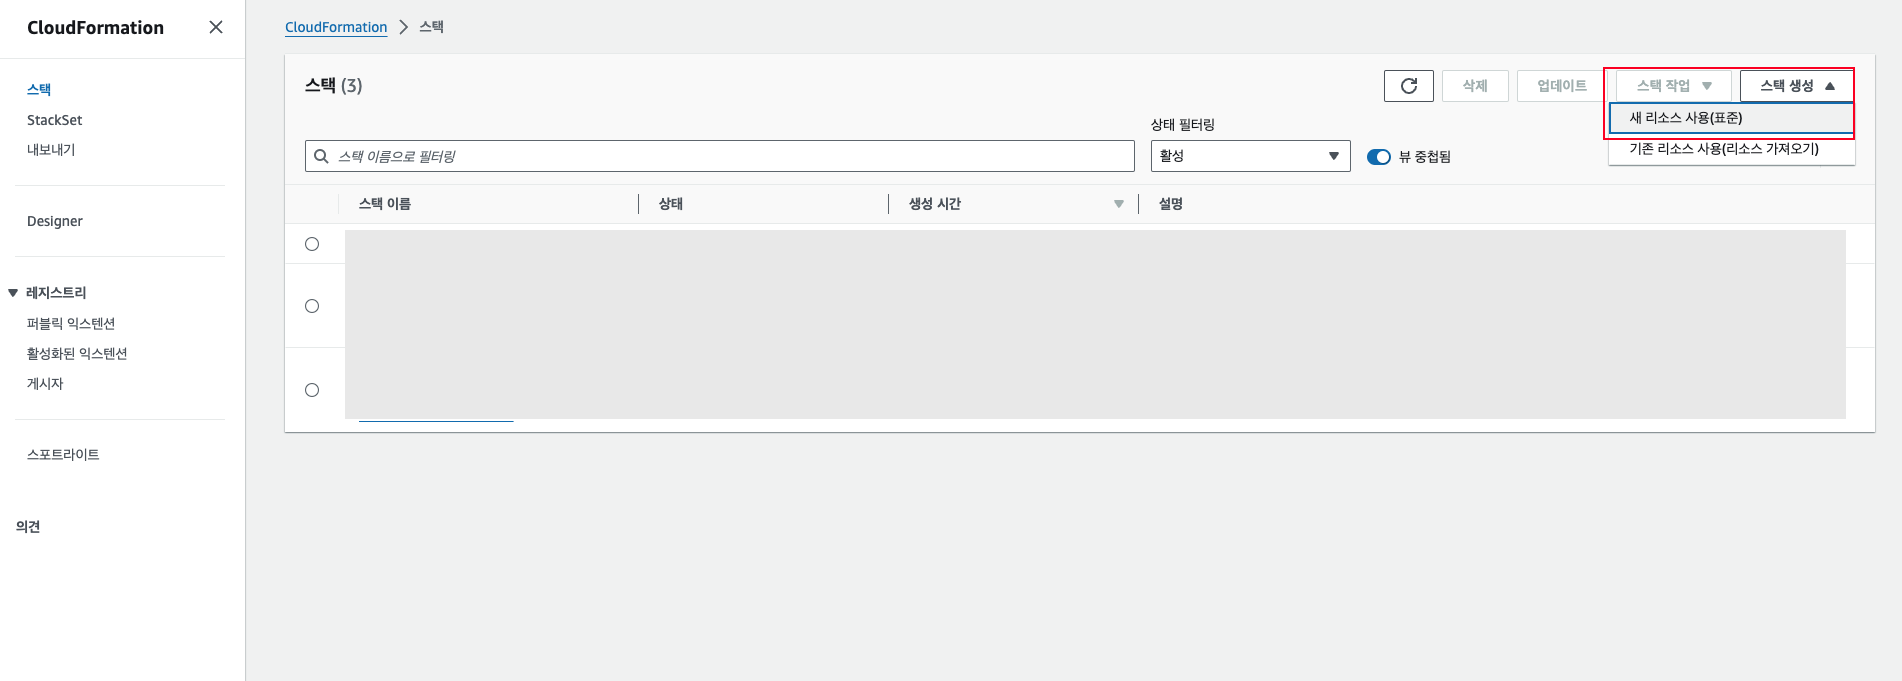
Access CloudFormation Menu
Click [CloudFormation > Stacks > Create Stack > With New Resources (Standard)].
Configure Template
Select [Template is Ready > Amazon S3 URL], then copy and enter the URL below.
https://spaceone-public.s3.ap-northeast-2.amazonaws.com/assets/spaceone_assume_role_template.json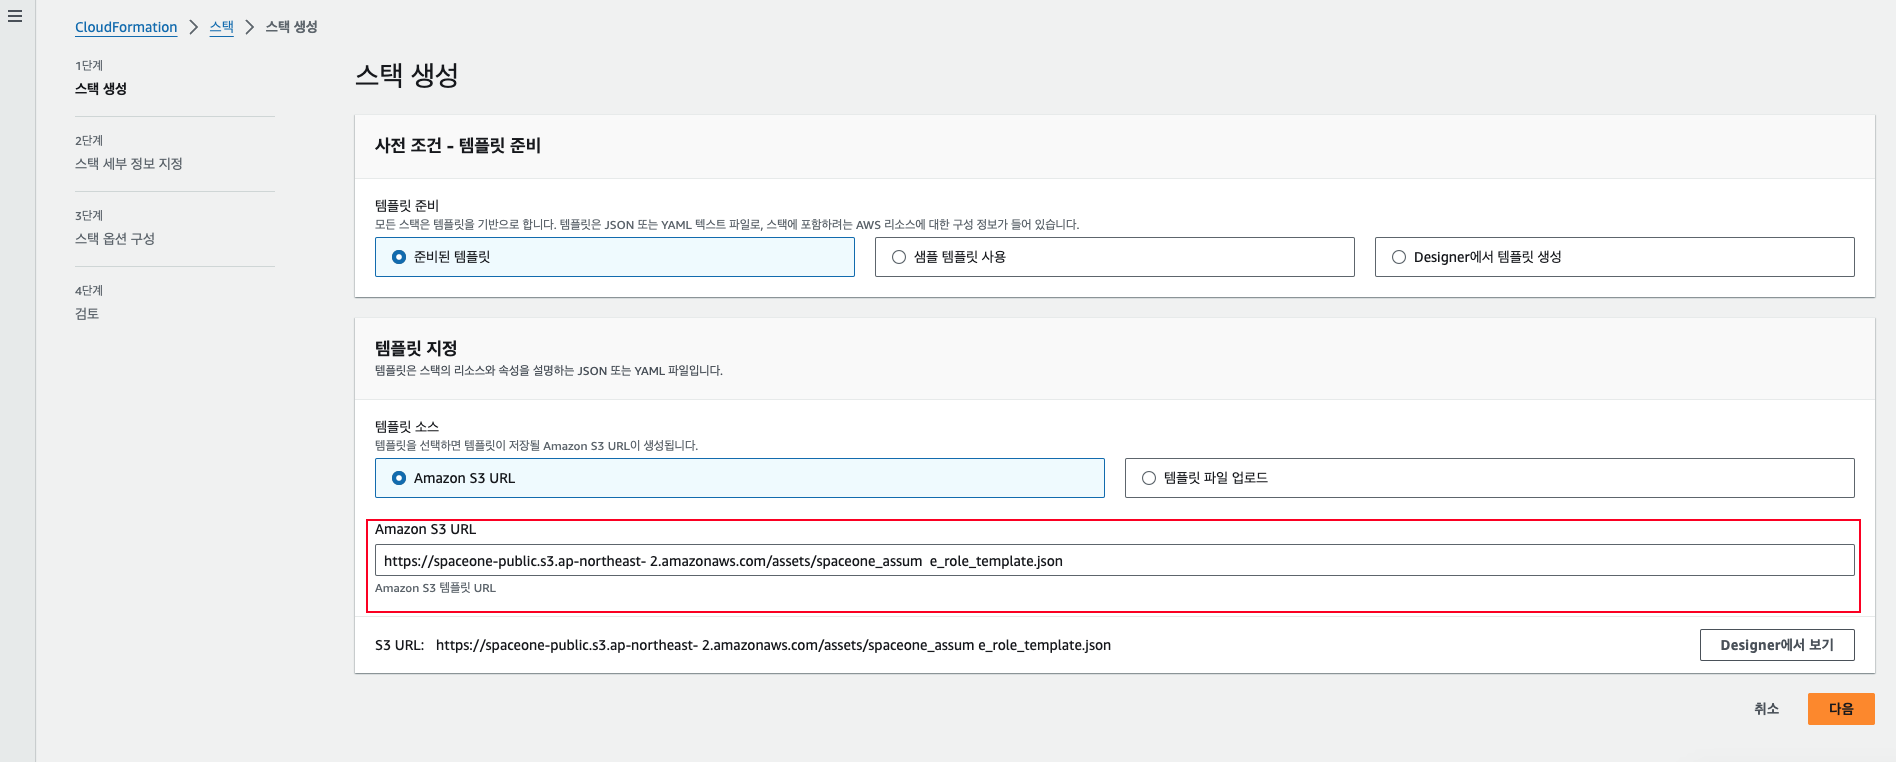
Enter Stack Details
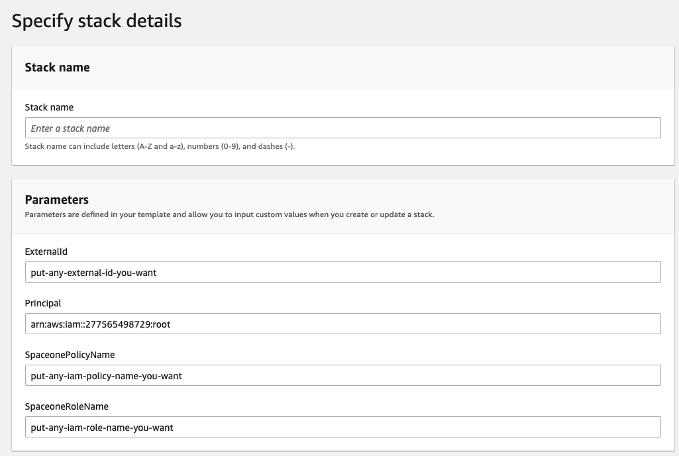
Enter the following information:
- Stack name: Enter stack name
- External ID: Create randomly or enter previously created External ID
- Principal: Pre-entered by CloudFormation Template
- SpaceONEPolicyName: Enter IAM Policy Name to be created (arbitrary)
- SpaceONERoleName: Enter IAM Role Name to be created (arbitrary)
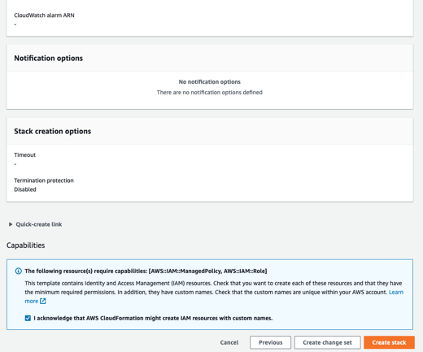
Create Stack
Click [Next] and [Create Stack] without any special setting changes.
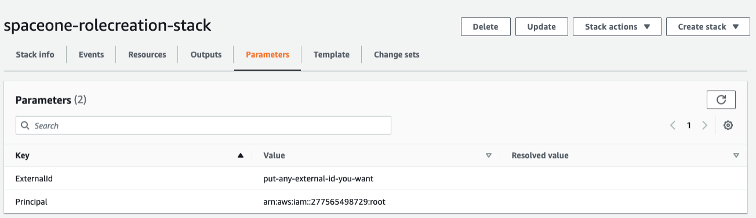
Verify Configuration Information
- Check
Role ARNinformation in the [Outputs] tab.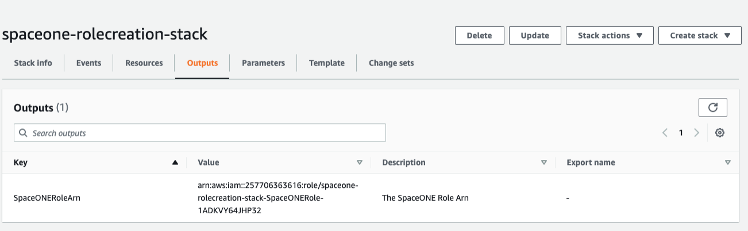
- Check
External IDinformation in the [Parameters] tab.