Configure Widget Options
After creating a data table, complete the widget by selecting a widget type and configuring visualization options.
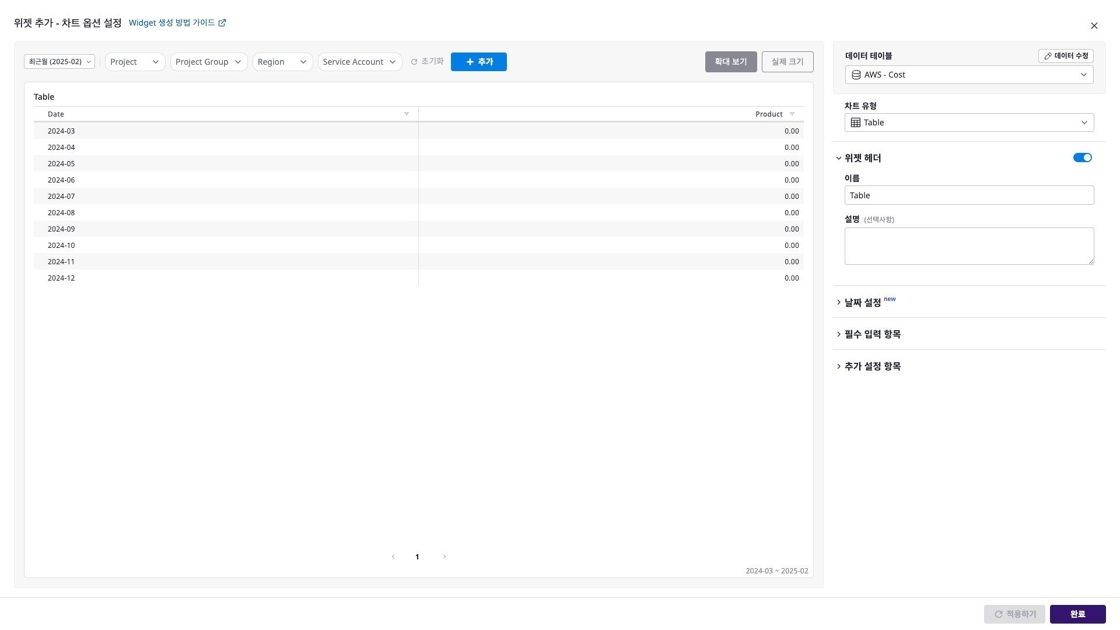
Configuring Widget Options
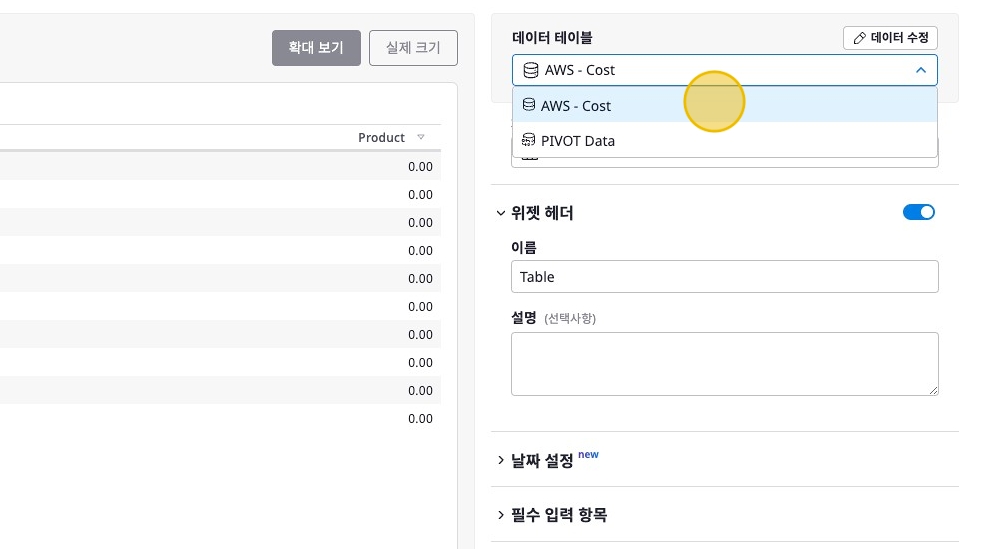
Select Data Table
The data table created in Step 1 is selected by default, but you can select a different data table if needed.
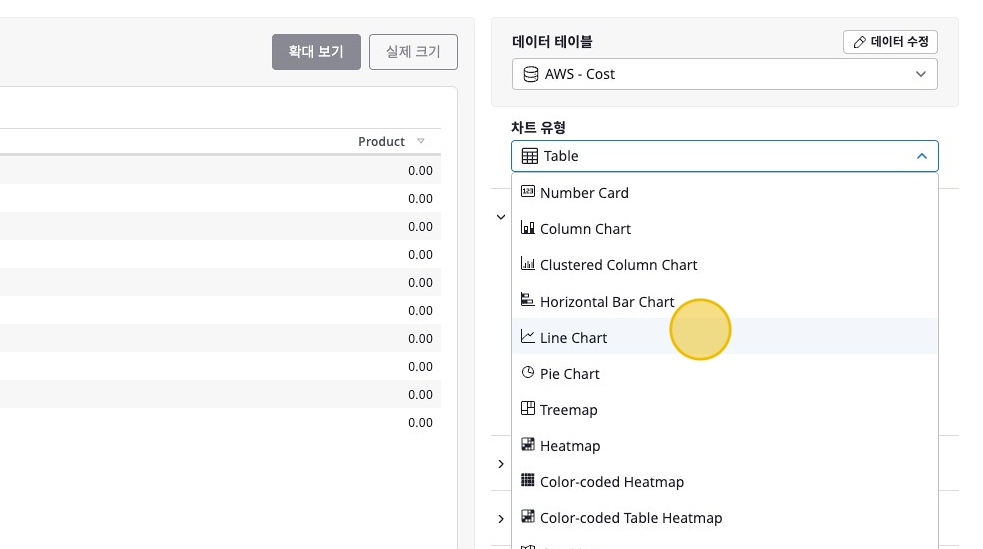
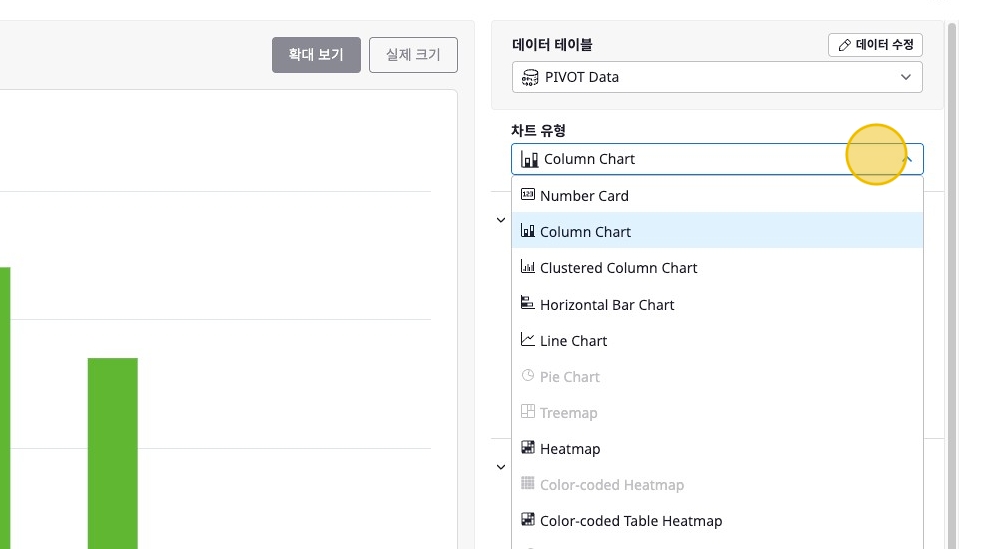
Select Widget Type
Choose a widget type.
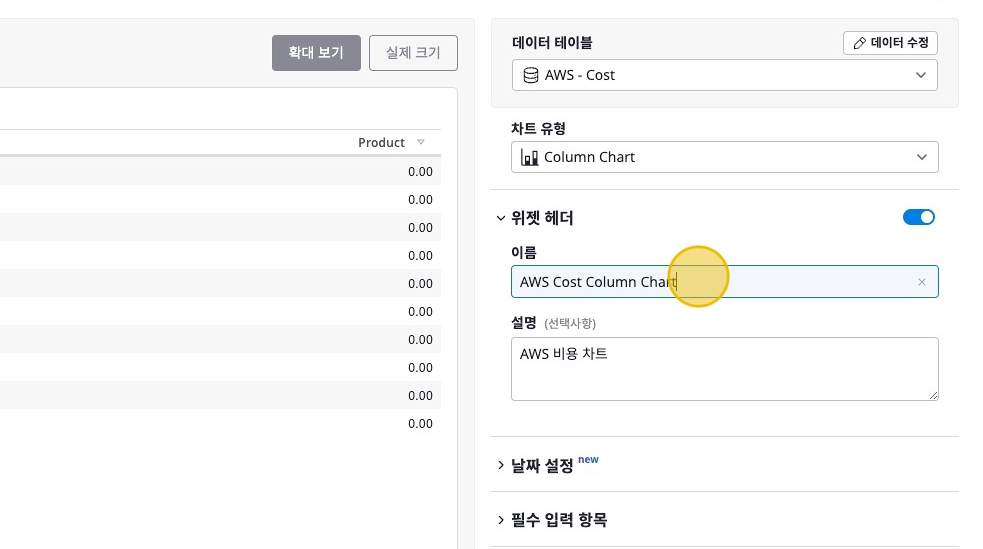
Enter Widget Header Information (Optional)
Enter the widget name and description.
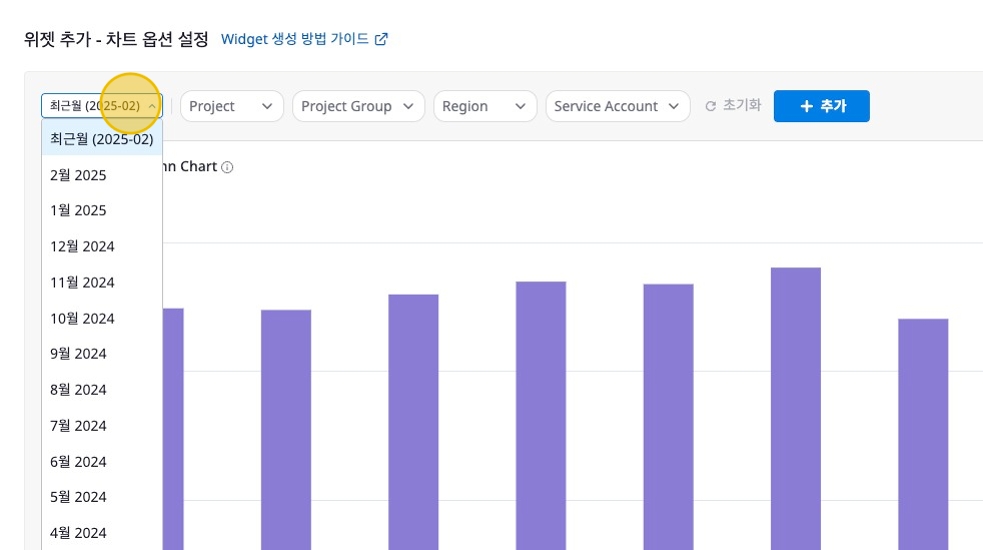
Configure Date Settings
In date settings, you can configure options related to the period for data visualization.
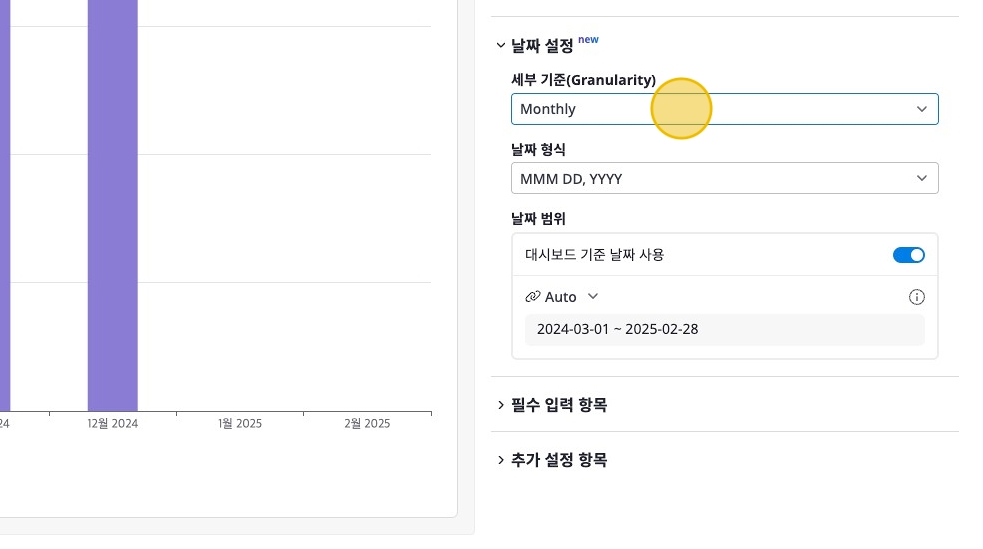
- Granularity: Set the time unit for aggregating data. You can select desired criteria such as Yearly, Monthly, Daily, etc.
- Date Format: Set the date display format. Displayed in formats like ‘MMM DD, YYYY’.
- Date Range: Set the period for data retrieval. When using
Dashboard Reference Date, data is retrieved based on the dashboard date.
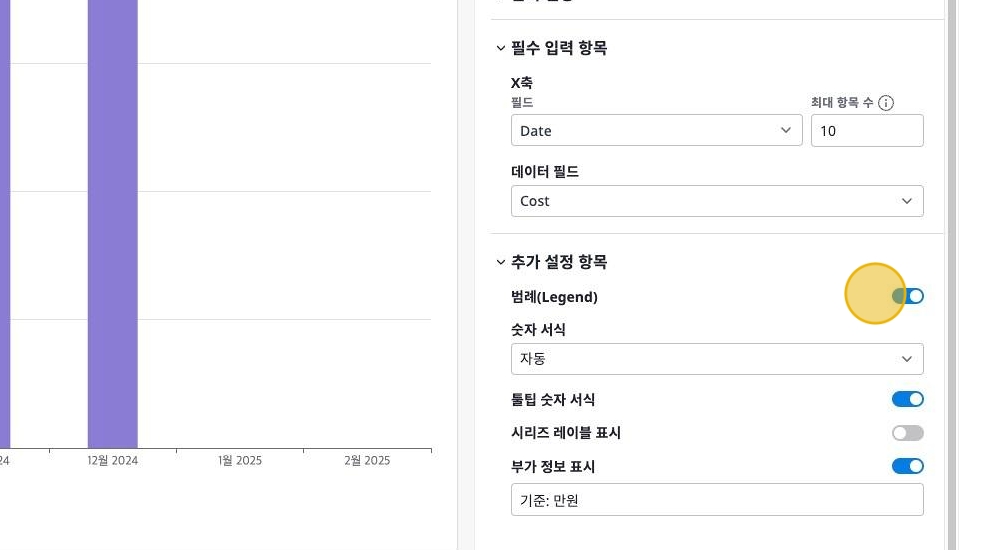
Enter Required Fields
There are required fields depending on the widget type.
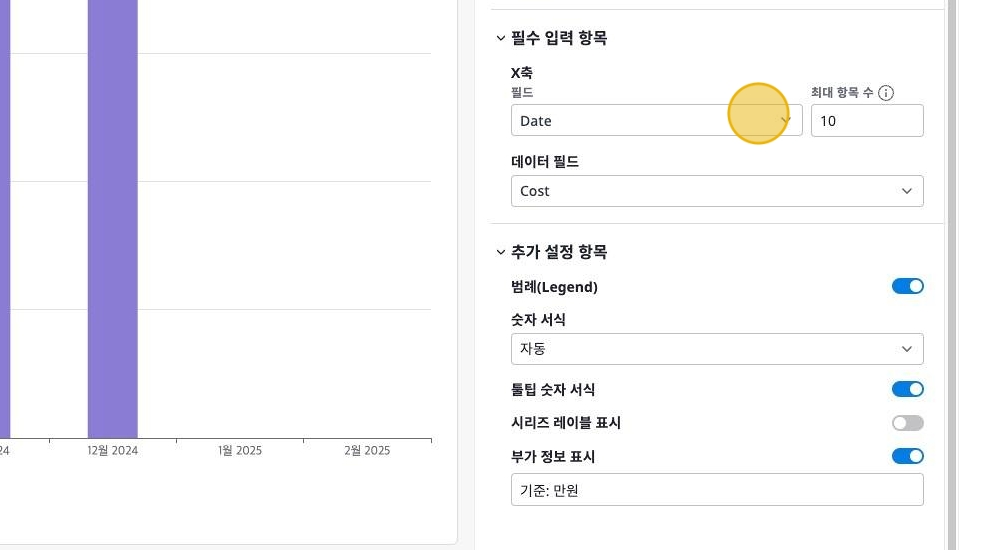
Enter Additional Settings (Optional)
There are additional configurable items depending on the widget type. All input values are optional and may vary by widget type.
Complete Widget Creation
After completing widget creation, you can view the widget on the dashboard detail page.

Additional Notes
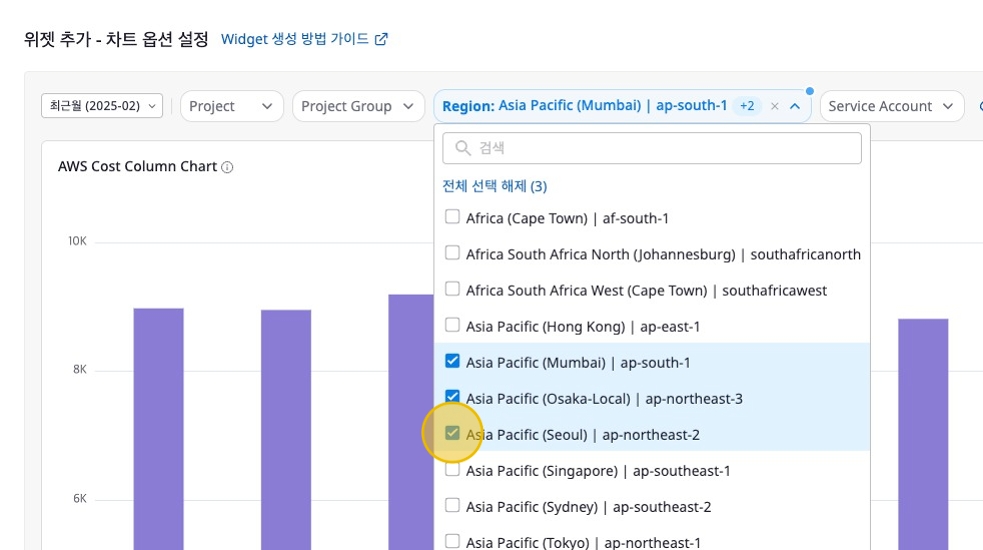
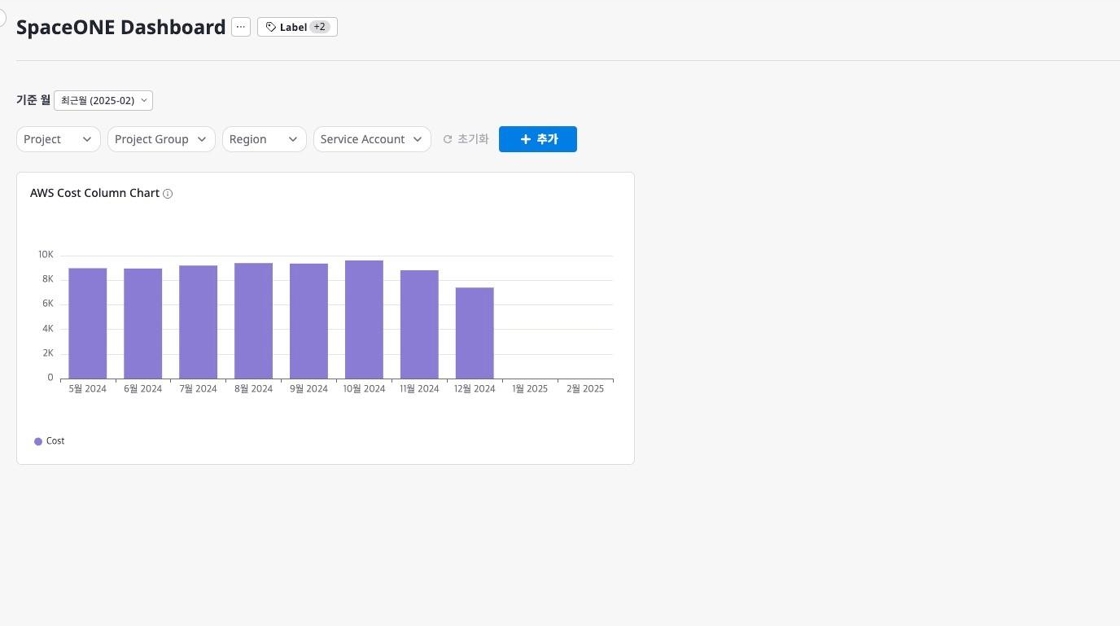
When configuring widget options, you can preview filtered widget data through the top filters.
Date Filter
Through the date filter on the left, you can preview data filtered by the reference month.
Variable Filter
Additionally, you can filter widget data based on specific variables through the variable filter.