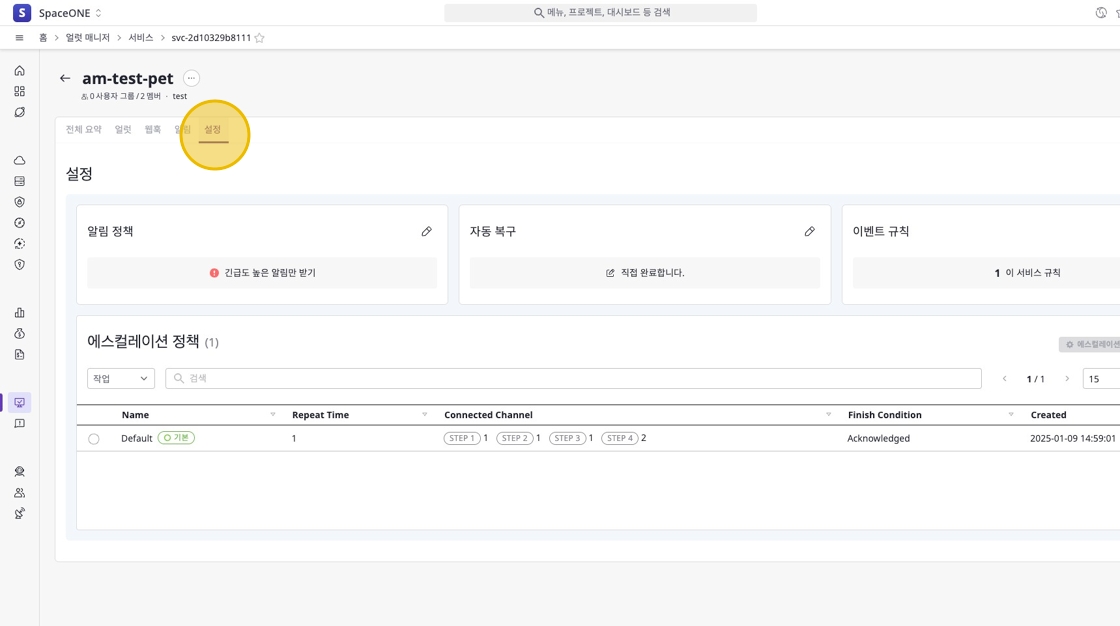
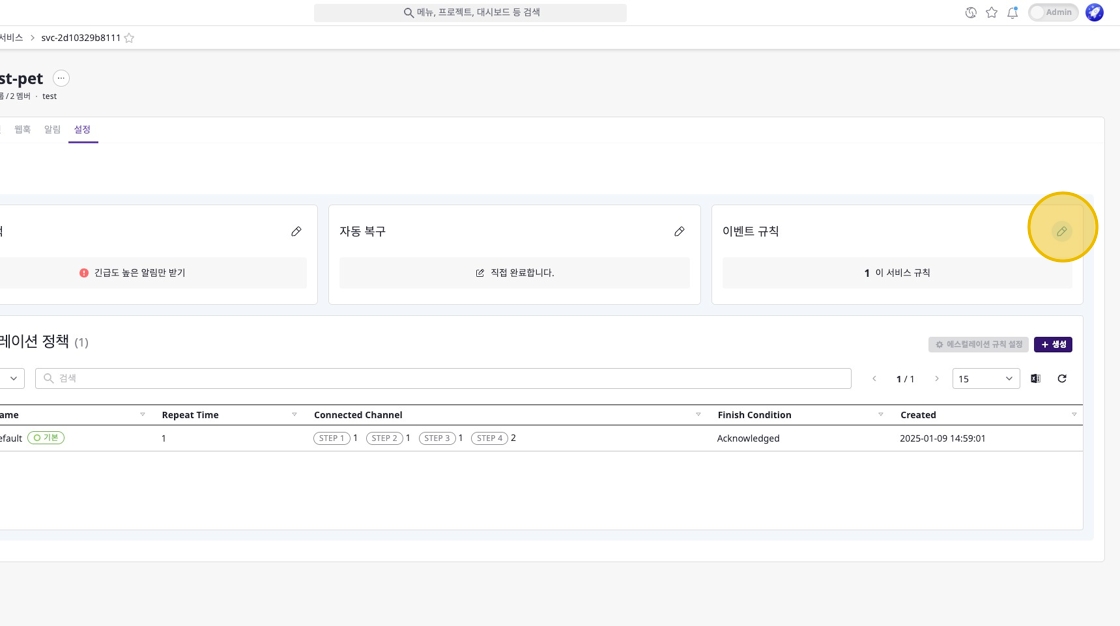
Settings
Alert service provides various settings to effectively manage generated alerts.
- Notification Policy: Configure the types of notifications to receive based on specific conditions.
- Auto Recovery: Set whether to automatically complete alerts when system failures are recovered.
- Event Rules: Define specific event conditions to enable automatic responses.
- Escalation Policy: Define rules for forwarding unresolved alerts to other channels or users after a certain time.
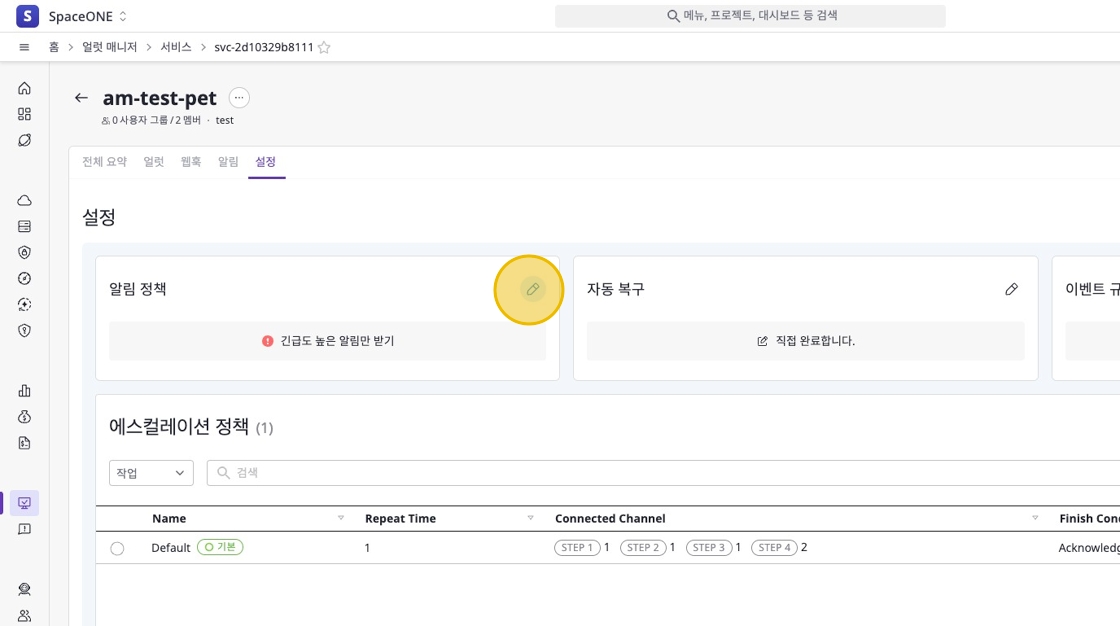
Notification Policy
Through notification policies, users can configure which types of notifications to receive. For example, you can configure to receive all notifications or only high-urgency notifications.
To change the notification policy, select the [Notification Policy] item in the [Settings] tab and set your desired policy. By default, all notifications are received, but you can choose to receive only high-urgency notifications if needed.

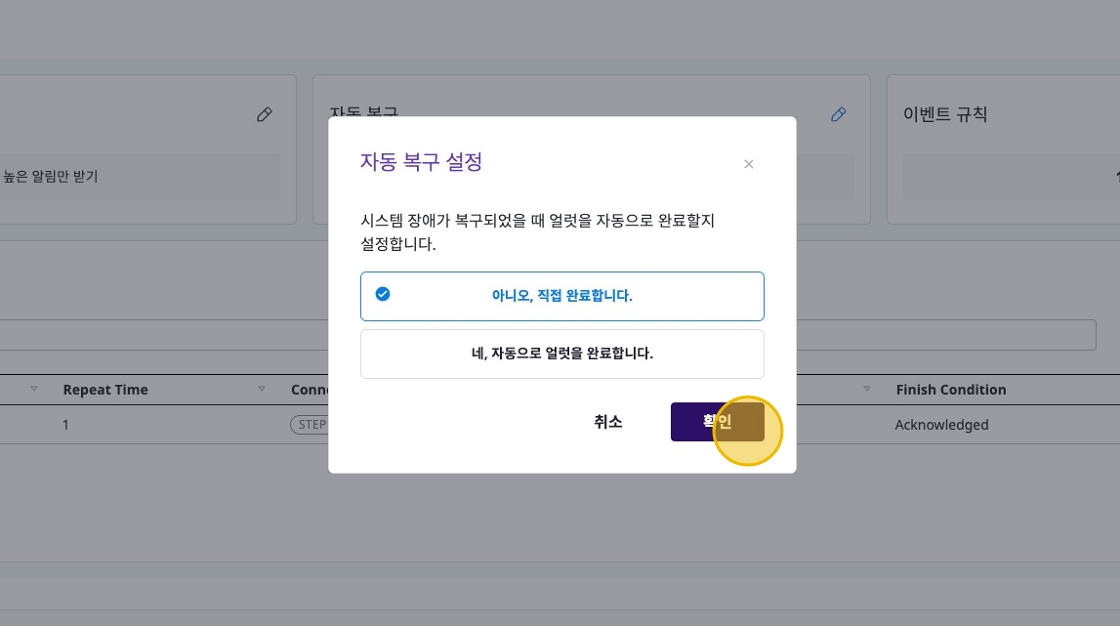
Auto Recovery
The auto recovery feature is an option to set whether alerts should be automatically completed when system failures are recovered. By default, users need to complete alerts manually, but when auto recovery is enabled, the system can automatically close alerts.
To configure, select the [Auto Recovery] item in the [Settings] tab and enable the “Automatically complete alerts” option.

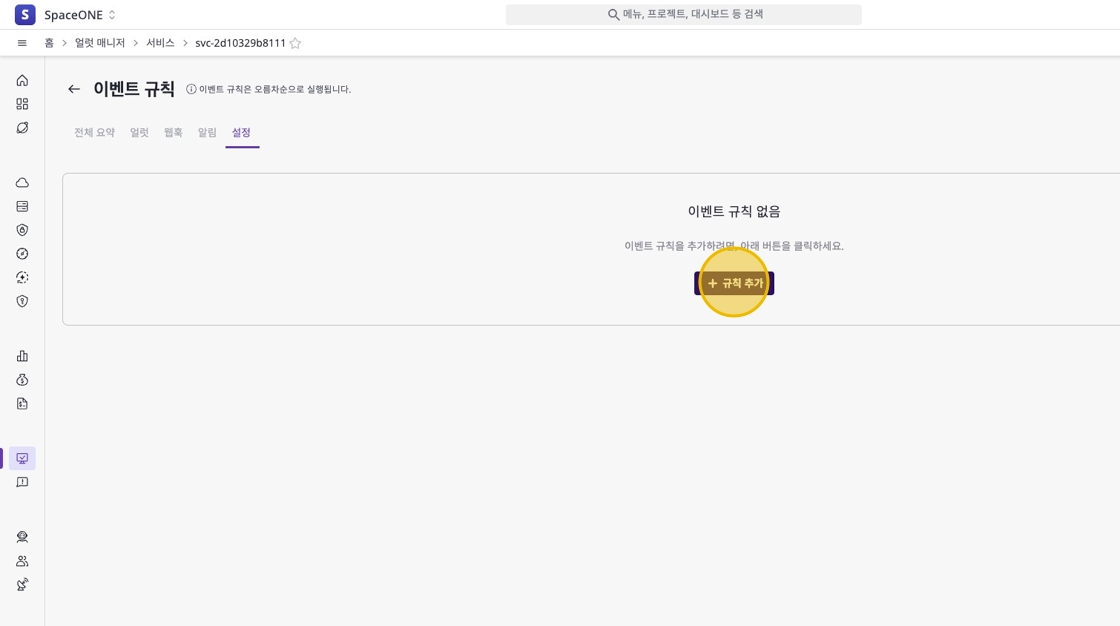
Event Rules
Event rules allow you to automatically handle events that match specific conditions.
By setting rules, you can configure events to operate according to specified webhooks or global event rules when they occur.
Navigate to Event Rules Settings Page
Click the edit icon in the [Event Rules] section of the [Settings] tab to move to the event rules settings page.
Then click the [+ Add Rule] button to add a new event rule.
Select Event Rule Scope
Select the scope to apply the event rule. You can select an existing webhook or specify a global event rule.
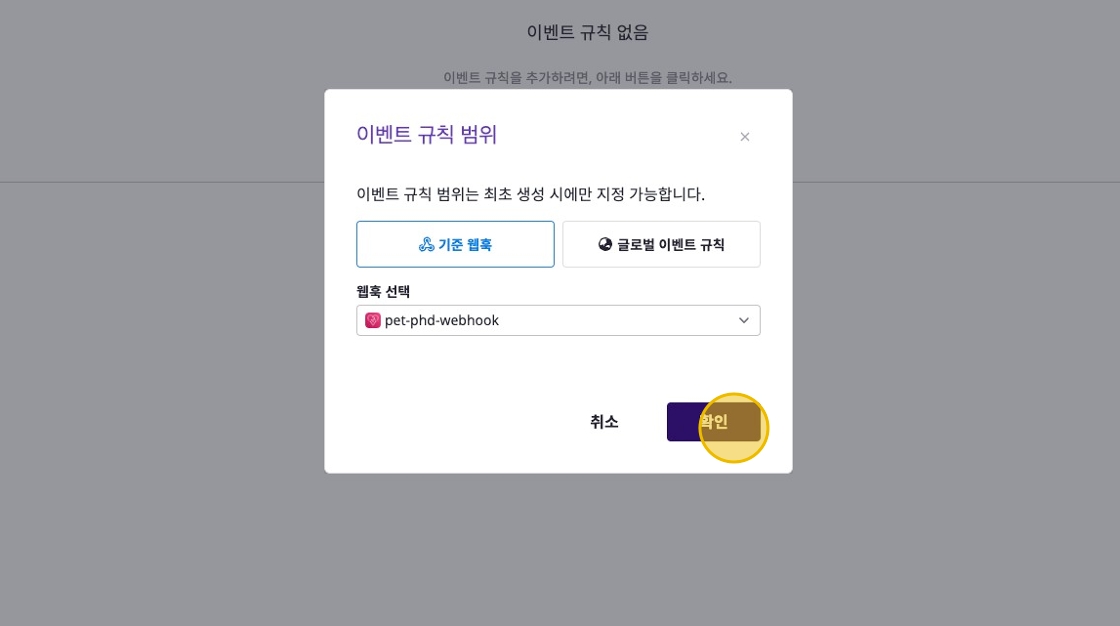
- Base Webhook: Select a specific webhook to handle events.
- Global Event Rule: Set event rules at a global level.
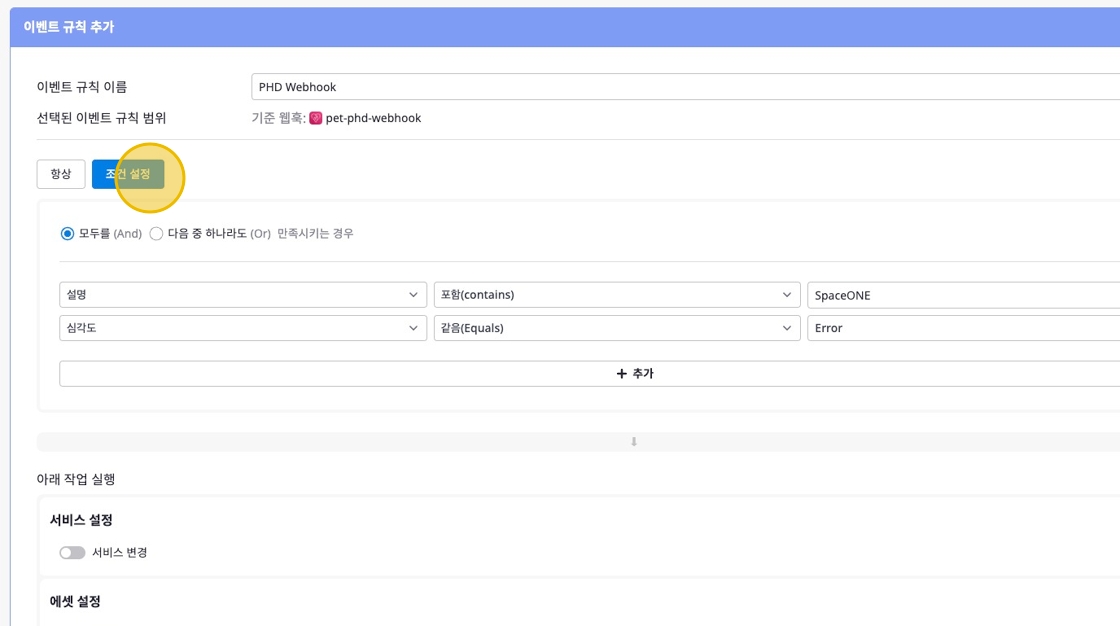
Set Event Trigger Conditions
Set trigger conditions for events to occur always or when specific conditions are met.
- Always
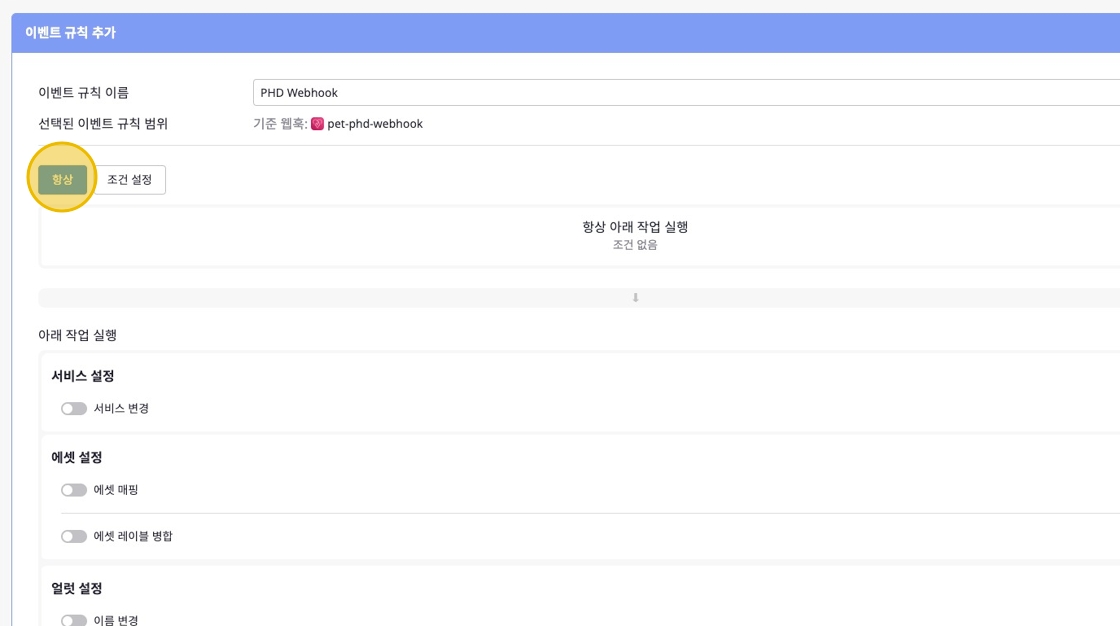
- Set Conditions: Configure events to occur when specific conditions are met.
Configure Action Settings
Set the actions to be executed when events occur according to the above conditions.
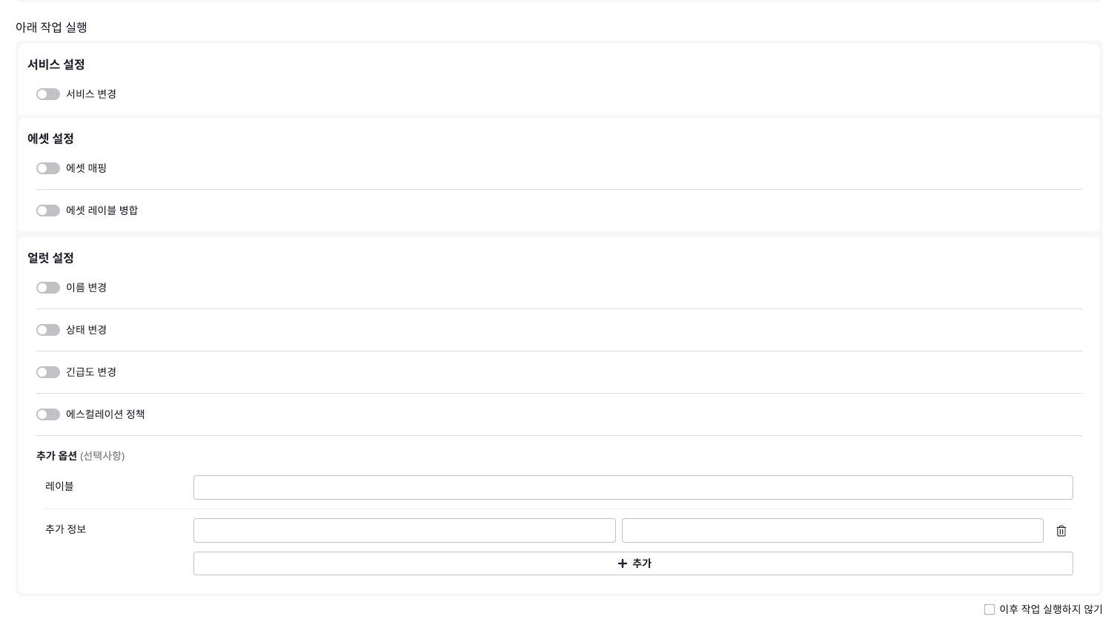
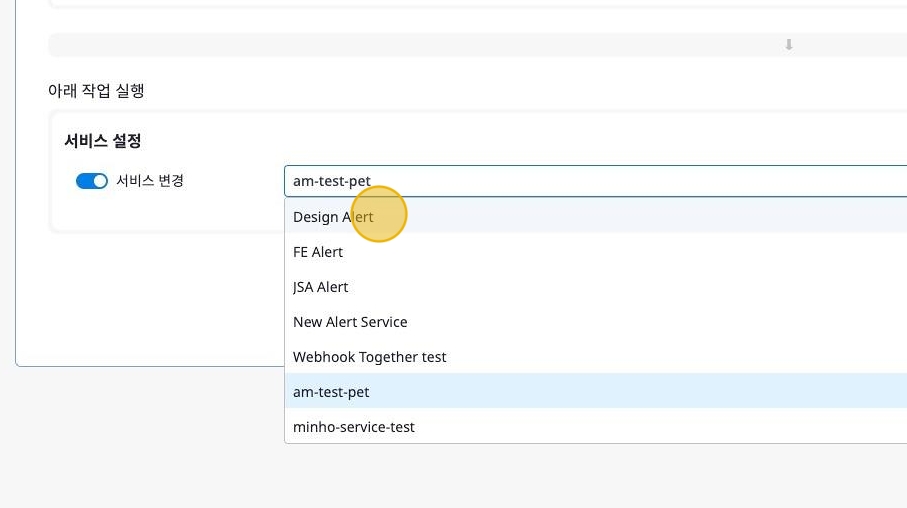
Service Settings
Through Service Settings, you can change the connection to a specific service when an event occurs. This allows triggered events to be directed to the appropriate service.
Asset Settings
In Asset Settings, you can map specific assets or merge asset labels when events occur. For example, you can configure CloudTrail events from AWS to be linked with specific assets.
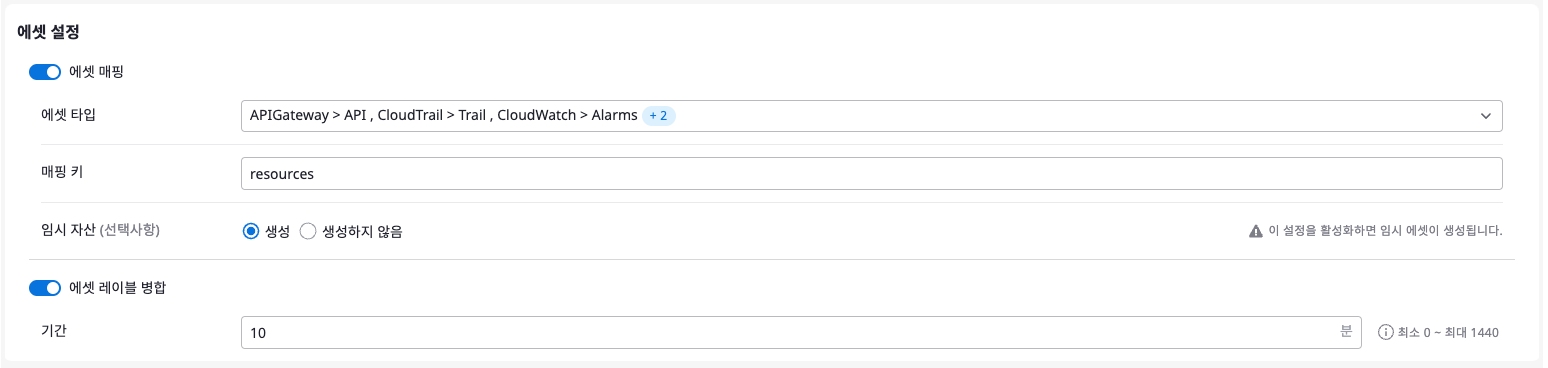
- Asset Mapping
- Asset Type: Map resources provided by specific cloud services.
- Mapping Key: Used to link detected data from events with specific assets.
- Temporary Asset: Choose whether to create temporary assets when events occur.
- Merge Asset Labels: When enabled, you can manage by merging information from detected assets with existing registered assets.
- Duration: The base time for merging newly detected assets with existing assets. For example, if the merge period is set to 10 minutes, assets of the same type detected within 10 minutes after the event will be merged with existing assets.
Alert Settings
Through Alert Settings, you can modify alert details.

- Change Name: Specify the name of the created alert.
- Change Status: Set the alert status. (Choose from
Created,Acknowledged,Resolved,Excluded) - Change Urgency: Specify the alert urgency.
- Escalation Policy: Automatically handle alerts using the specified escalation policy.
- Additional Options
- Labels: Set tags to classify alerts.
- Additional Information: Add metadata in key:value format.
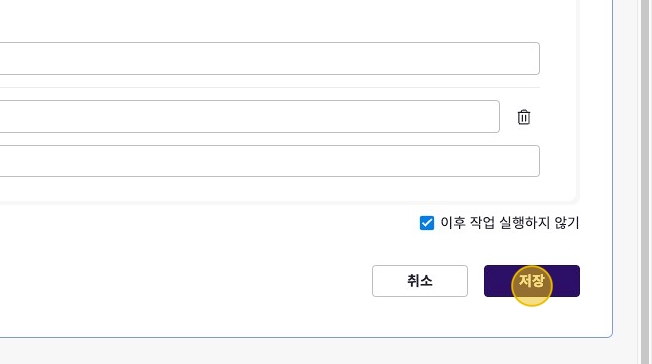
Save Event Rule
Click the [Save] button to save the event rule when all settings are complete.
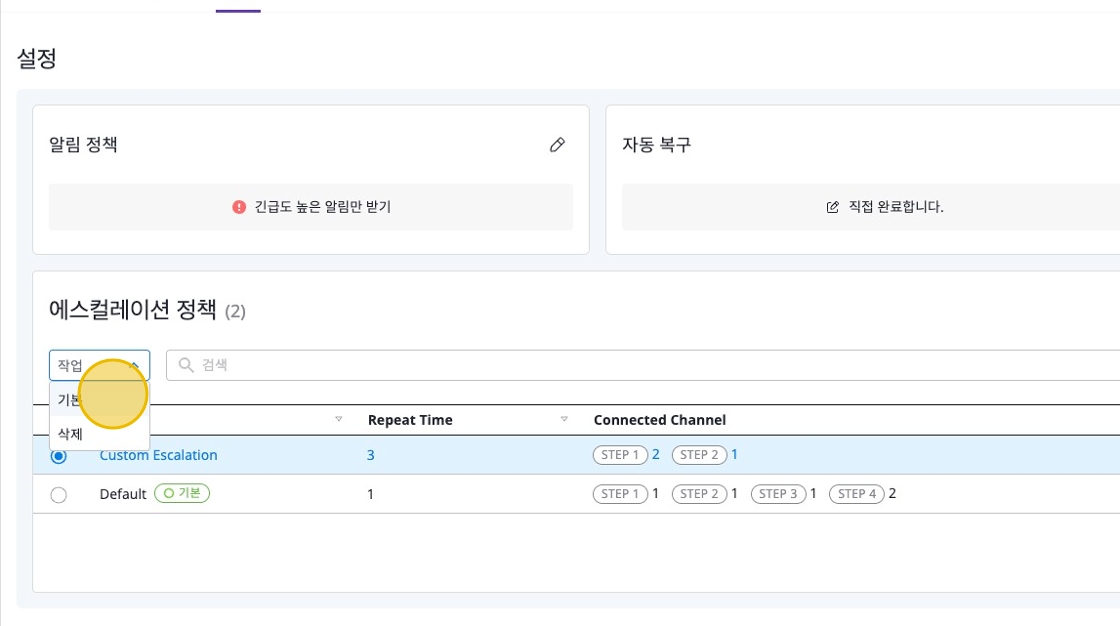
Escalation Policy
Escalation Policy is a feature that gradually forwards notifications to other channels or persons in charge if a specific notification is not resolved within a designated time.
This helps ensure important notifications are not missed.
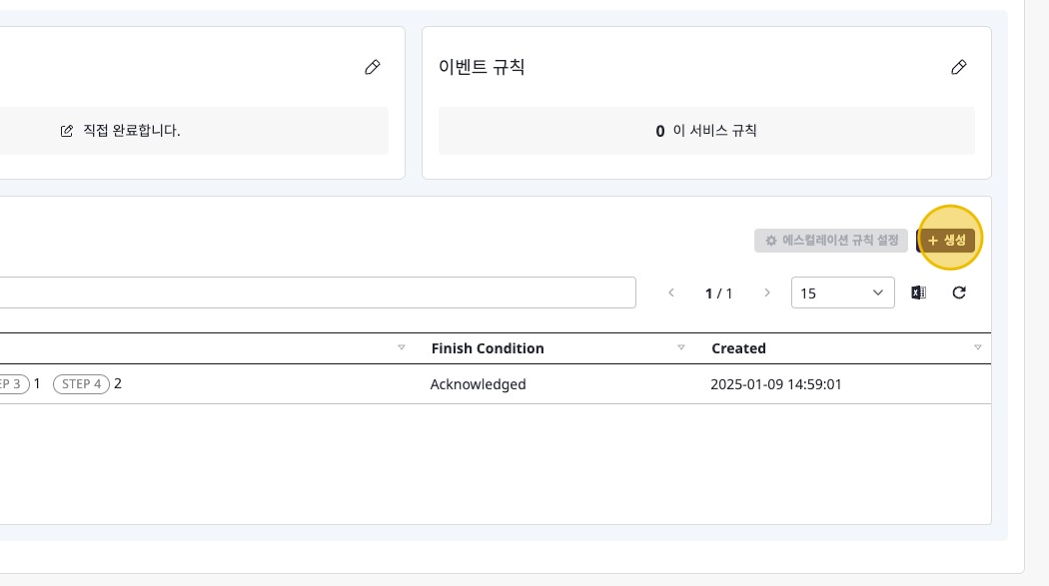
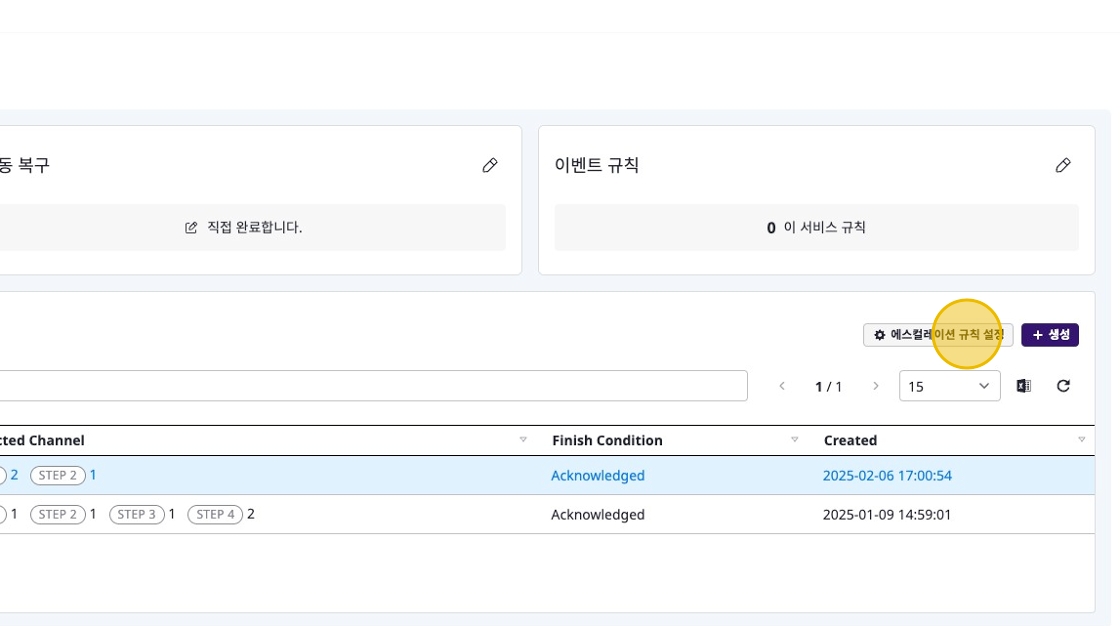
Creating Escalation
Navigate to the [Escalation Policy] section in the [Settings] tab, then click the [+ Create] button.
Configure the following settings in the escalation modal:
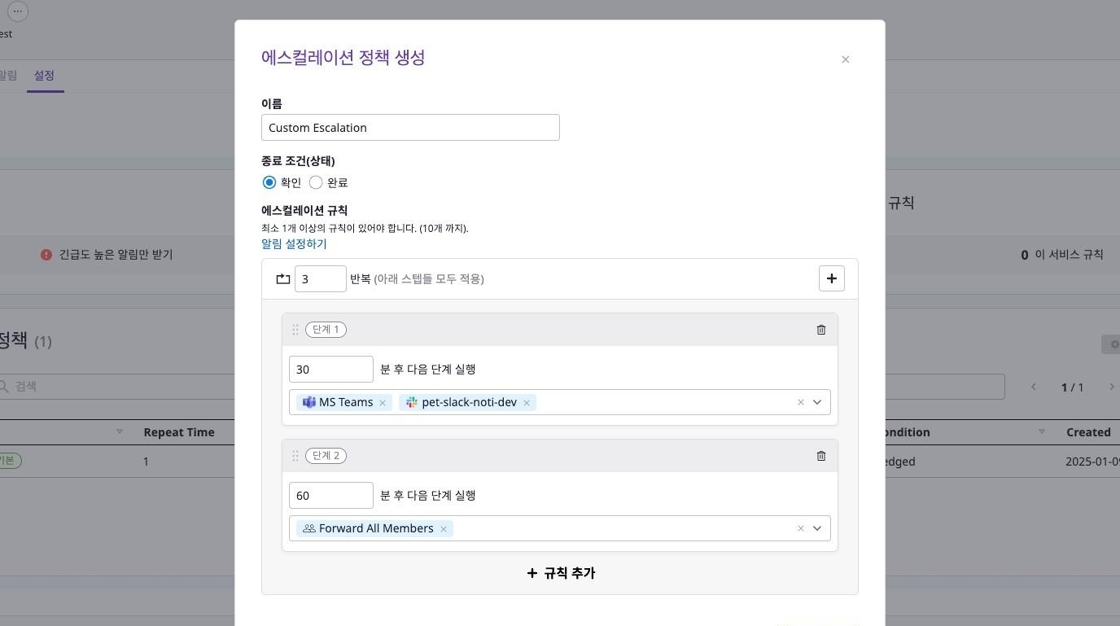
- Name: Enter the policy name.
- End Condition (Status):
- Acknowledged: Escalation stops when the notification is acknowledged.
- Resolved: Escalation stops when the notification is resolved.
- Escalation Rules: At least 1 rule must be added, with a maximum of 10 rules.
- Repeat Count: Set the number of times to repeat the escalation steps.
- Steps:
- Time Setting: Enter the waiting time in minutes before moving from the current step to the next.
- Delivery Target: Select the channel to deliver notifications to. (e.g., MS Teams, Slack, Email, etc.)
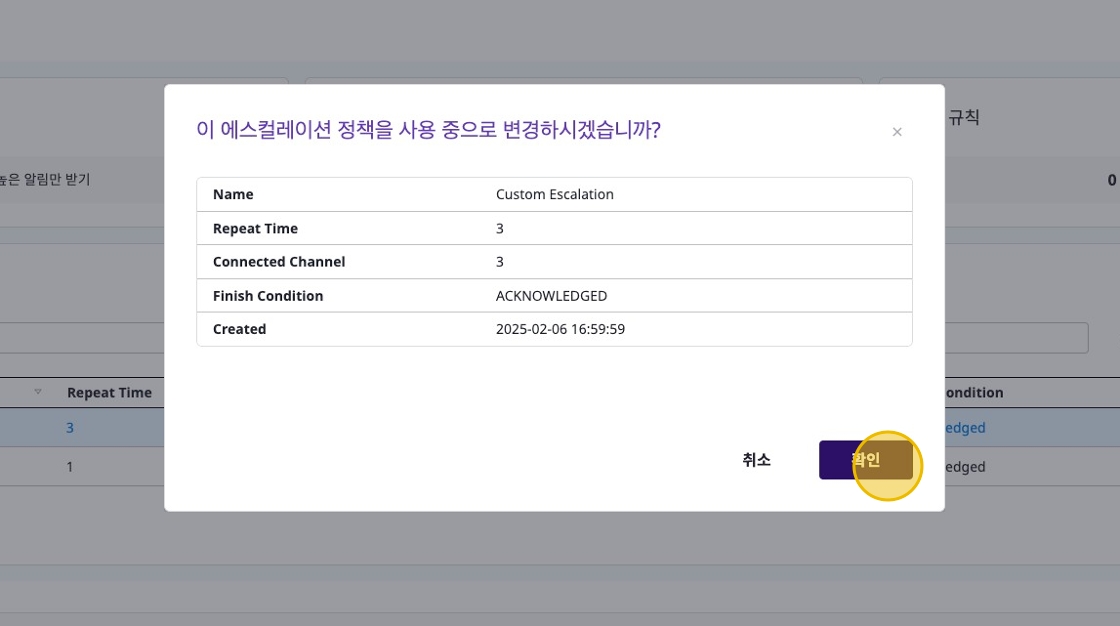
Activating Escalation
Only one escalation policy can be active by default.
Click the [Default] button in the [Actions] dropdown to set the default escalation policy.
Modifying Escalation
Select the escalation you want to modify, then click the [Set Escalation Rules] button on the right.
The modification modal is identical to the creation modal.
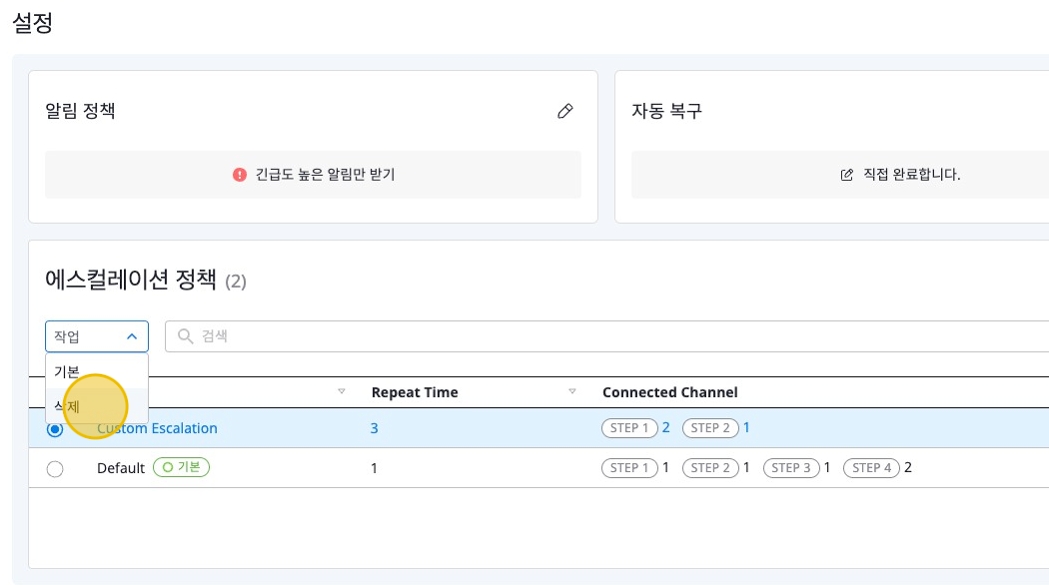
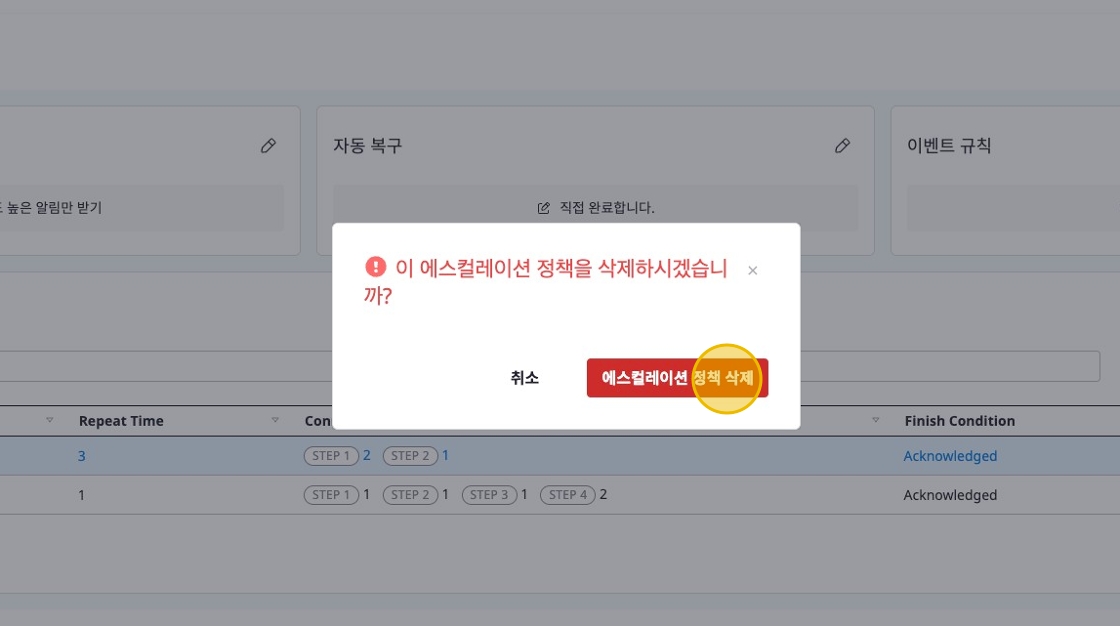
Deleting Escalation
Select the escalation you want to delete, then click the [Delete] button in the [Actions] dropdown.